Declarative Authorization Service
Overview
The Declarative Authorization Service (DAS) is a vital feature within CE, designed to empower enterprises in safeguarding their valuable software services through precise control mechanisms. DAS operates on a scalable and automated framework, significantly reducing the need for manual intervention. By enhancing service availability, DAS effectively mitigates potential revenue losses.
At the core of DAS lies the principle of 'allow on need basis,' ensuring that application resources are accessed only when necessary for internal consumption or CRUD operations. To facilitate this, the DAS Administrator oversees several key entities within CE:
Cloud Tenant Access: CE seamlessly integrates with Azure Tenants to retrieve essential Active Directory (AD) information, including internal users and groups.
Enterprise/Business Applications Details: This encompasses crucial application server information, such as Fully Qualified Domain Names (FQDN) or IP Addresses, and Ports.
Resources (Rest Endpoints): DAS prioritizes the protection of specific endpoints offered by a given service or application.
Policies: CE currently supports the configuration of 'Blocking' rules for clients, ensuring stringent access control. Internally, DAS leverages open-source applications like OPA (Open Policy Agent), Traefik (Reverse Proxy Agent), and MongoDB (for storing access details) to monitor and fine-tune policies effectively.
Installation
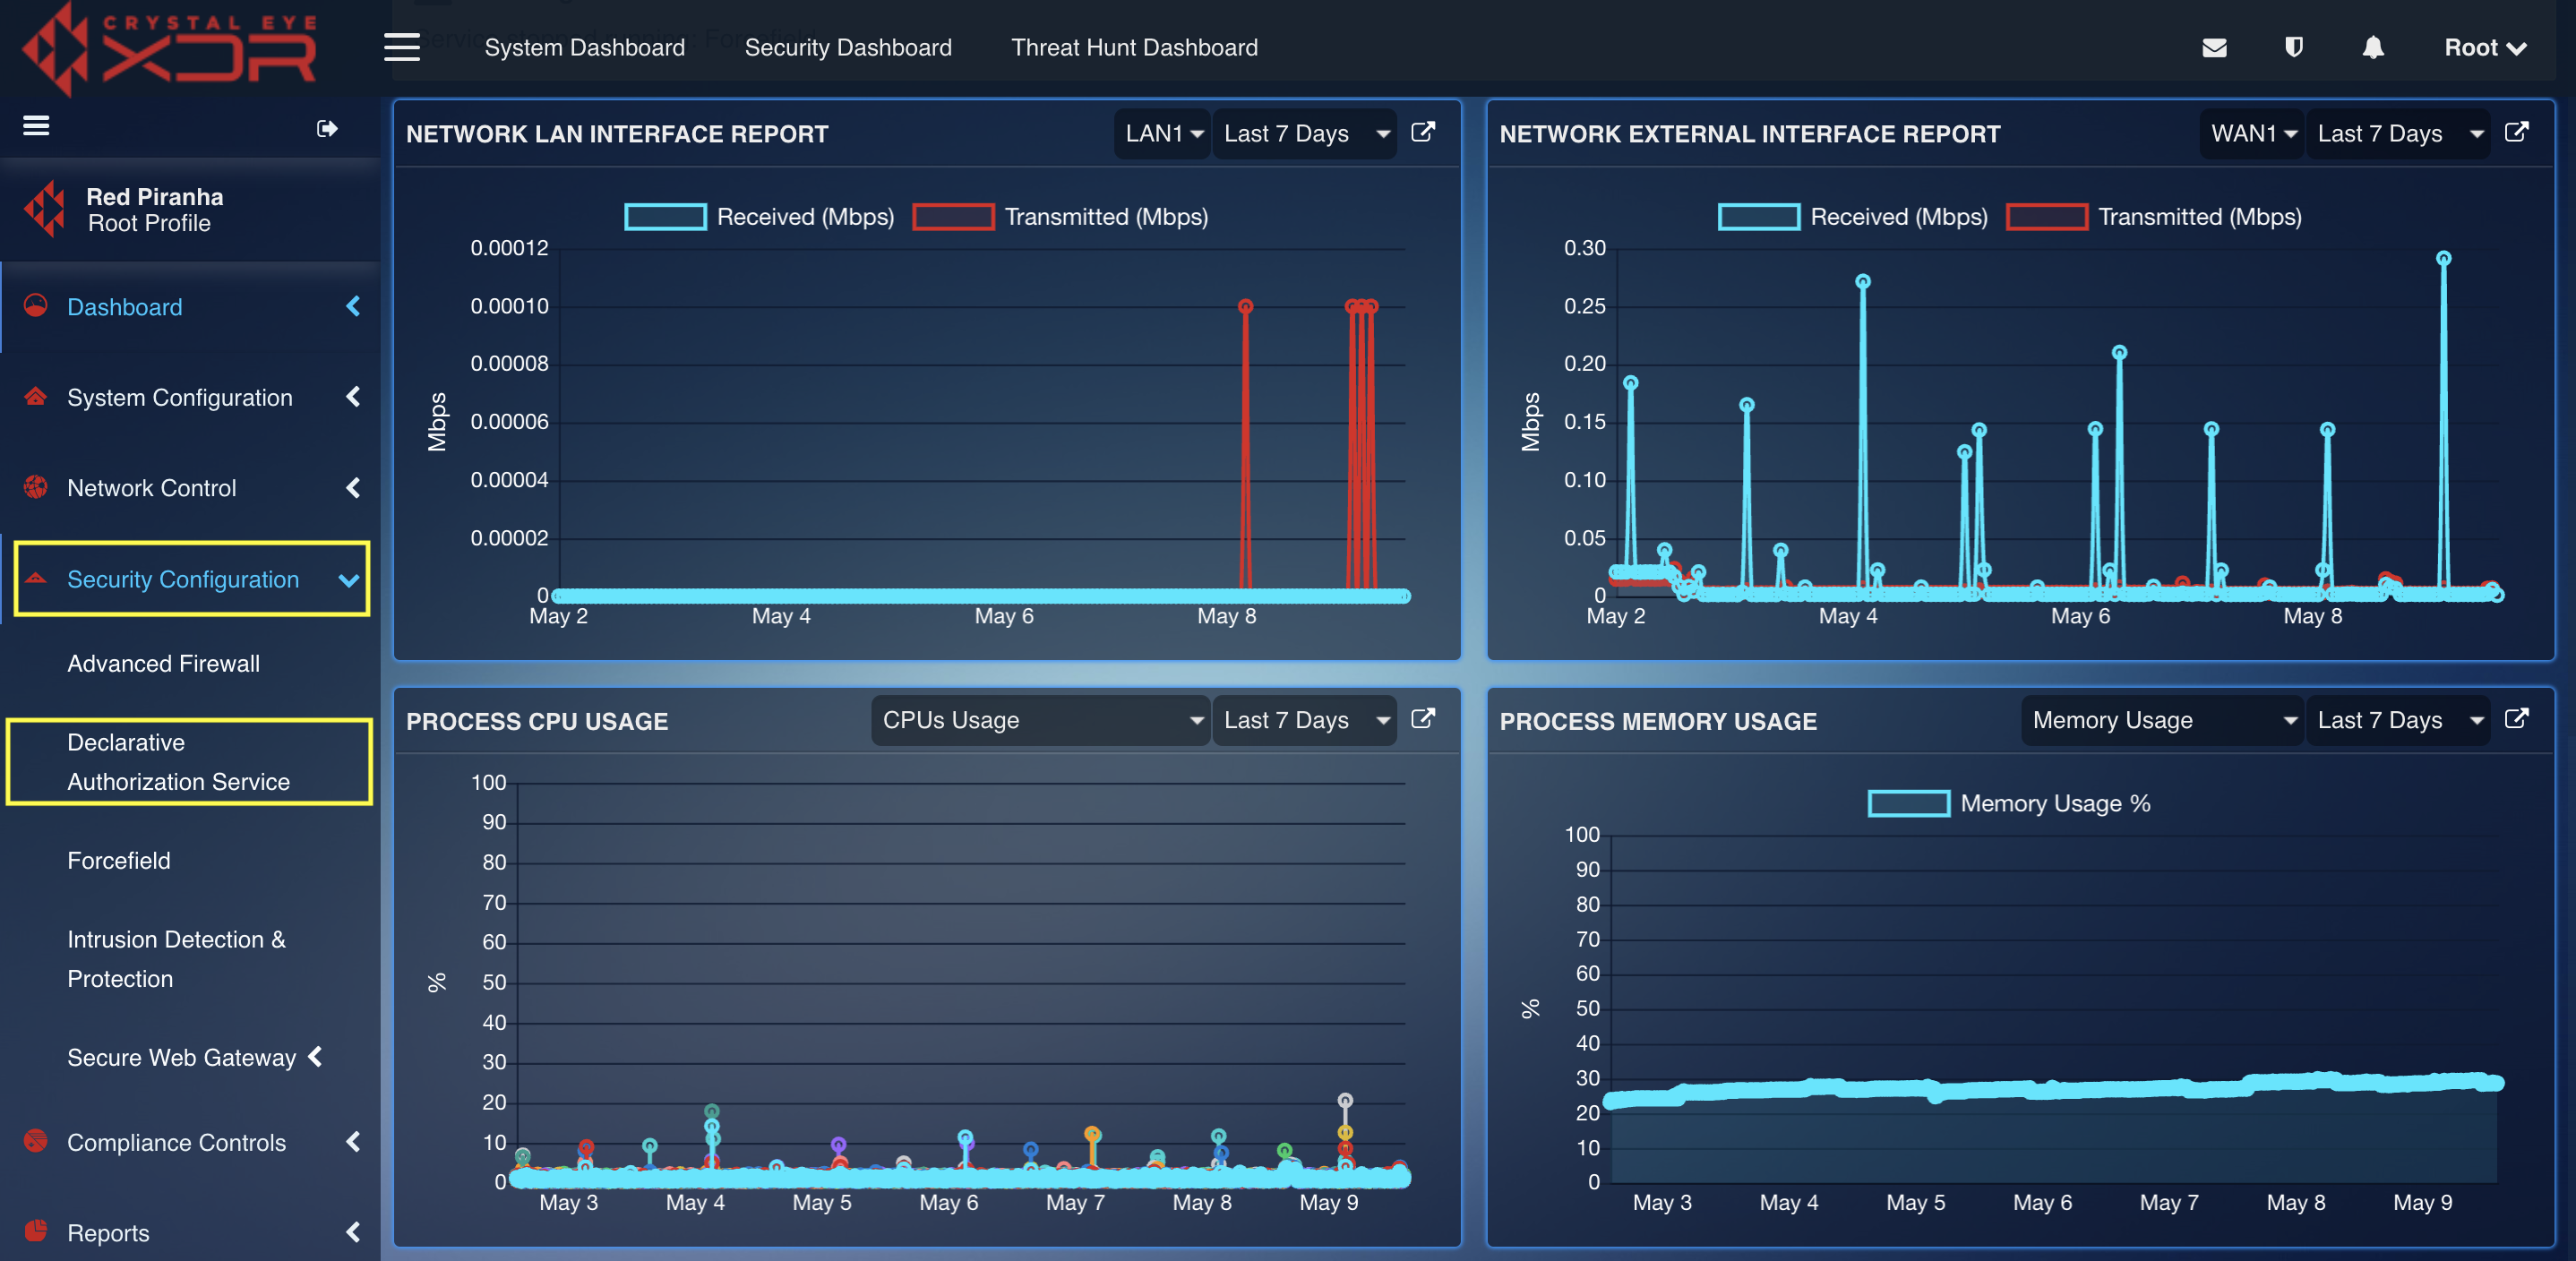
The Declarative Service Authorization application is not installed by default. You need to download it from the Marketplace and after installling can be accessed from the left-hand navigation panel.
Navigation to the Declarative Authorization Service Application
Left-hand navigation panel > Security Configuration > Declarative Authorization Service
DAS Configuration
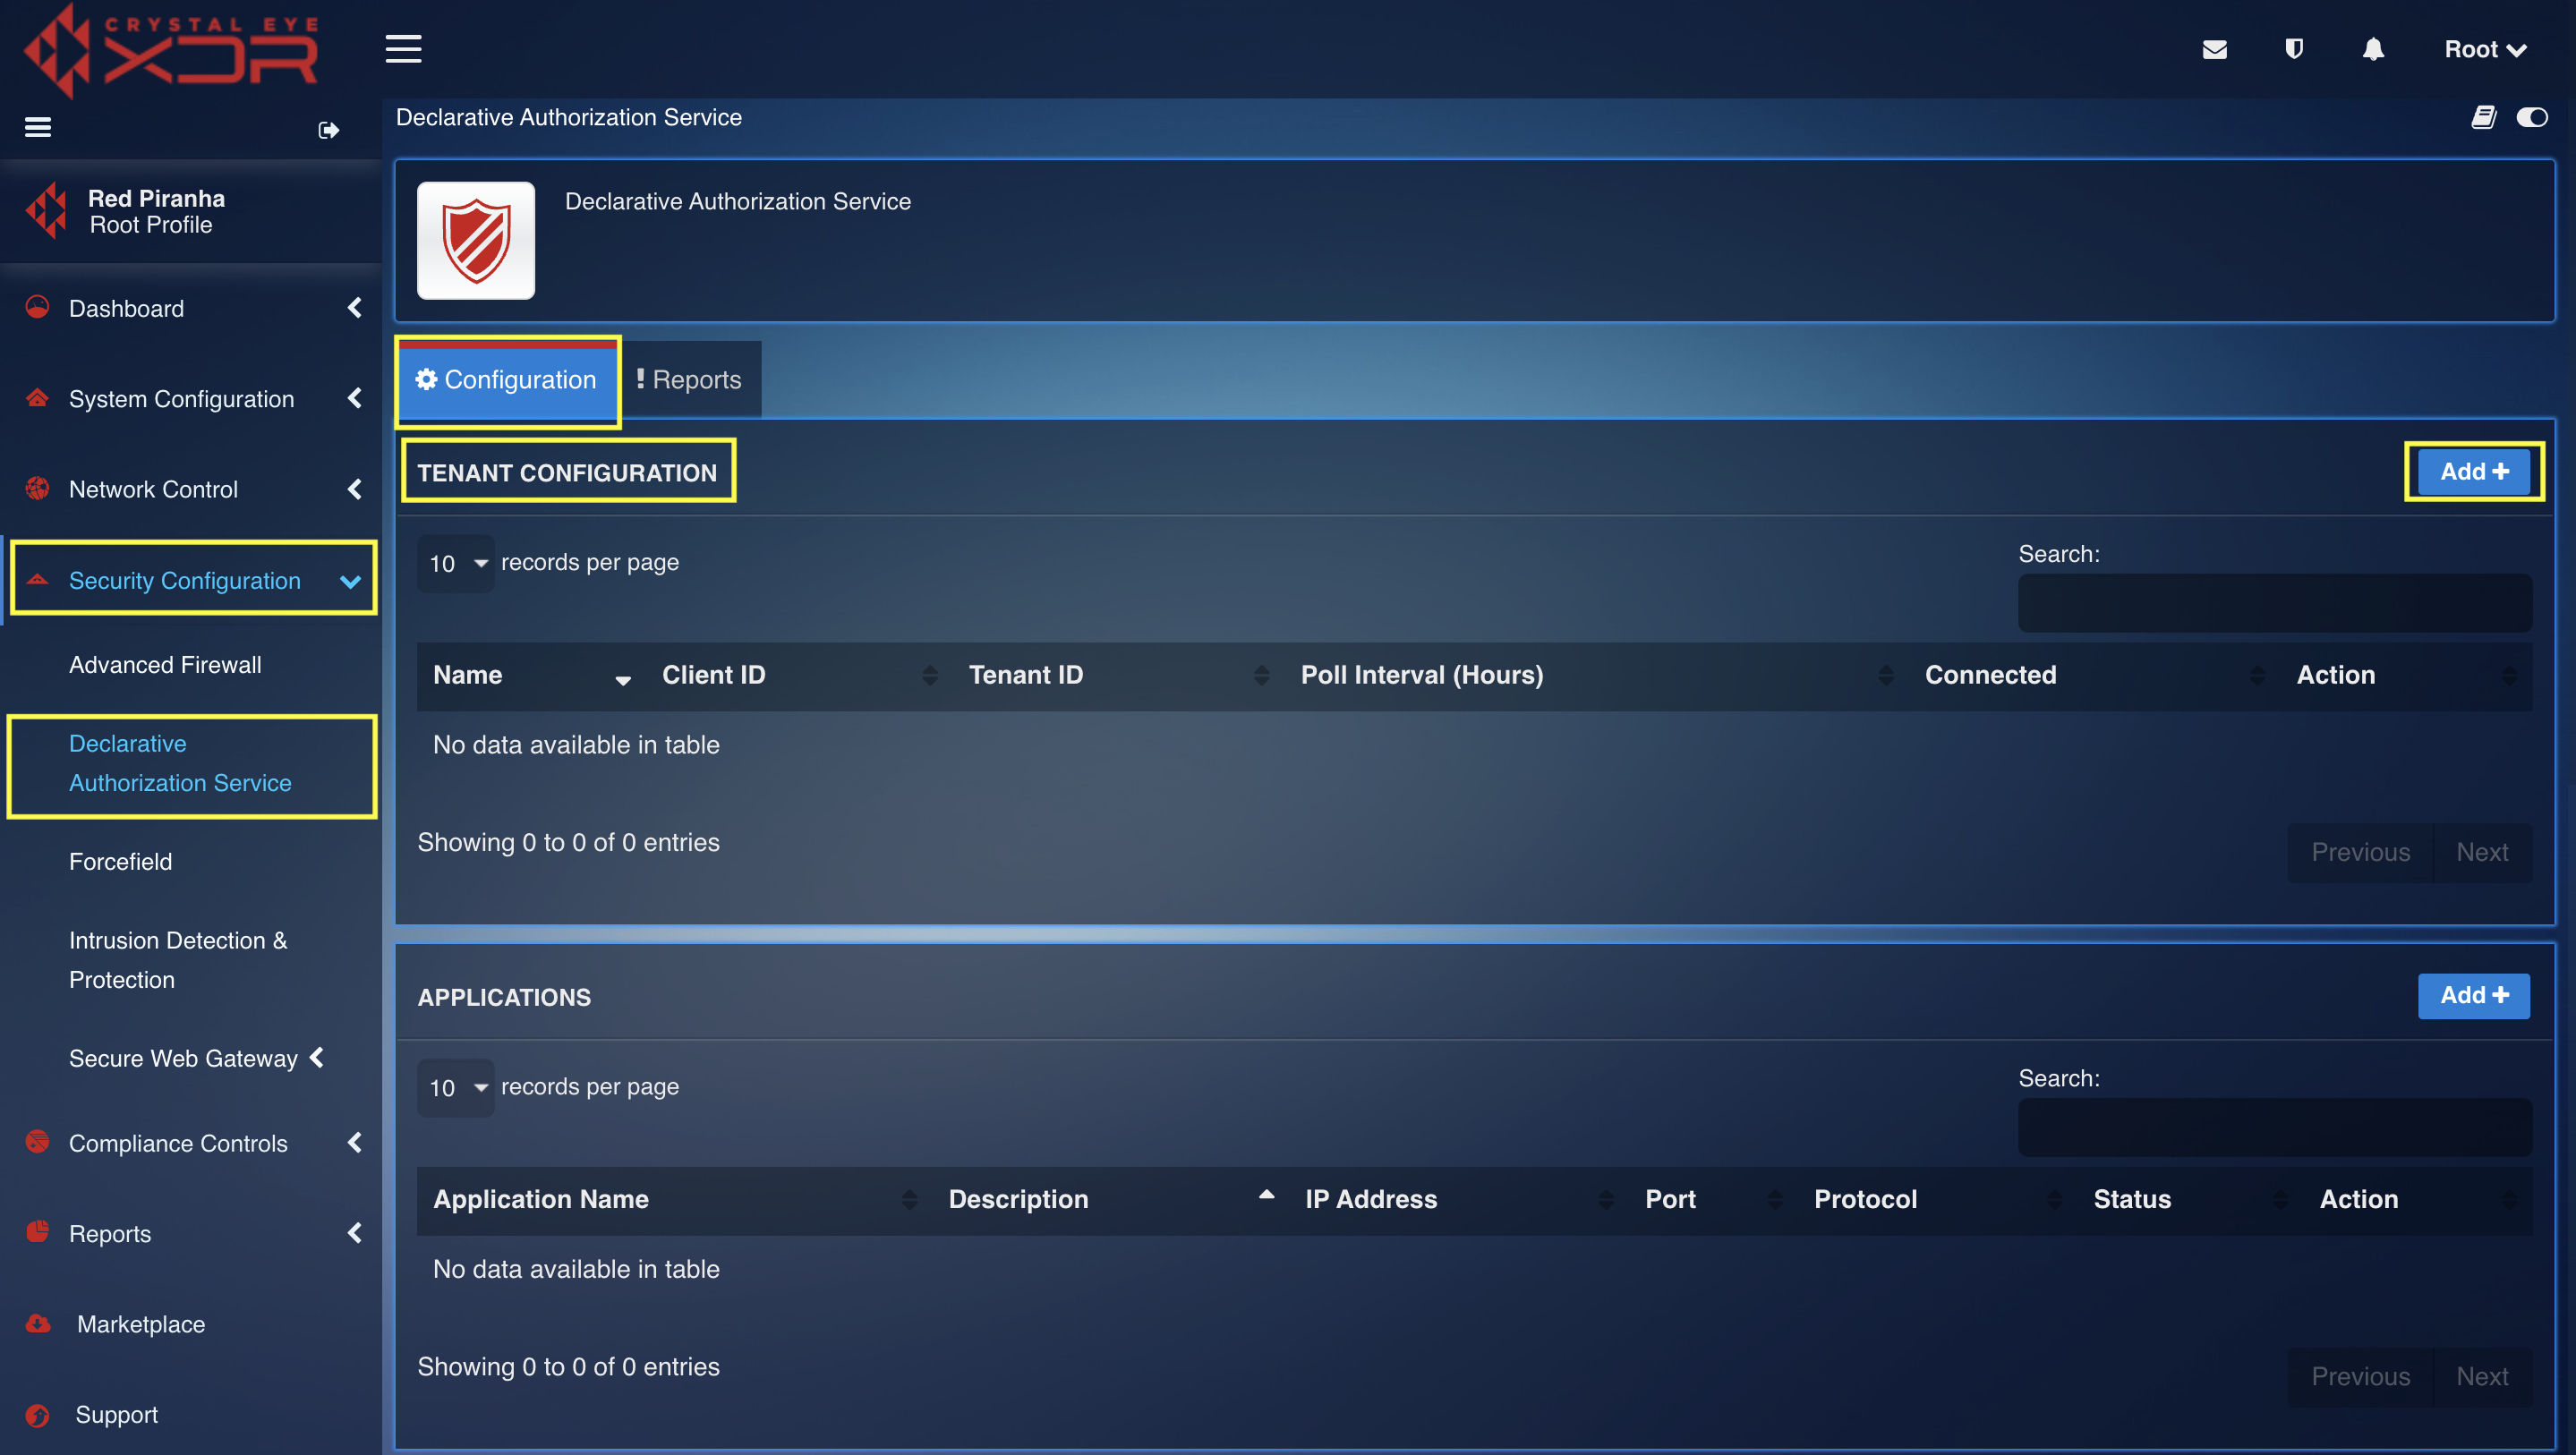
How to Configure Tenants in DAS
Step 1: In the DAS application page, click the Add button in the Tenant configuration section under the Configuration tab.
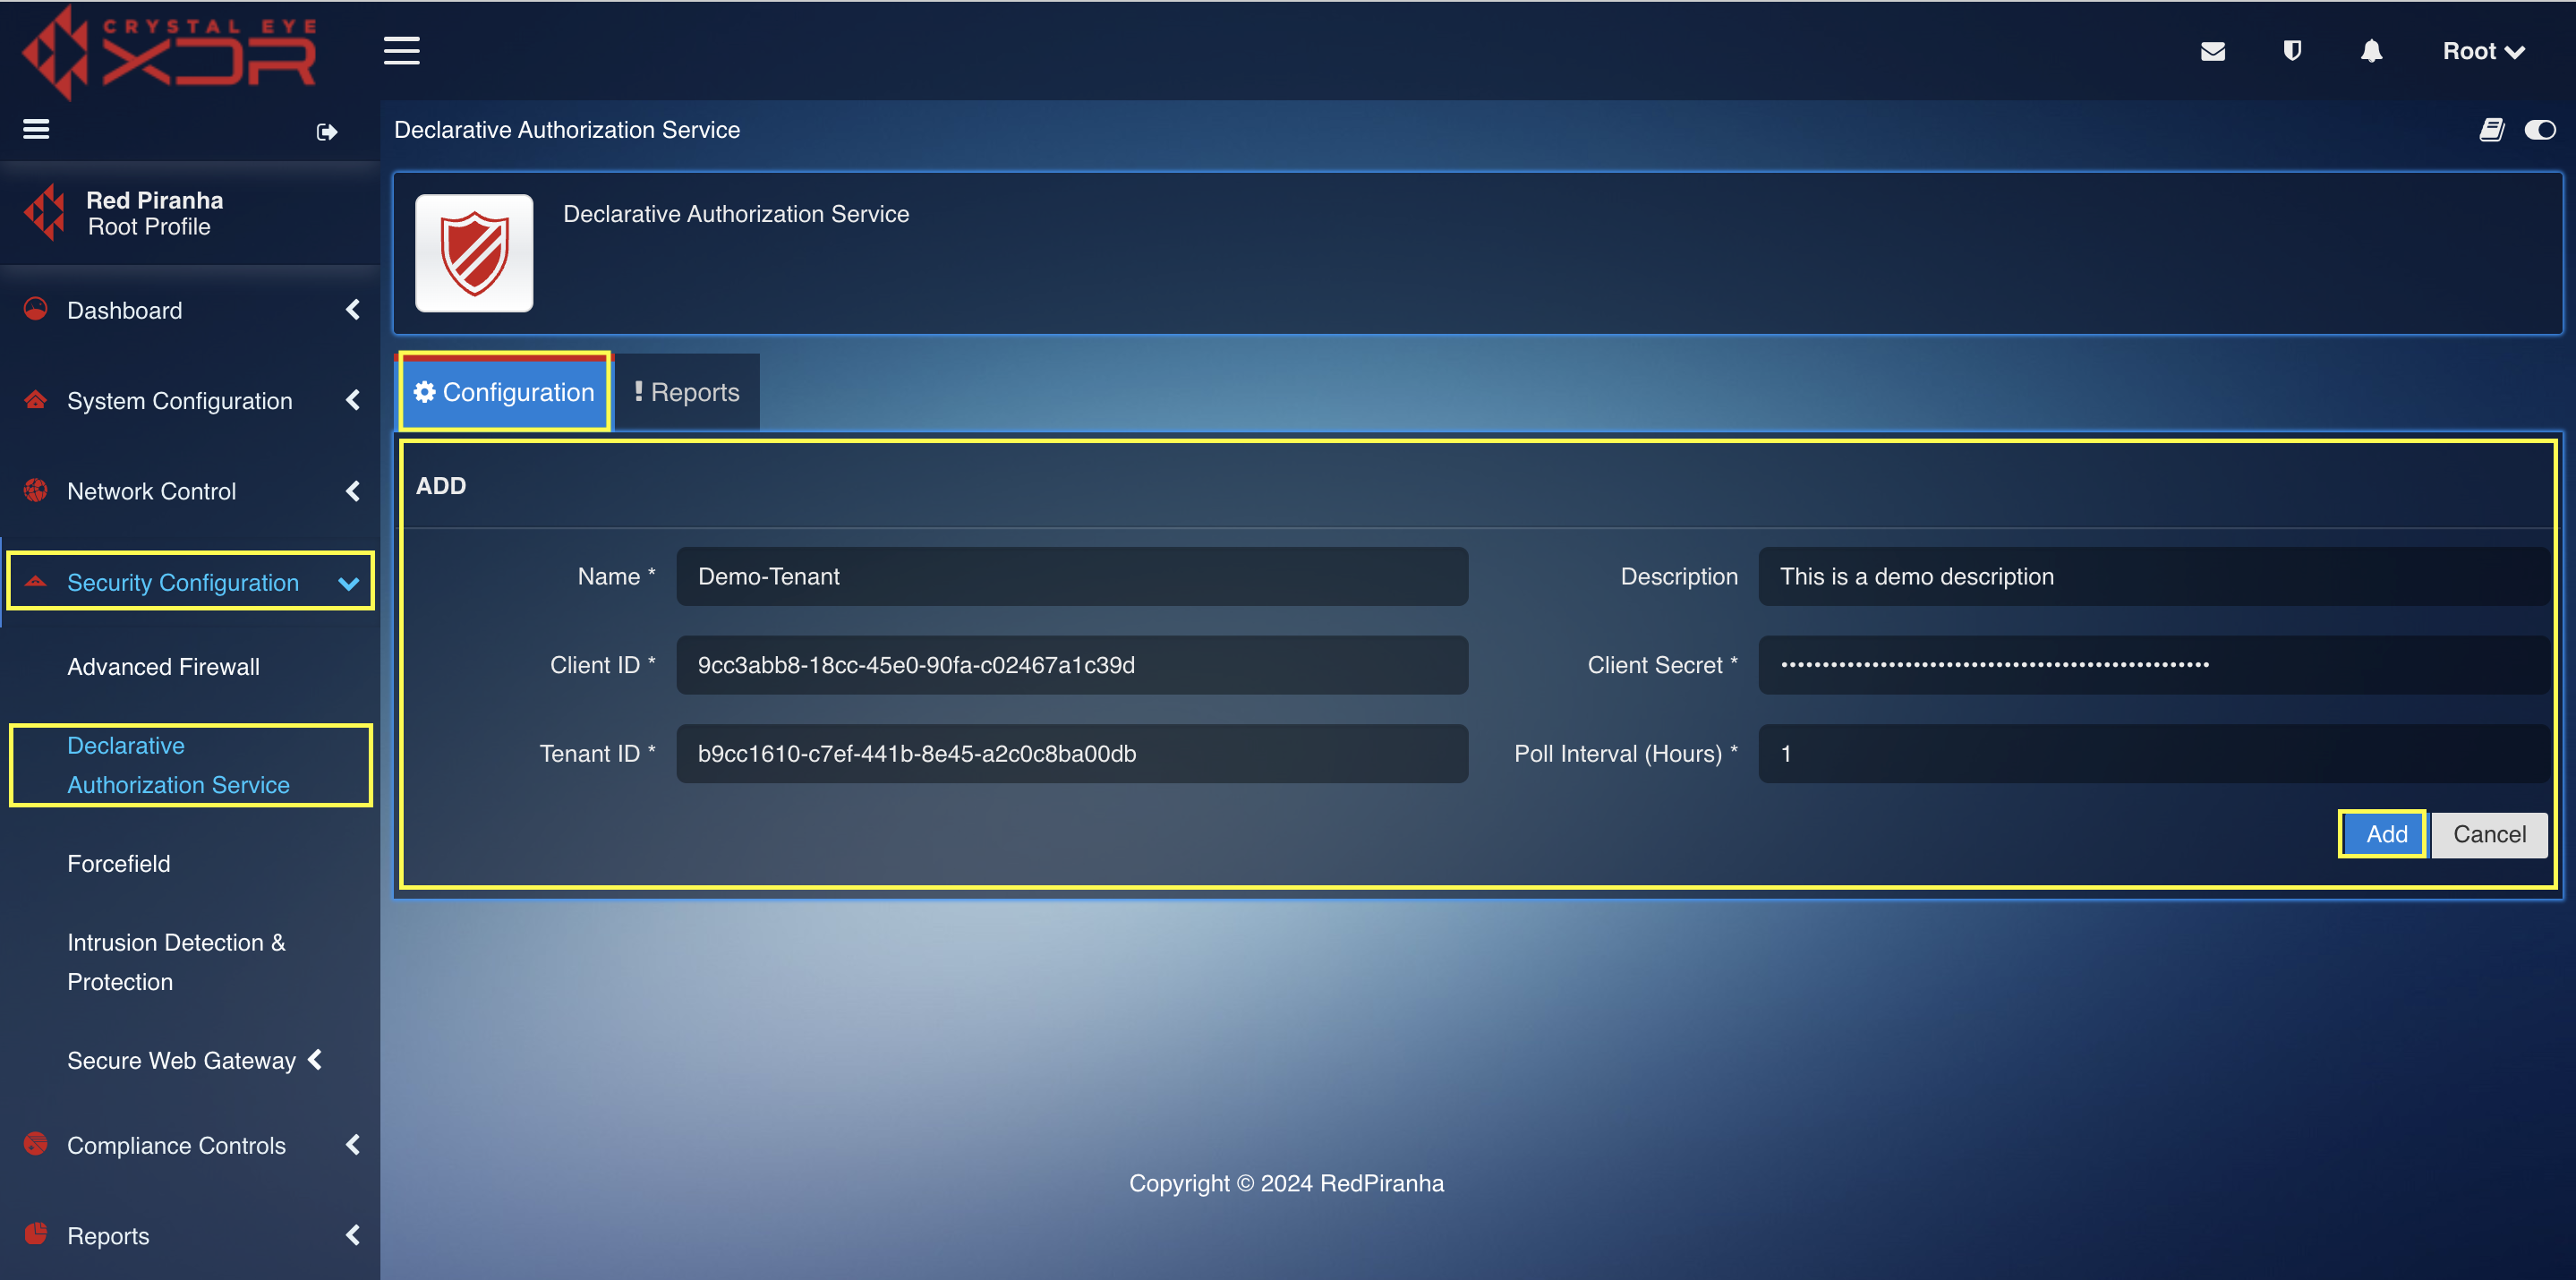
Step 2: You will now see Add Page. Fill in the Name, Description, Client ID, Client Secret, Tenant ID and Poll Interval in hours as shown in the screenshot below and Click the Add button.
Note
The configuration parameters in the DAS app constitutes of 3 components - Client ID, Client Secret, Tenant ID that can be copied/extracted from the Azure Portal.
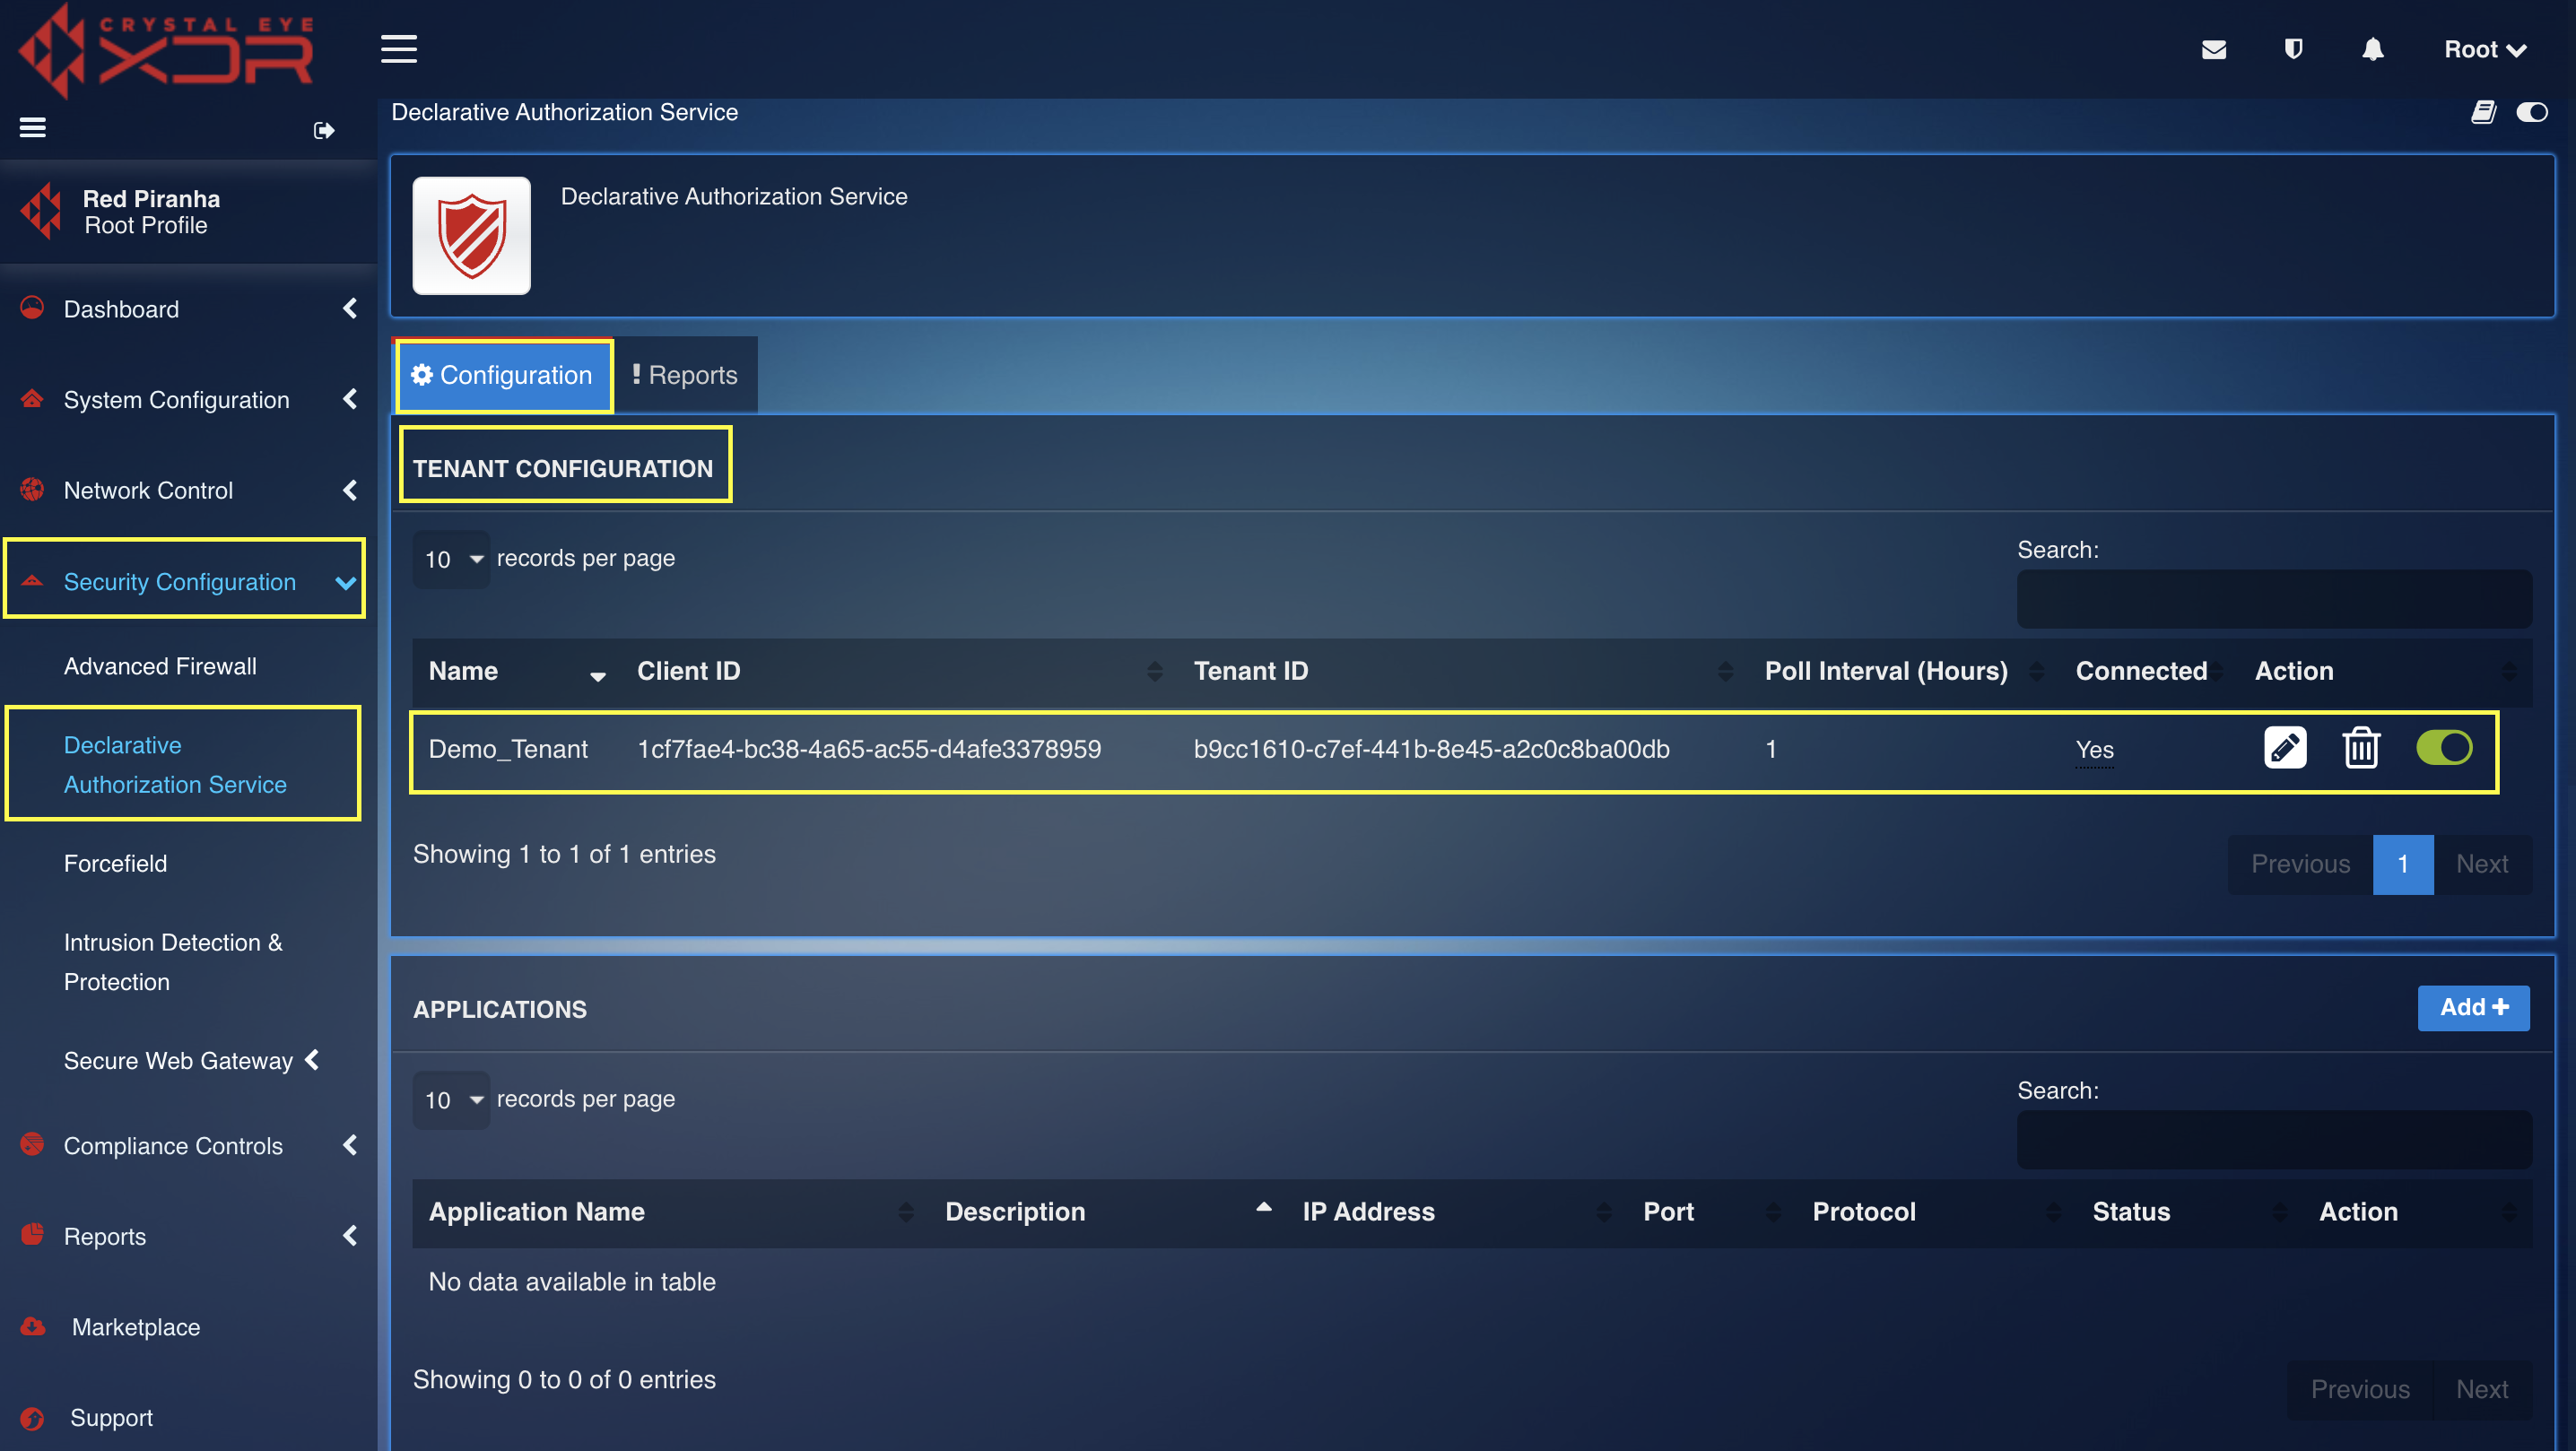
Step 3: You will now be directed to the Tenant Configuration page. The newly added Tenant will now be listed.
How to Configure Applications in DAS
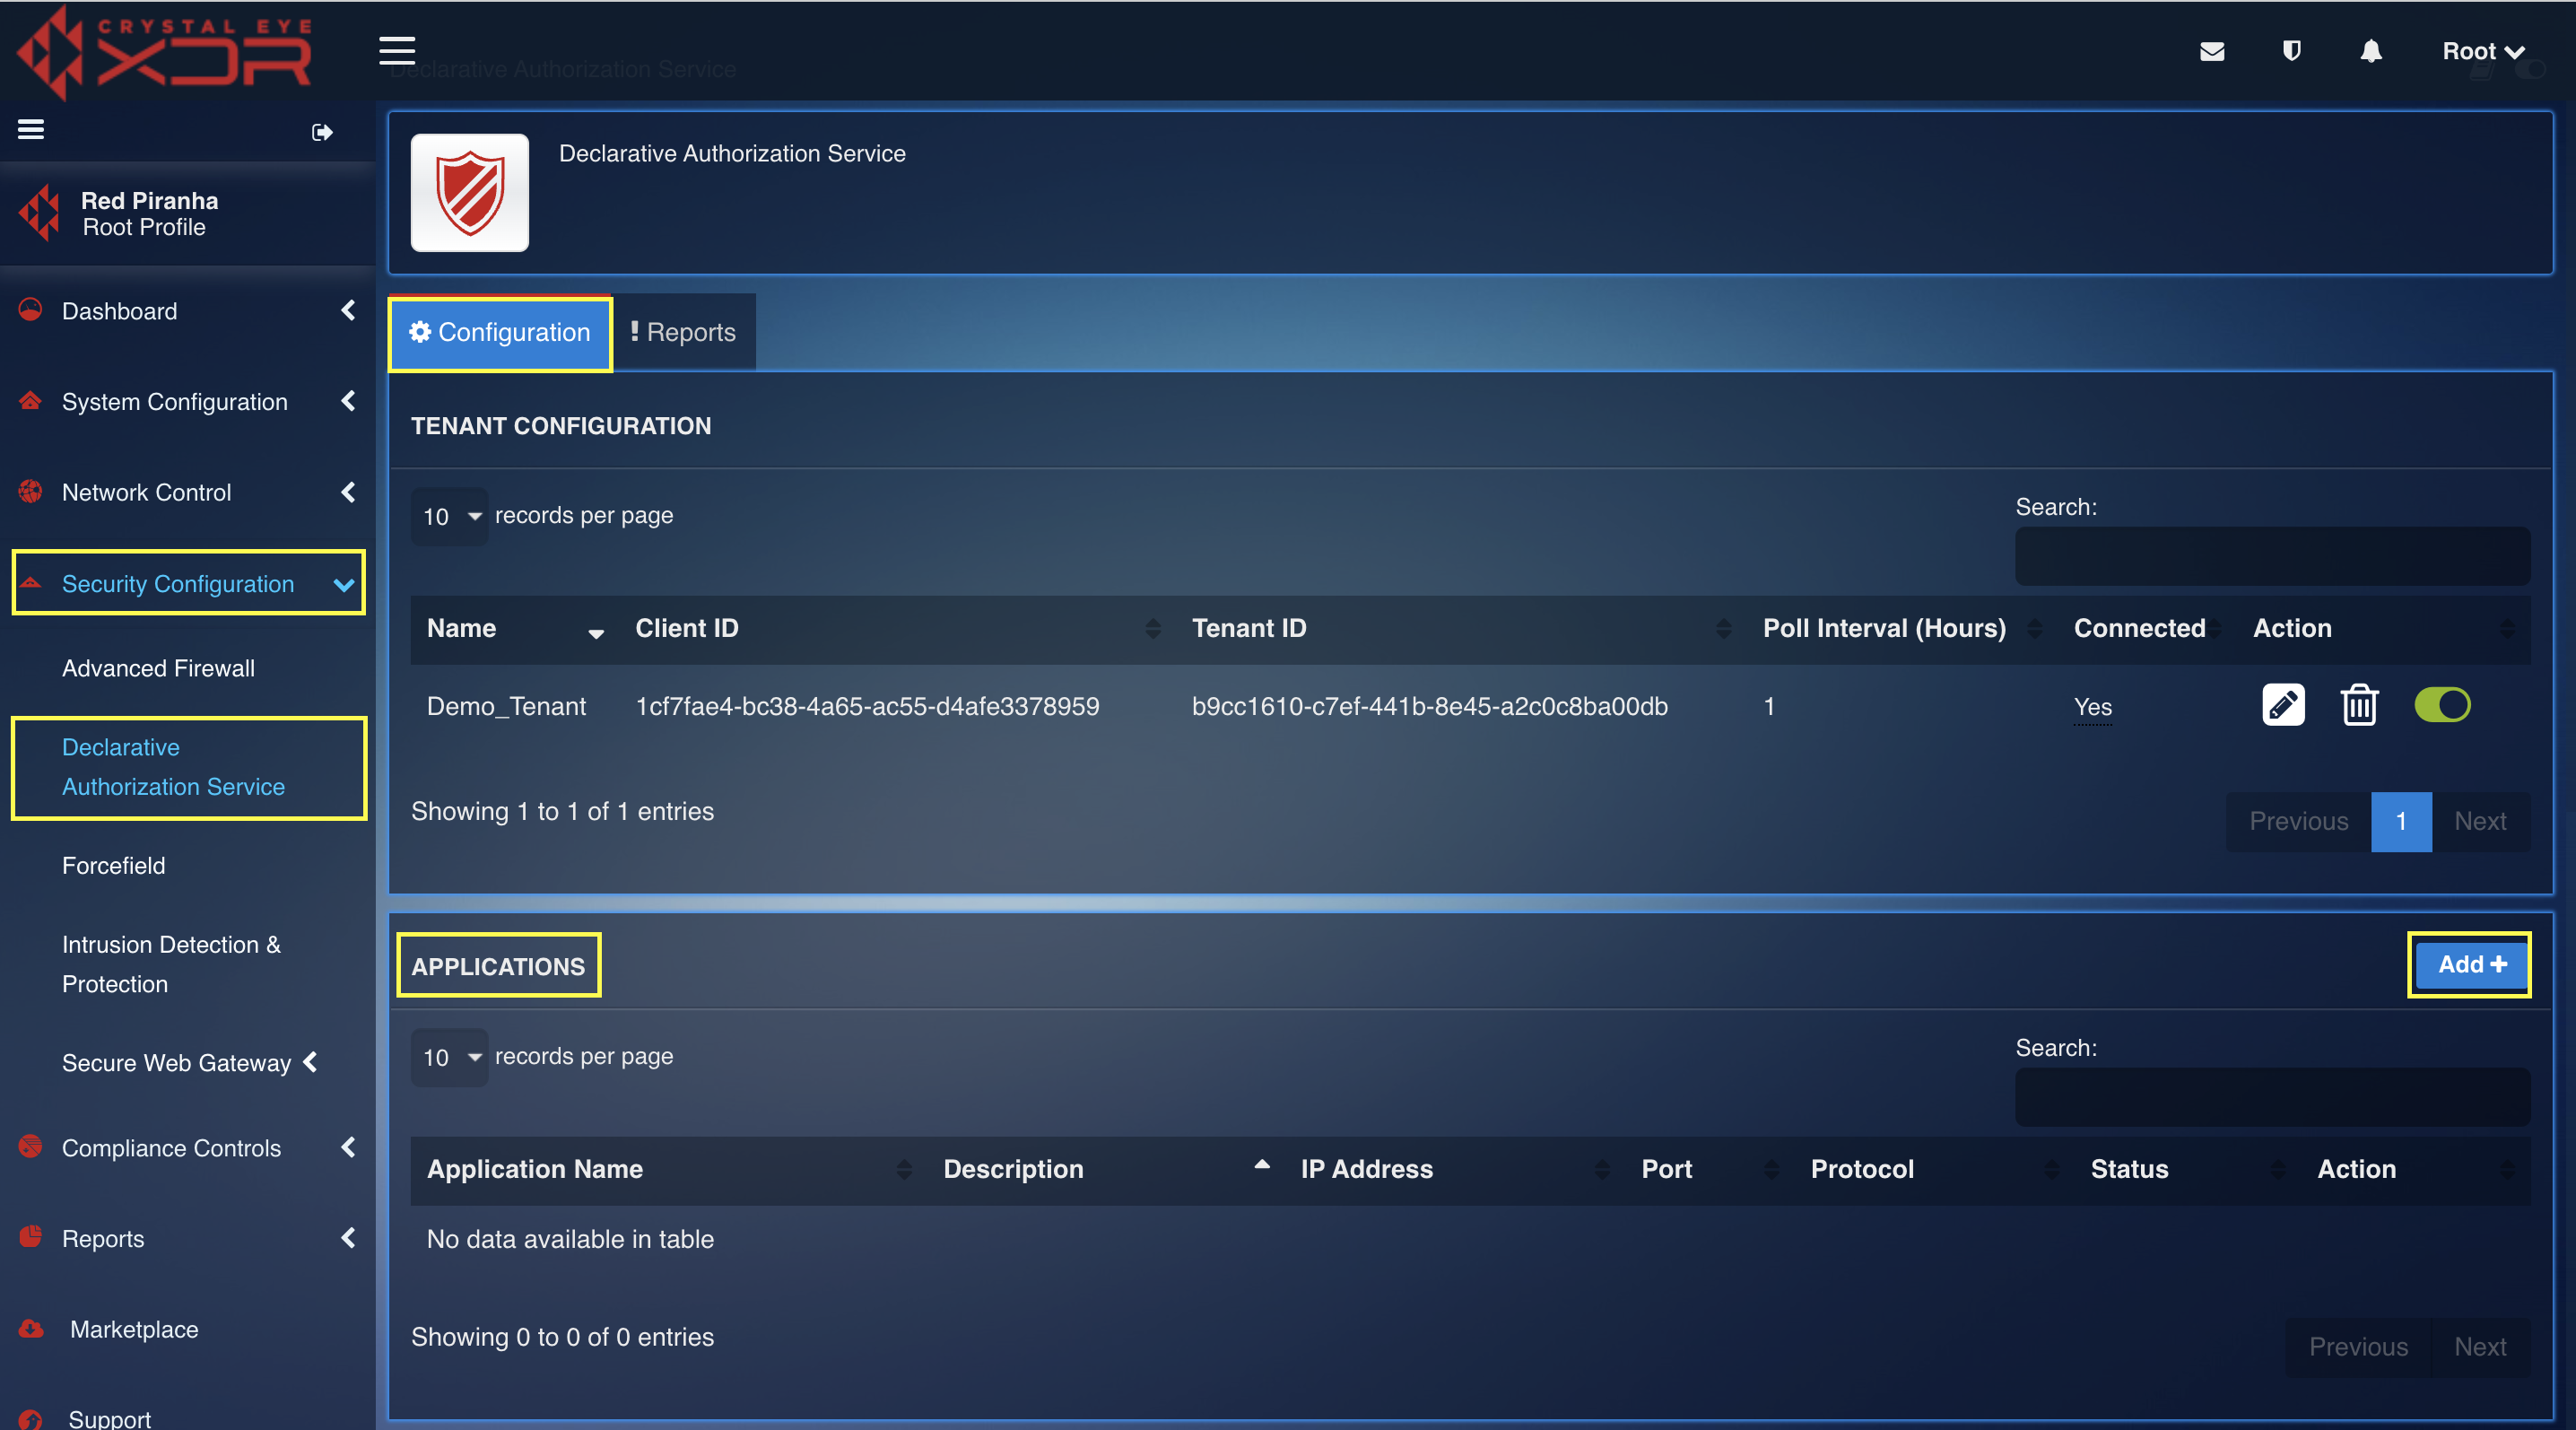
Step 1: In the DAS application page, click the Add button in the Applications section under the Configuration tab.
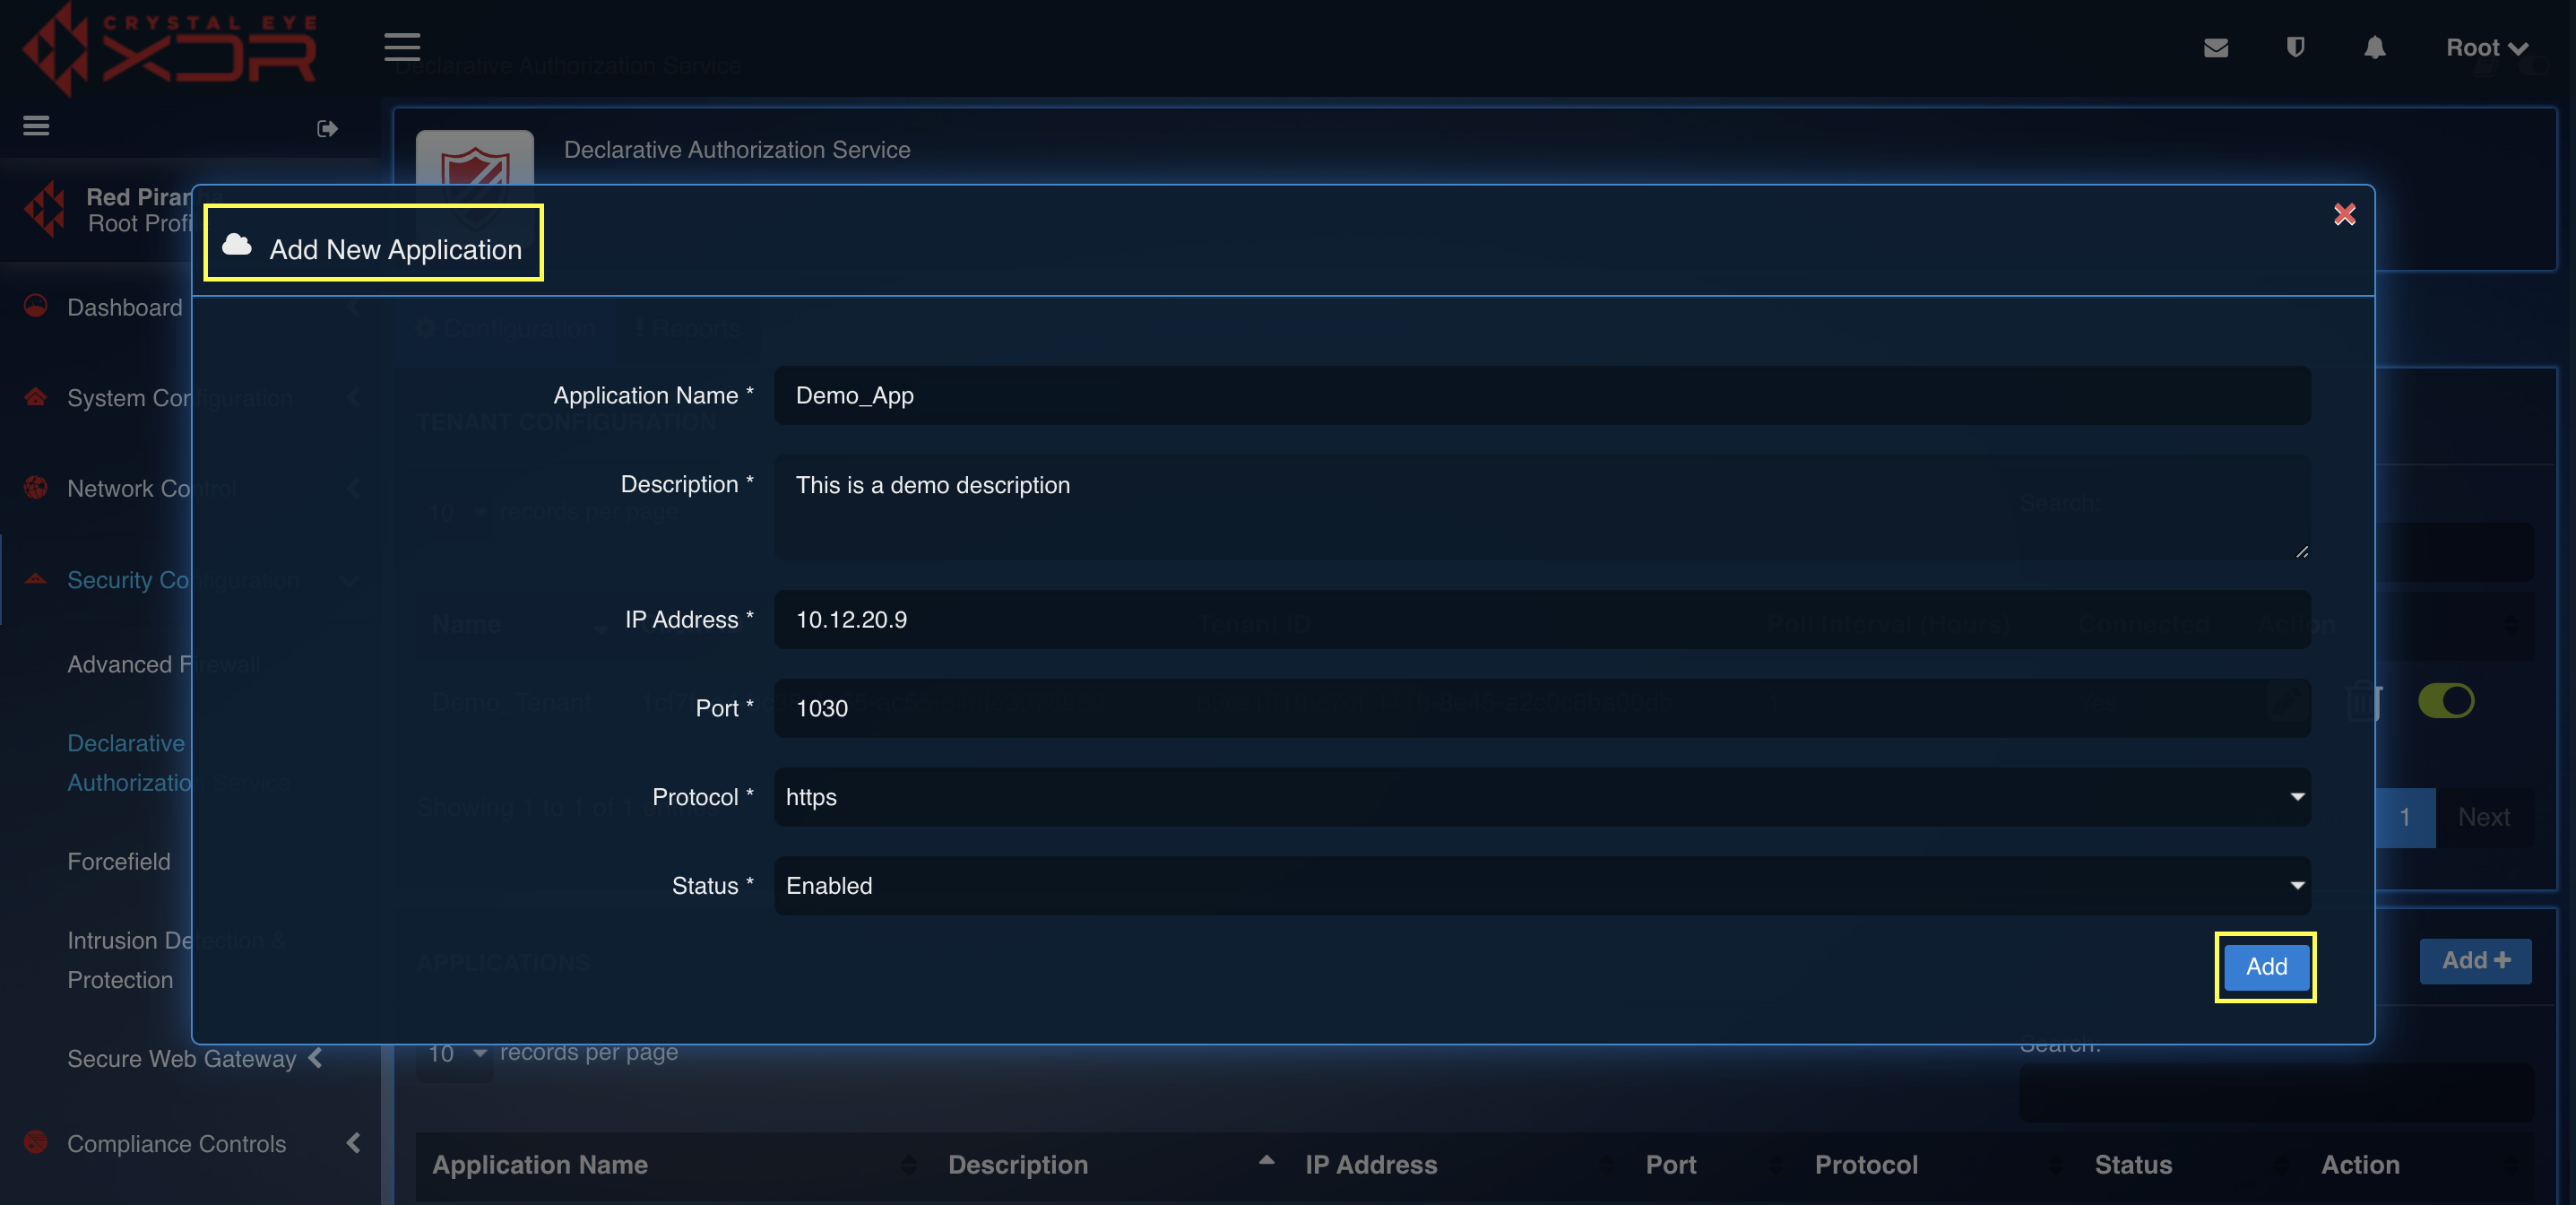
Step 2: You will now see Add New Application Page. Fill in the Application Name, Description, IP Address, Port, Protocol and Status of the application as shown in the screenshot below and Click the Add button.
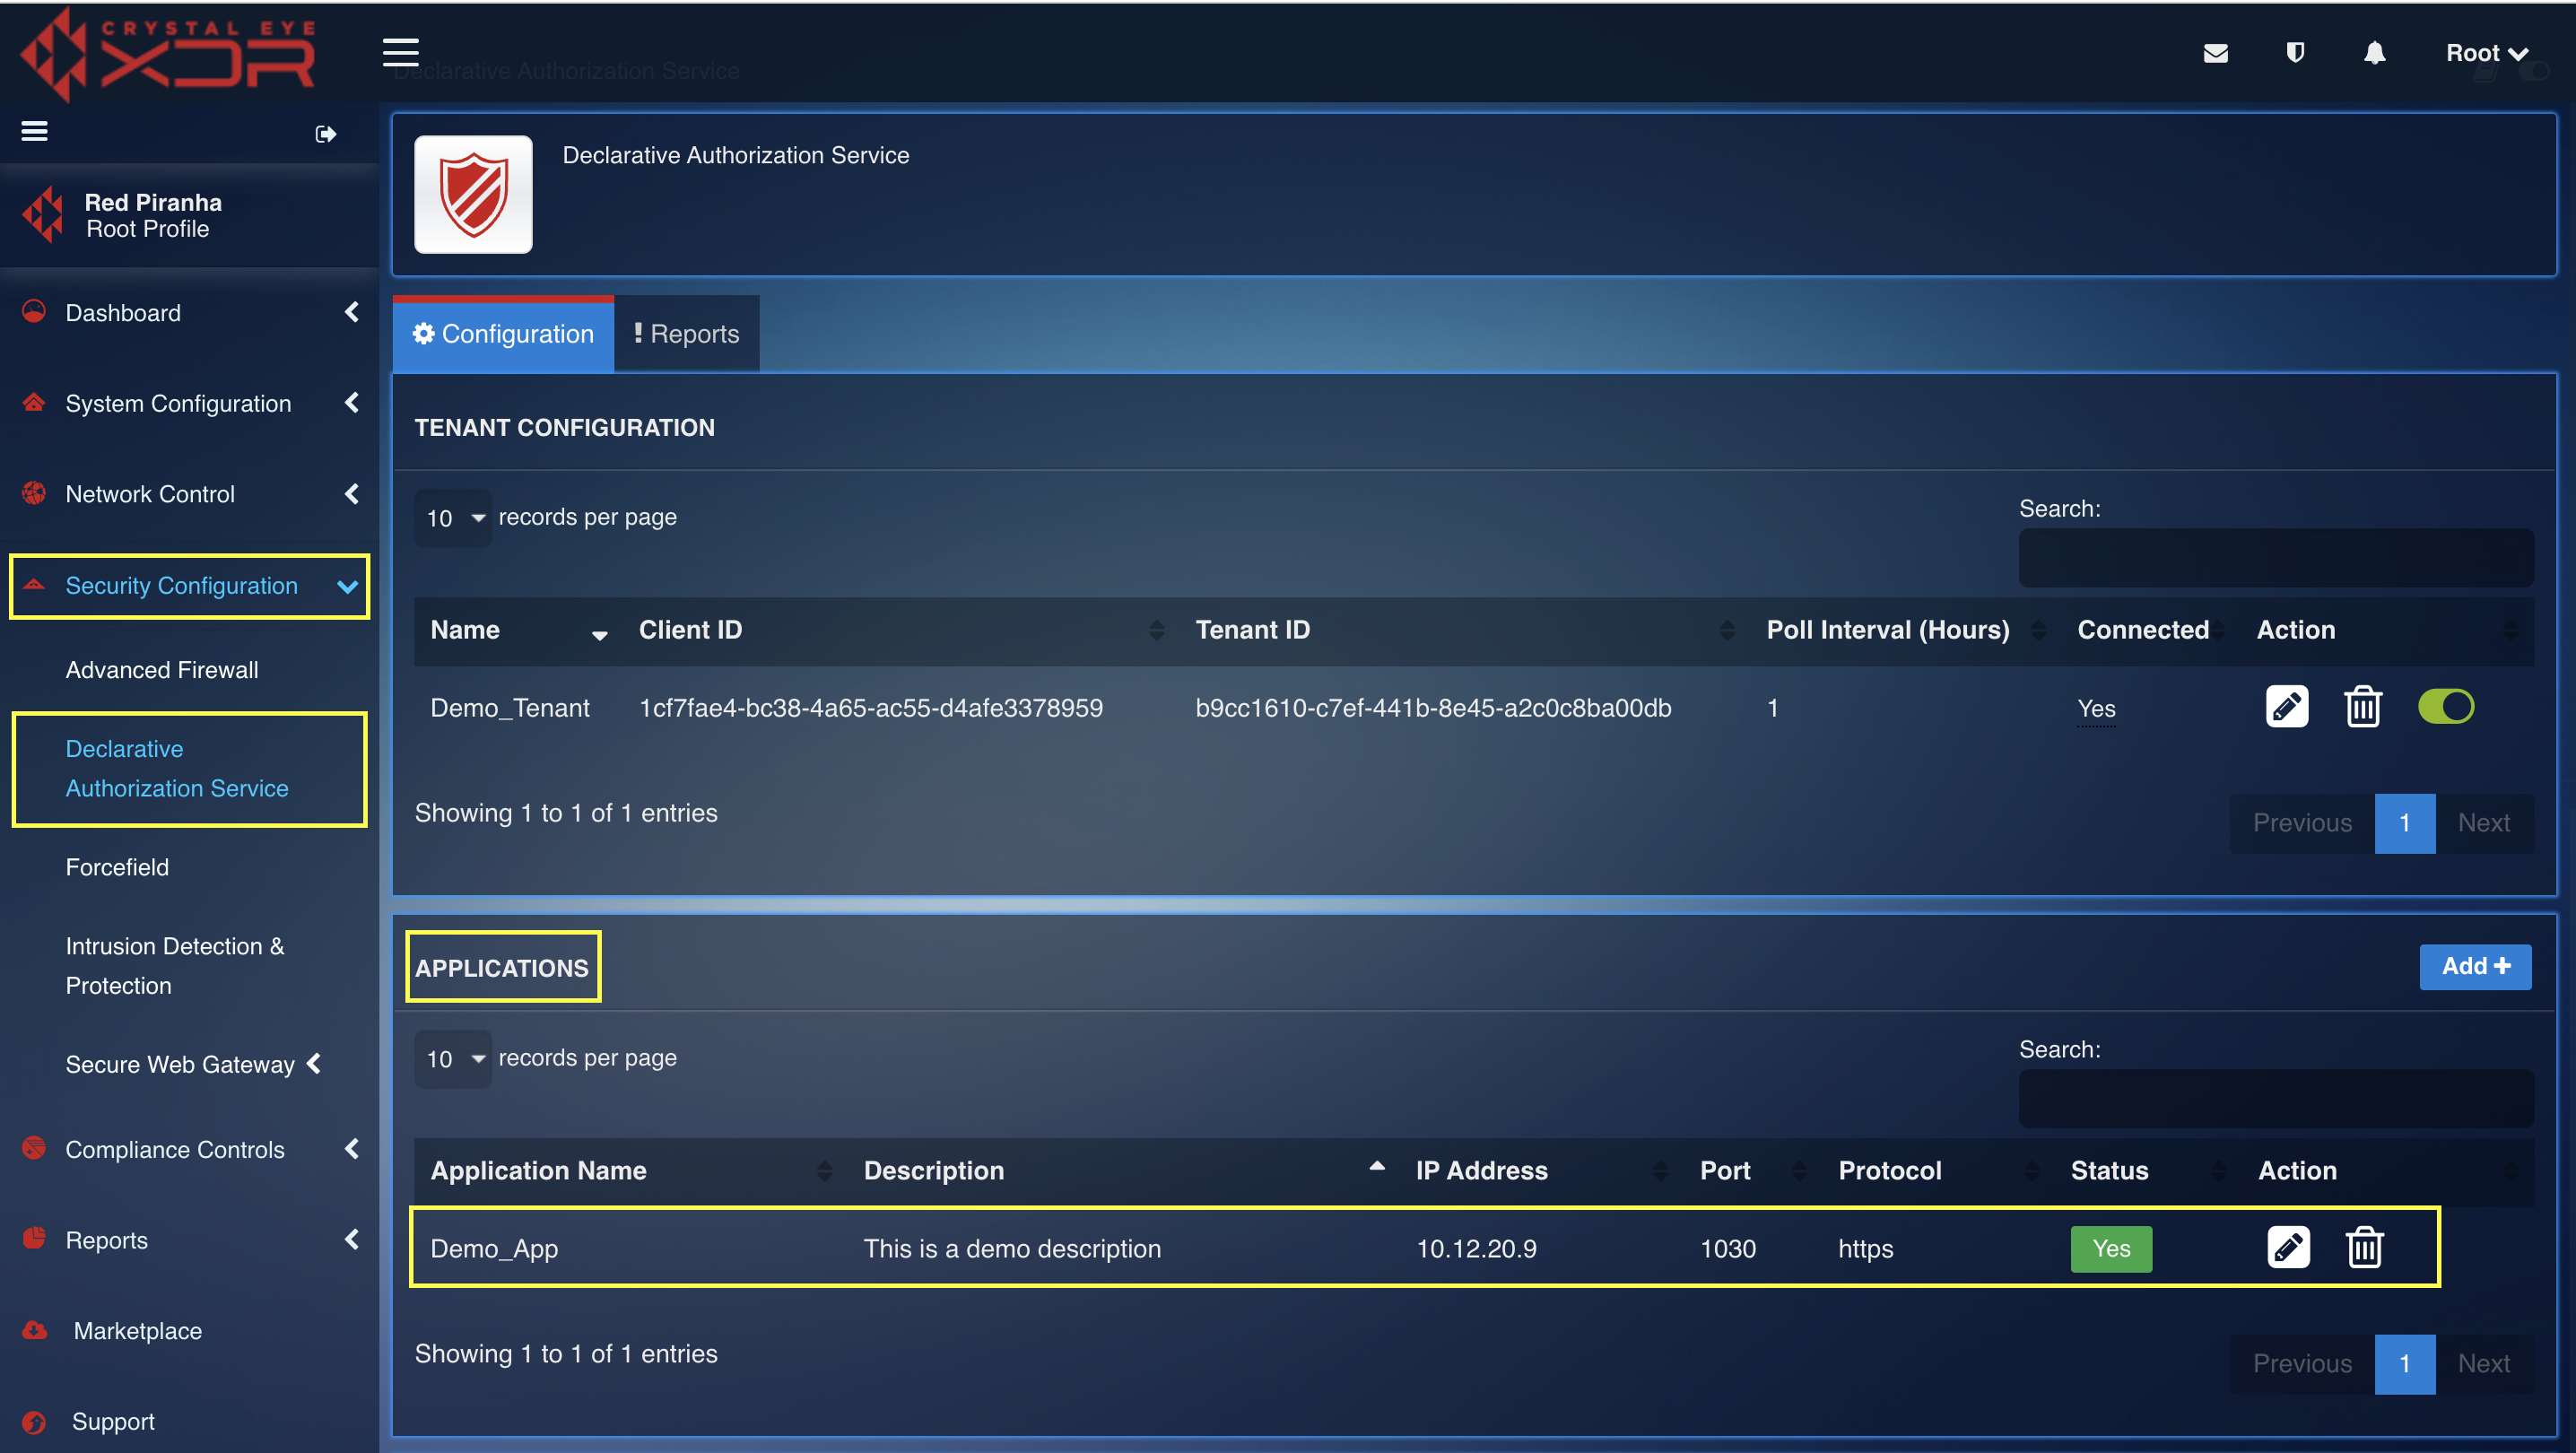
Step 3: You will now be directed to the Application page. The newly added Application will now be listed.
How to Configure Resources in DAS
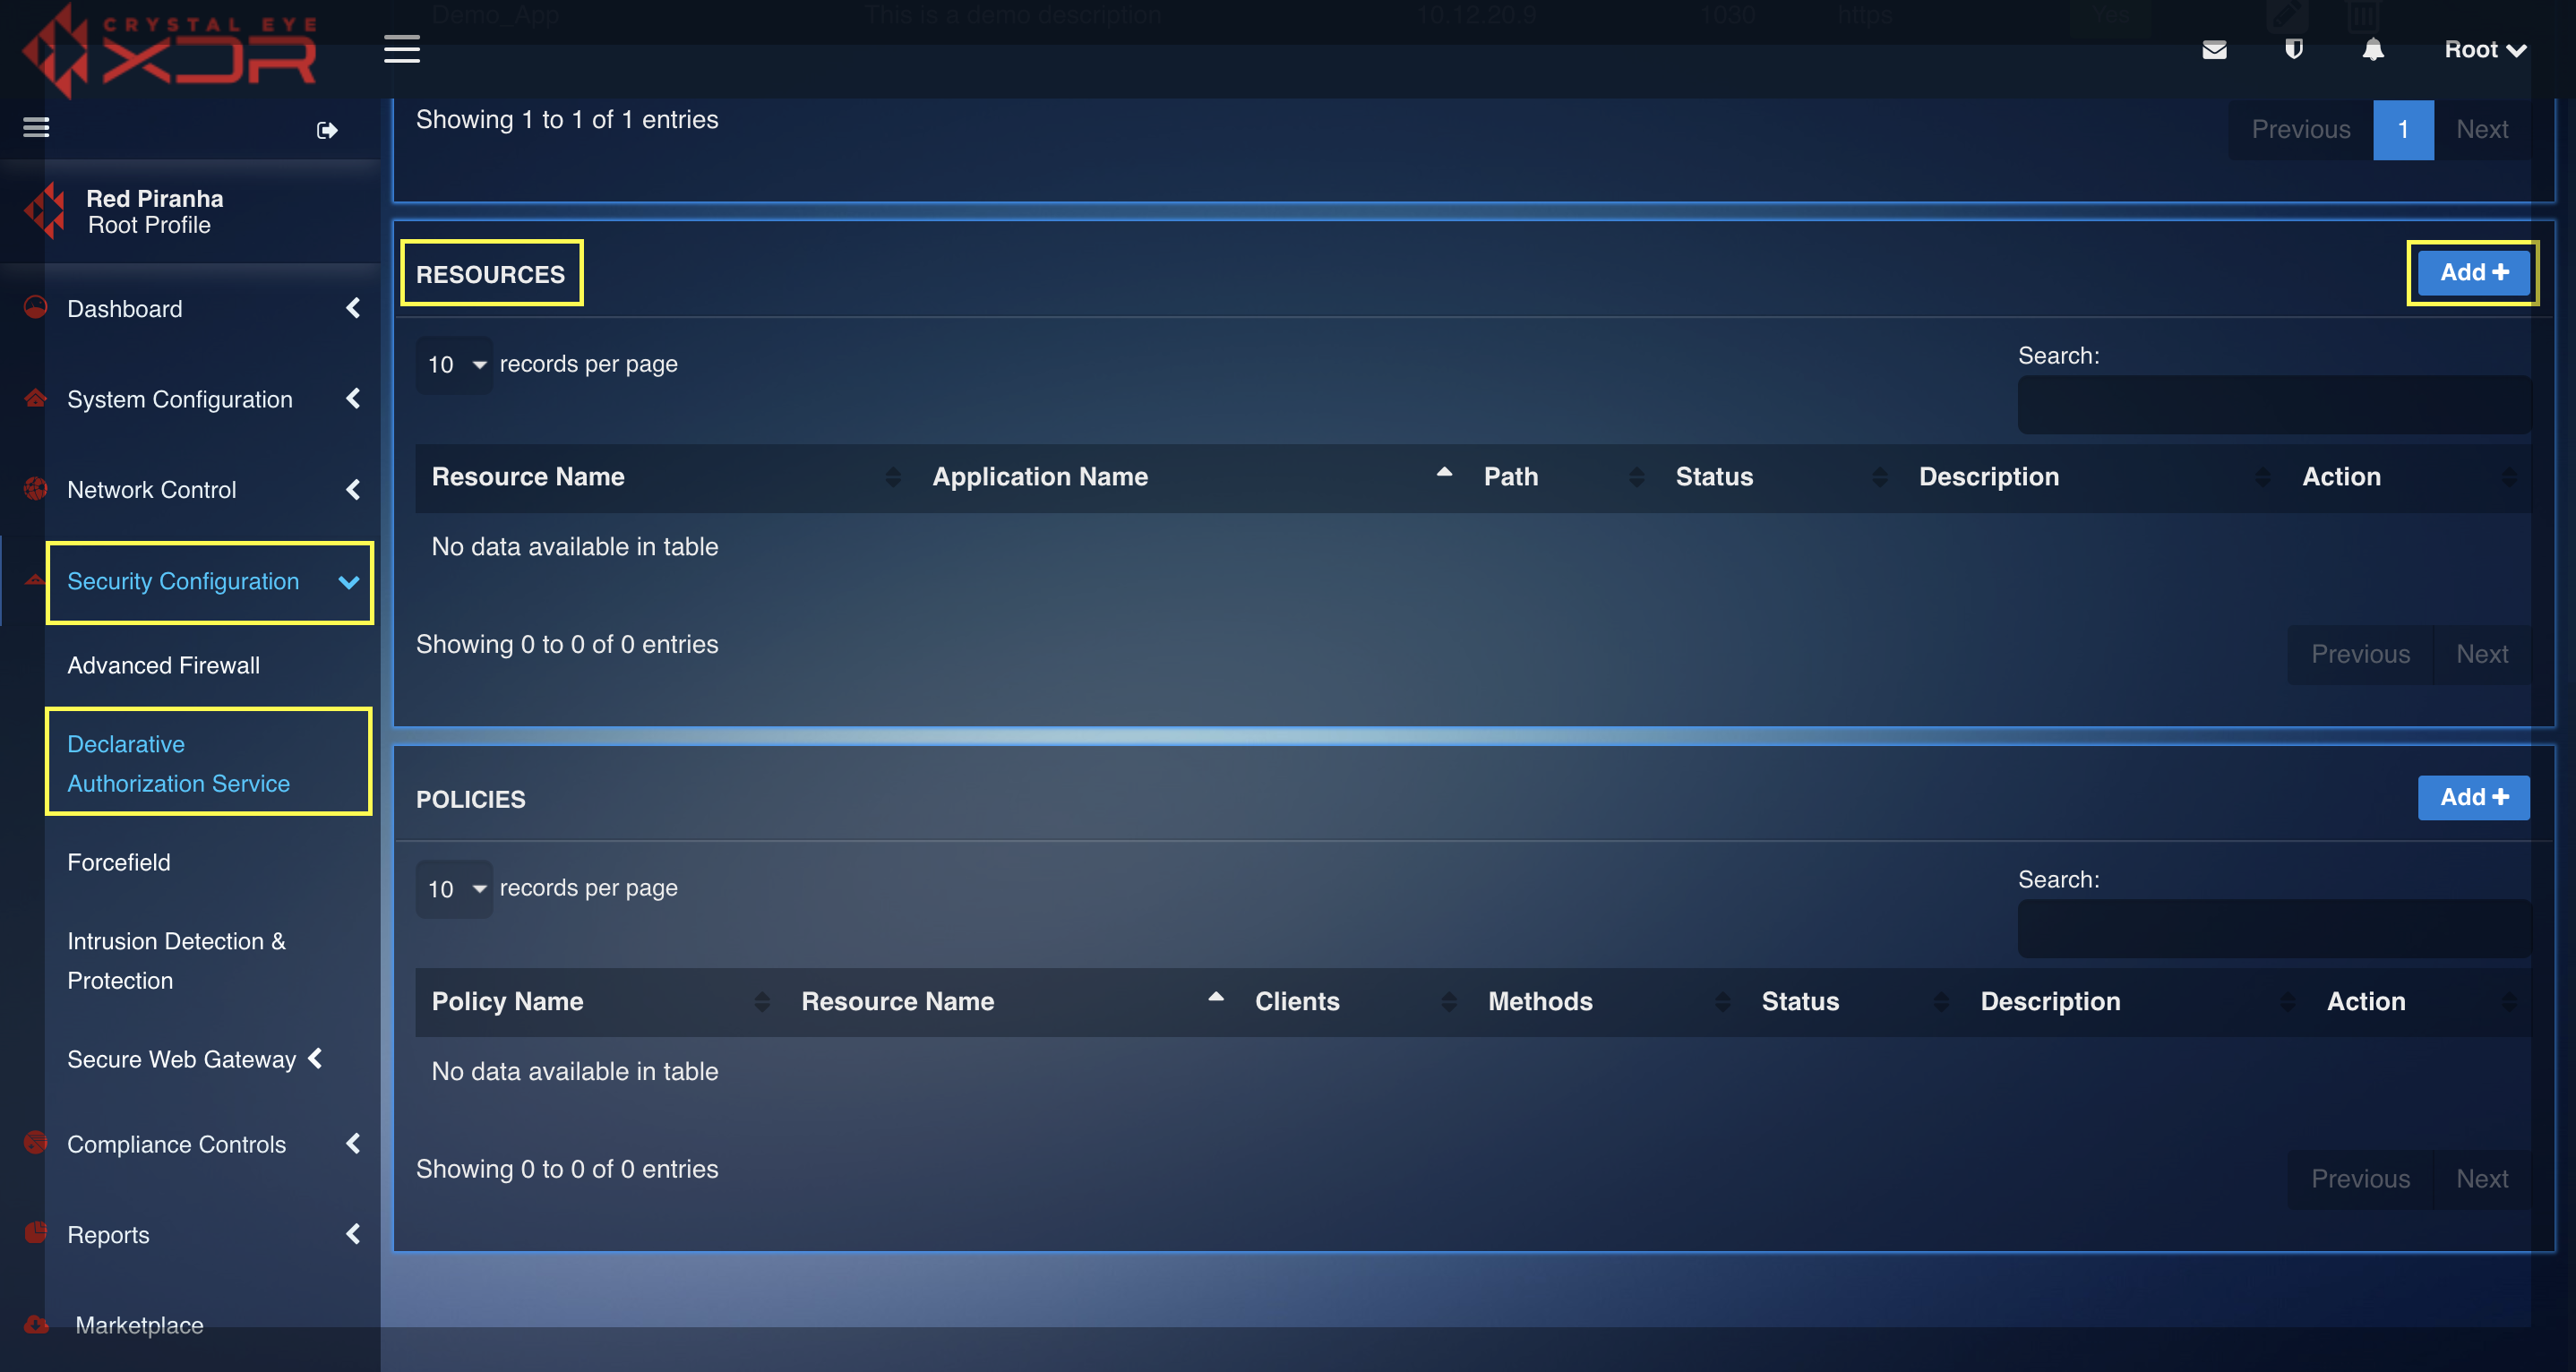
Step 1: In the DAS application page, click the Add button in the Resources section under the Configuration tab.
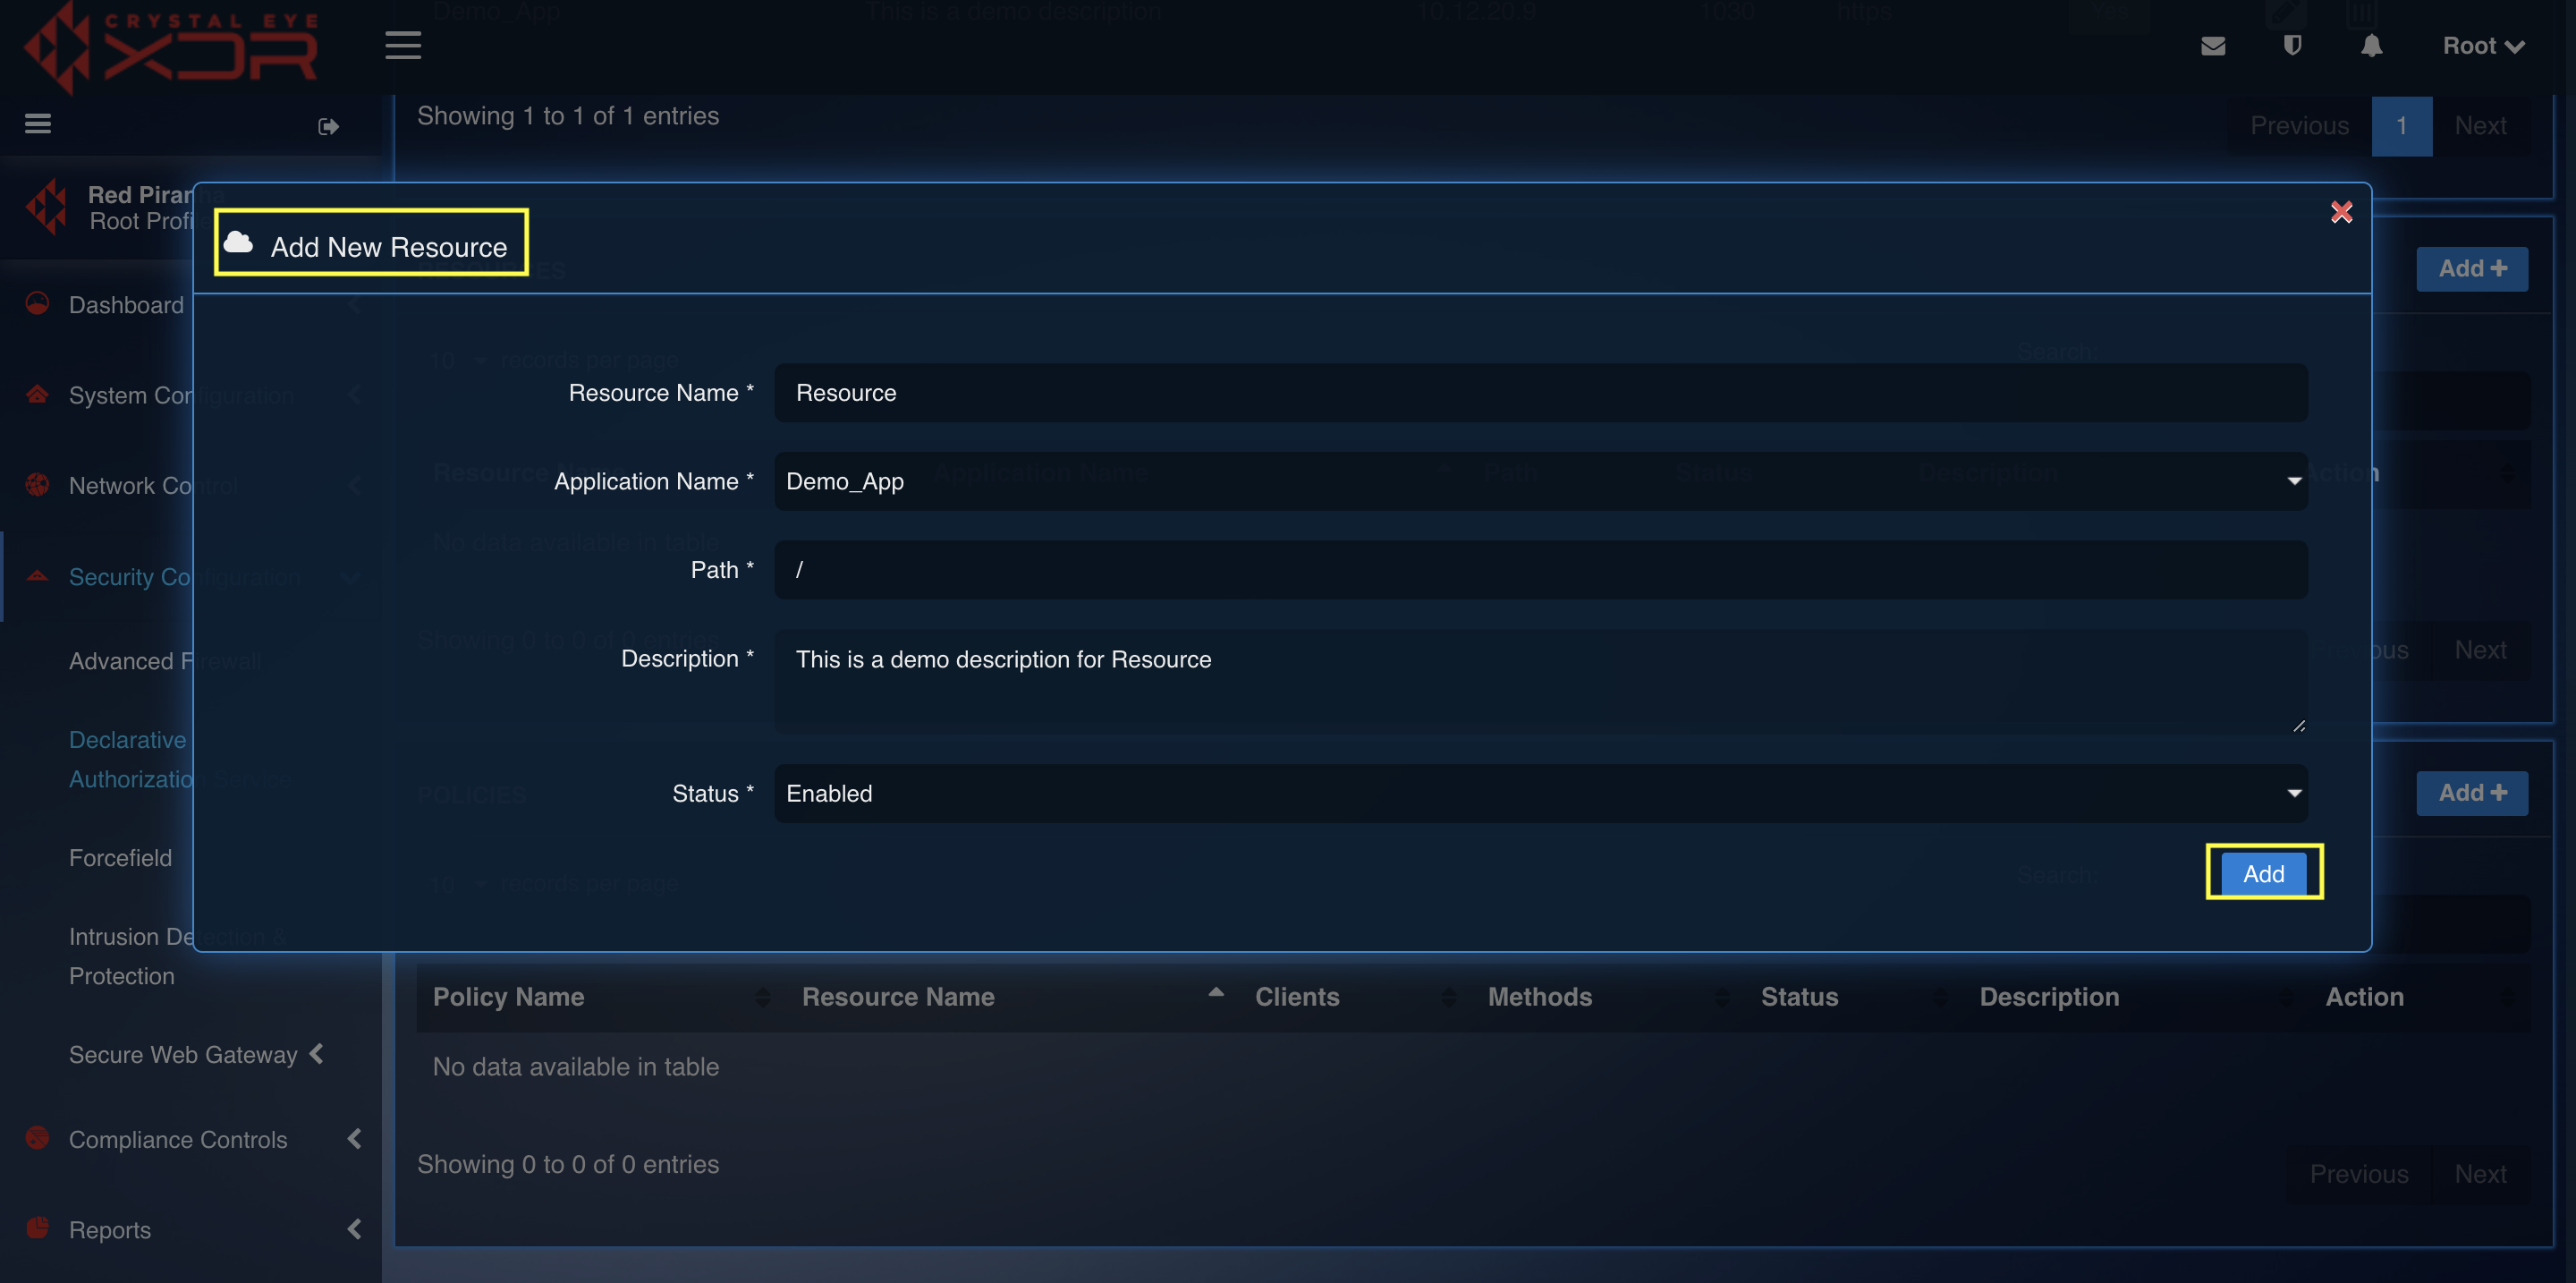
Step 2: You will now see Add New Resource Page. Fill in the Resource Name, Application Name, Path, Description and Status of the resource as shown in the screenshot below and Click the Add button.
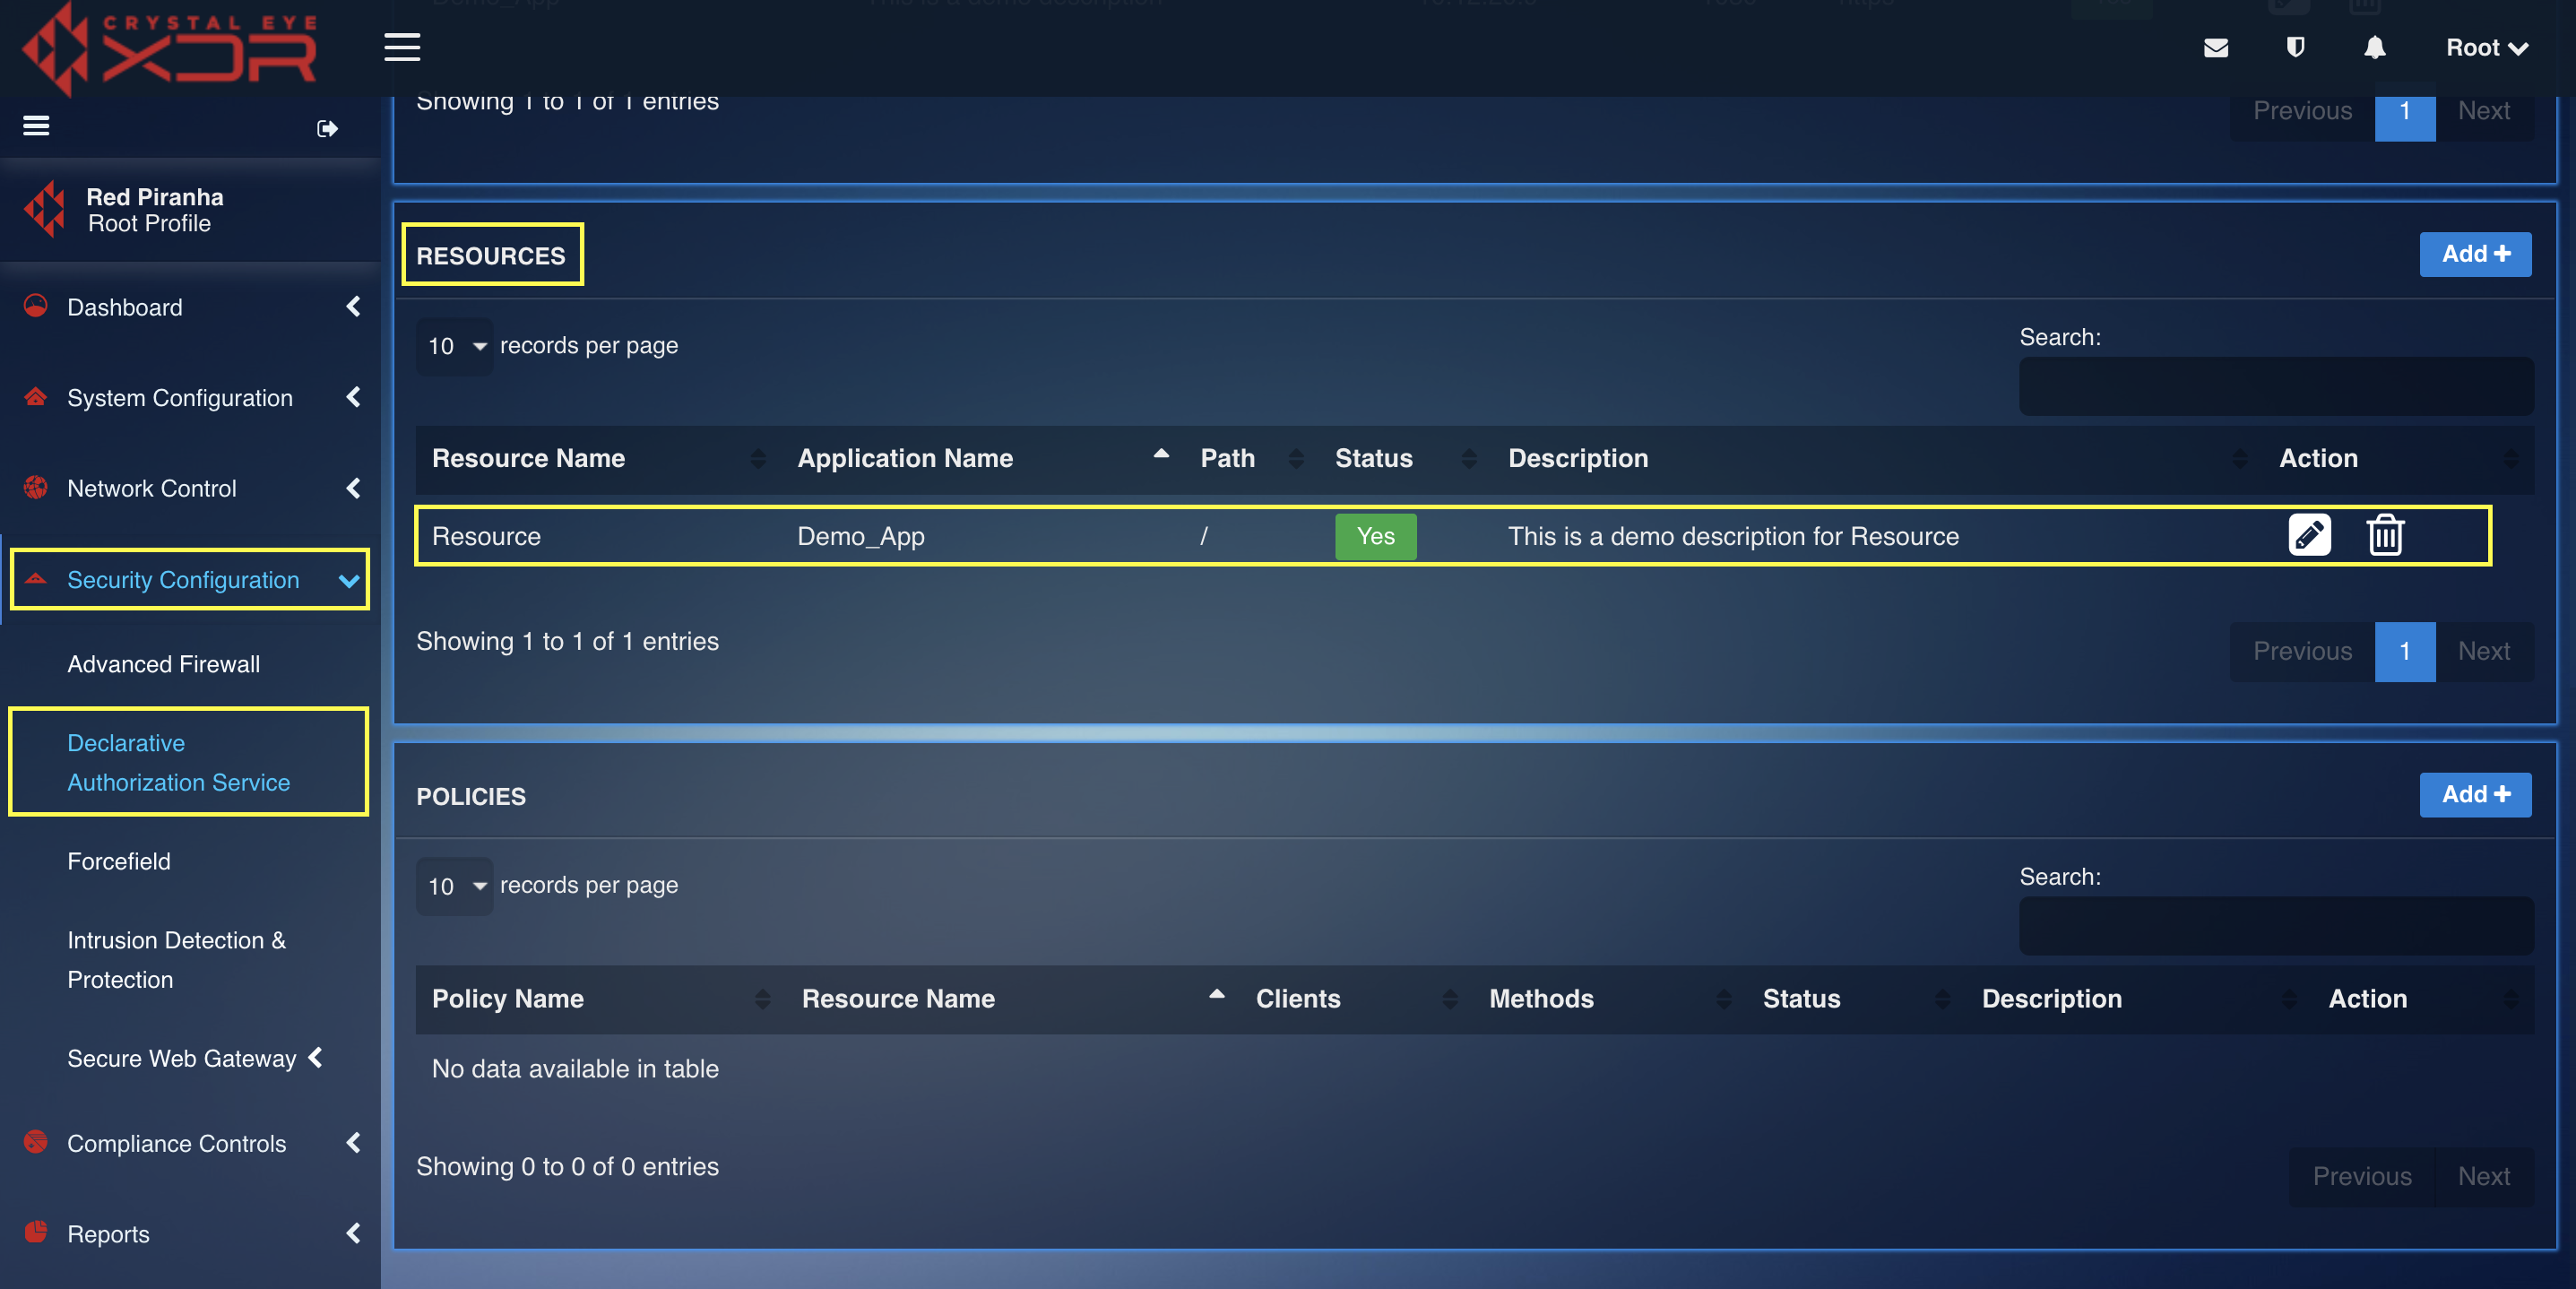
Step 3: You will now be directed to the Resources page. The newly added Resource will now be listed.
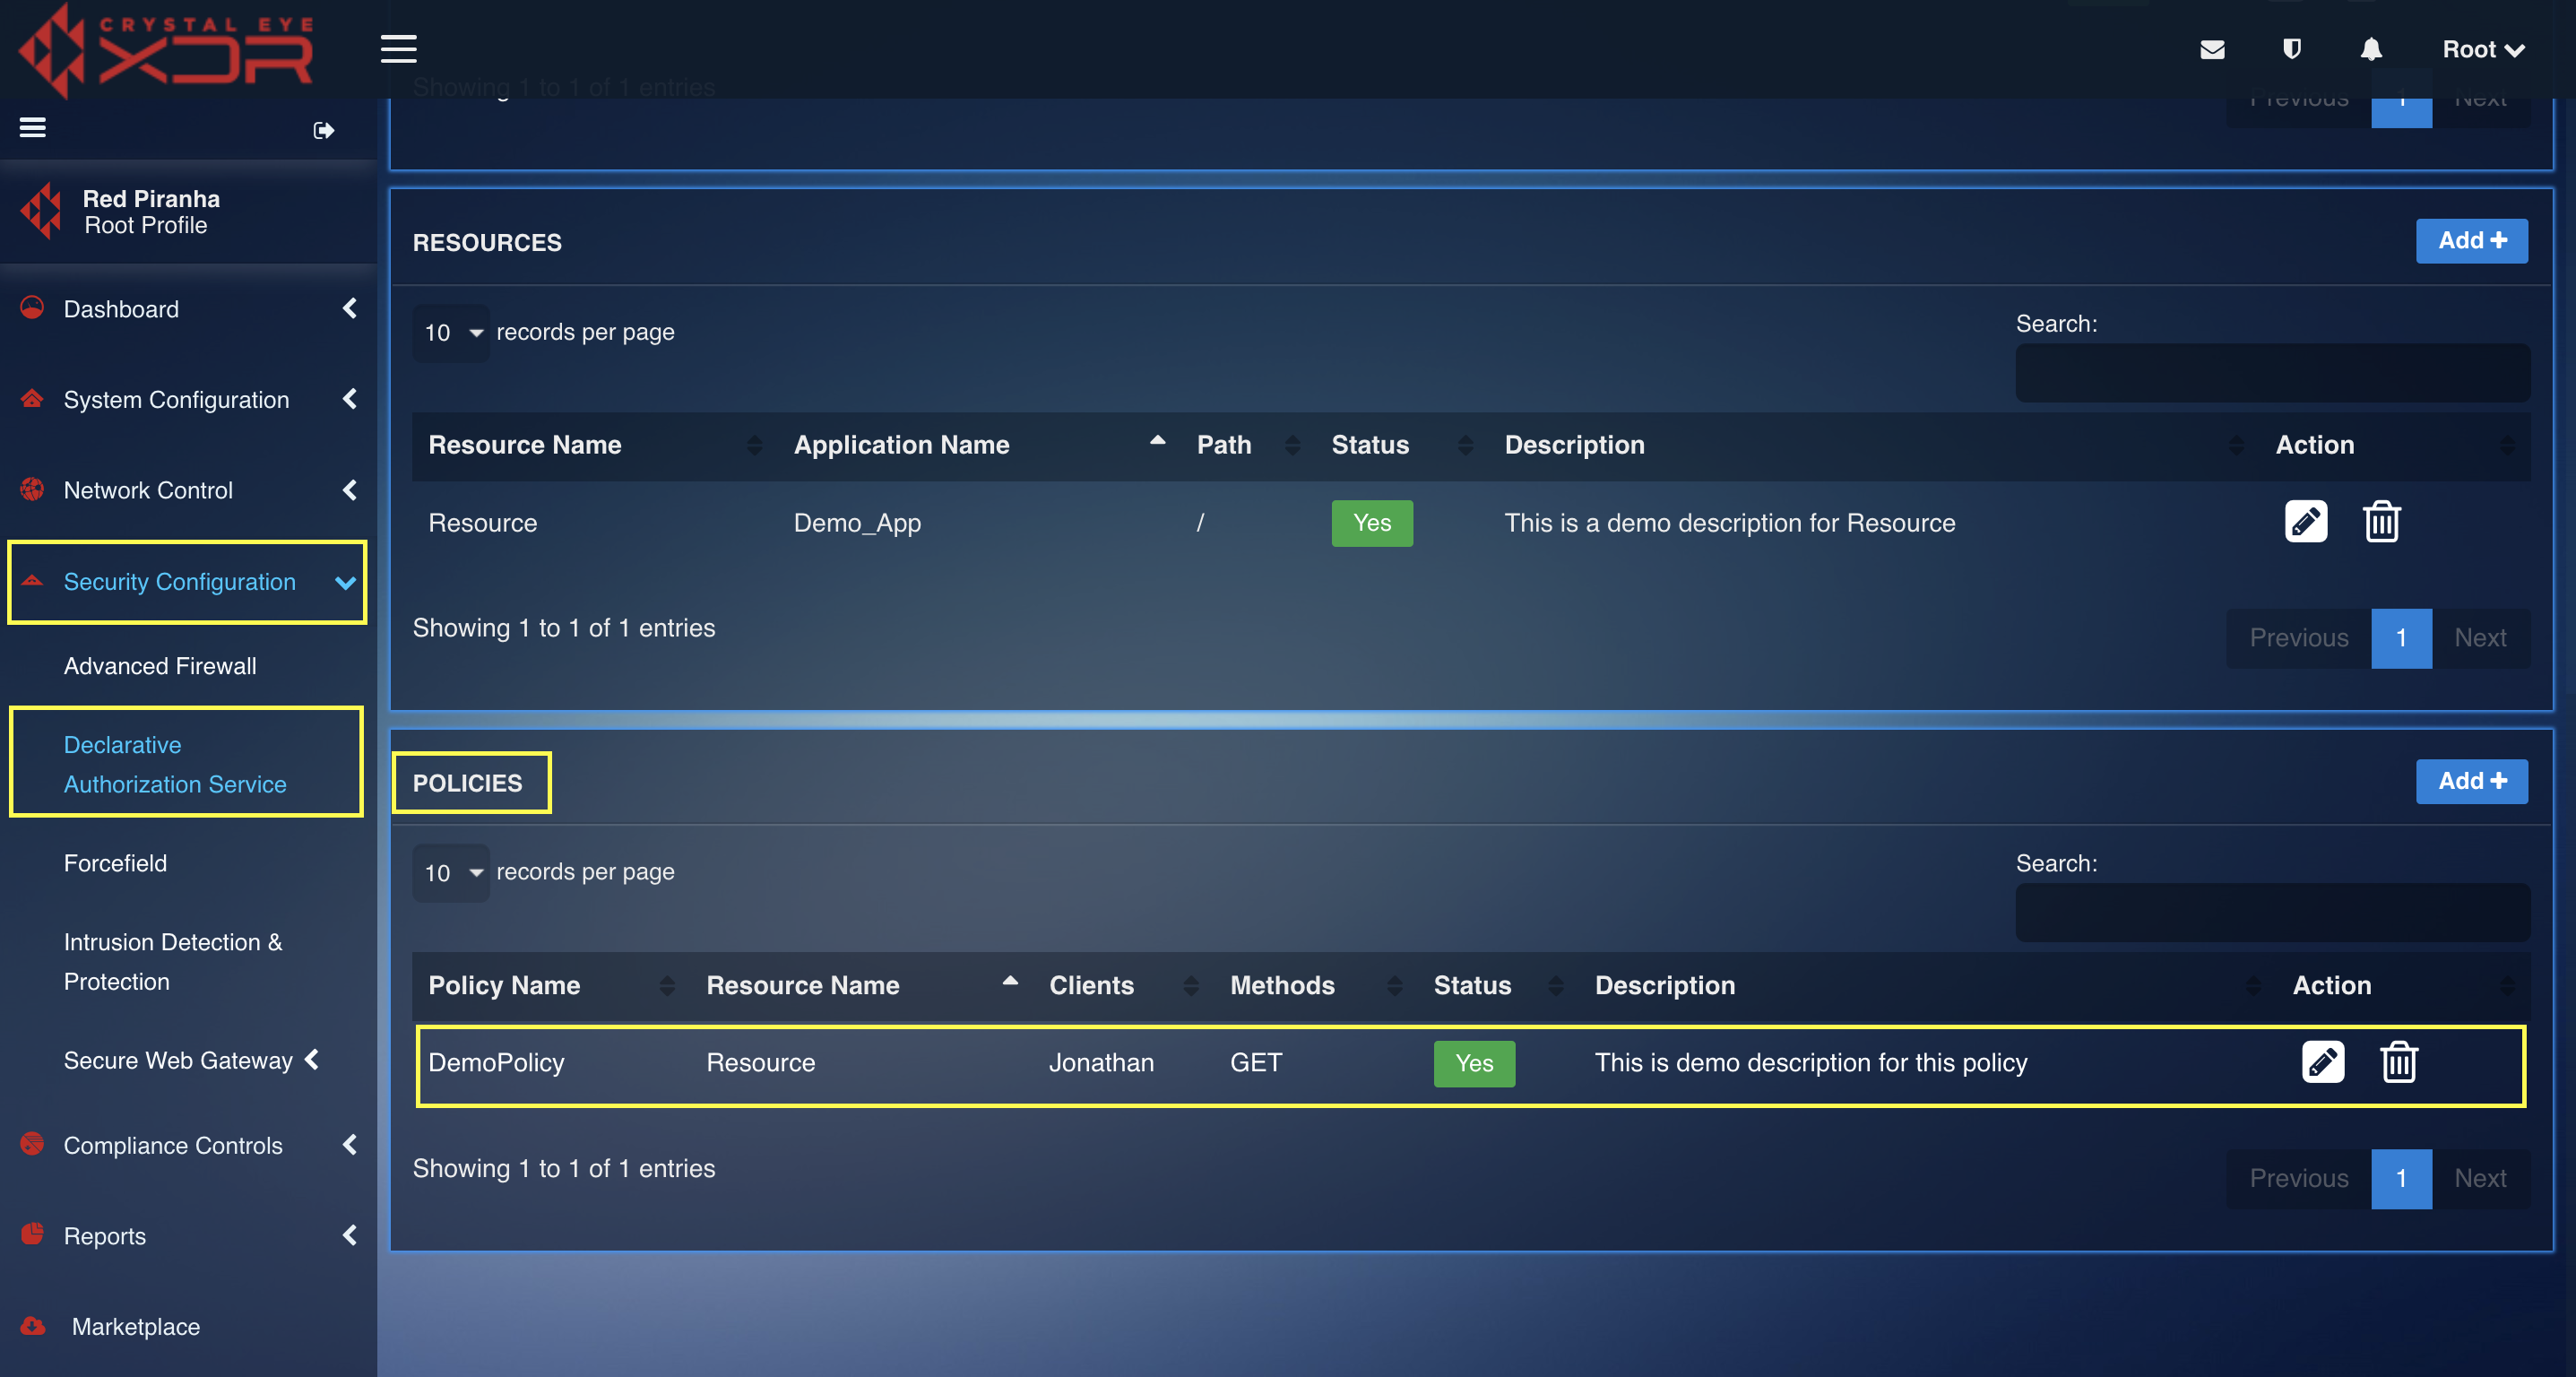
How to Configure Policies in DAS
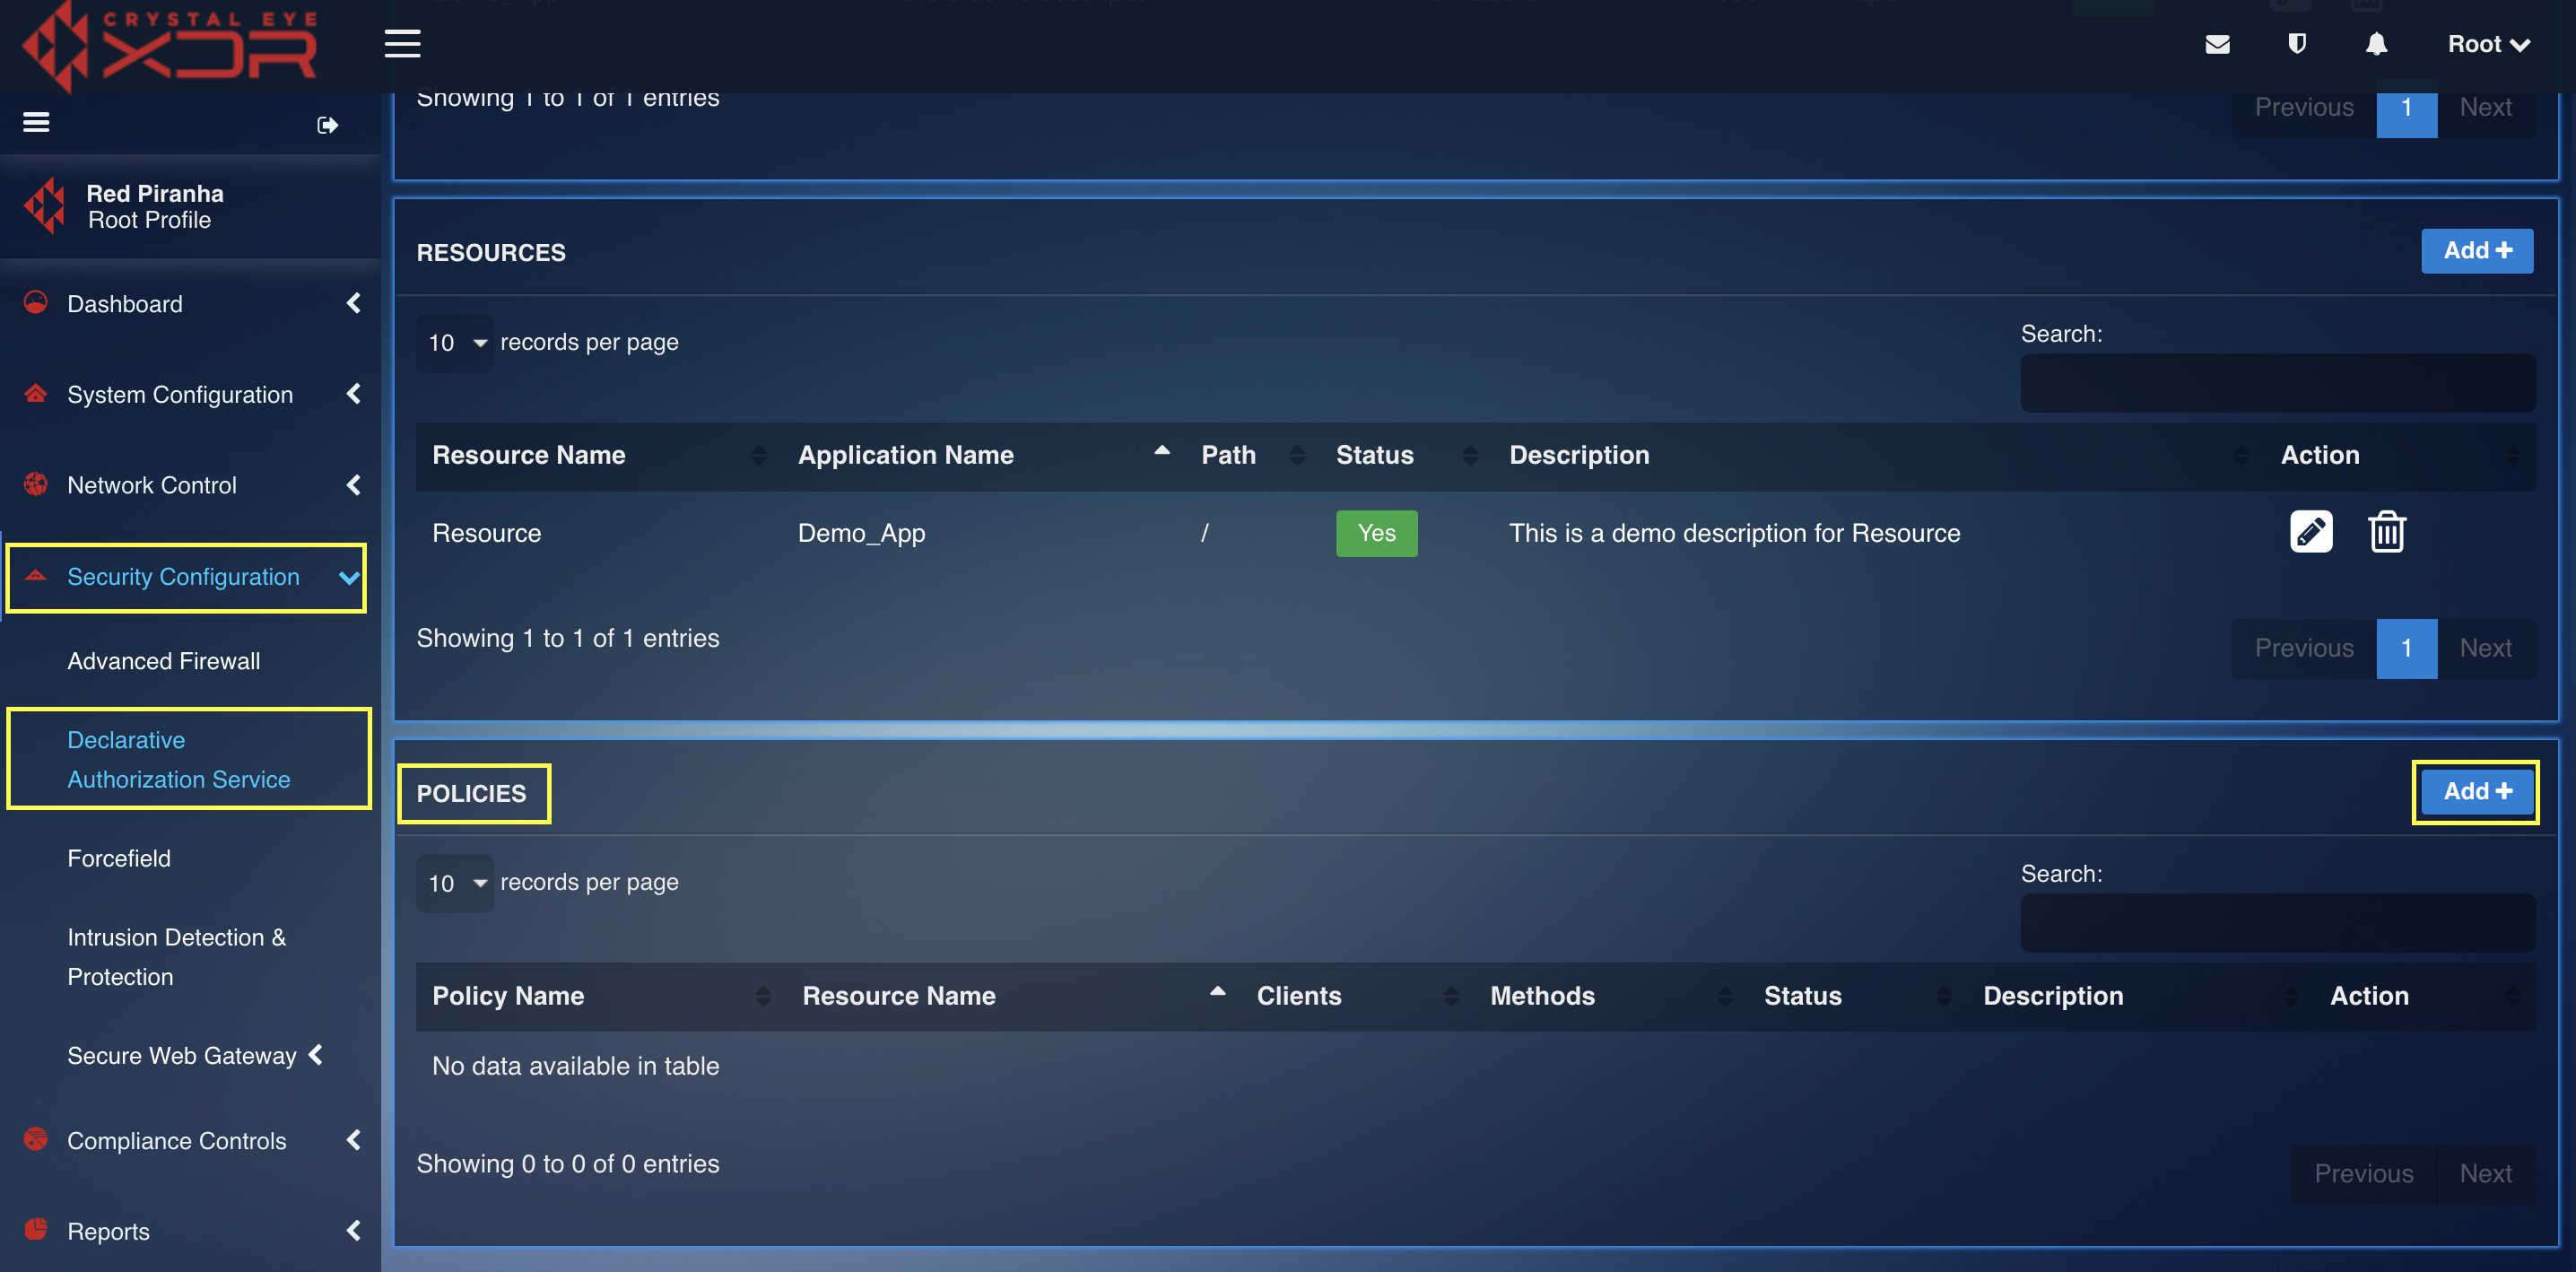
Step 1: In the DAS application page, click the Add button in the Policies section under the Configuration tab.
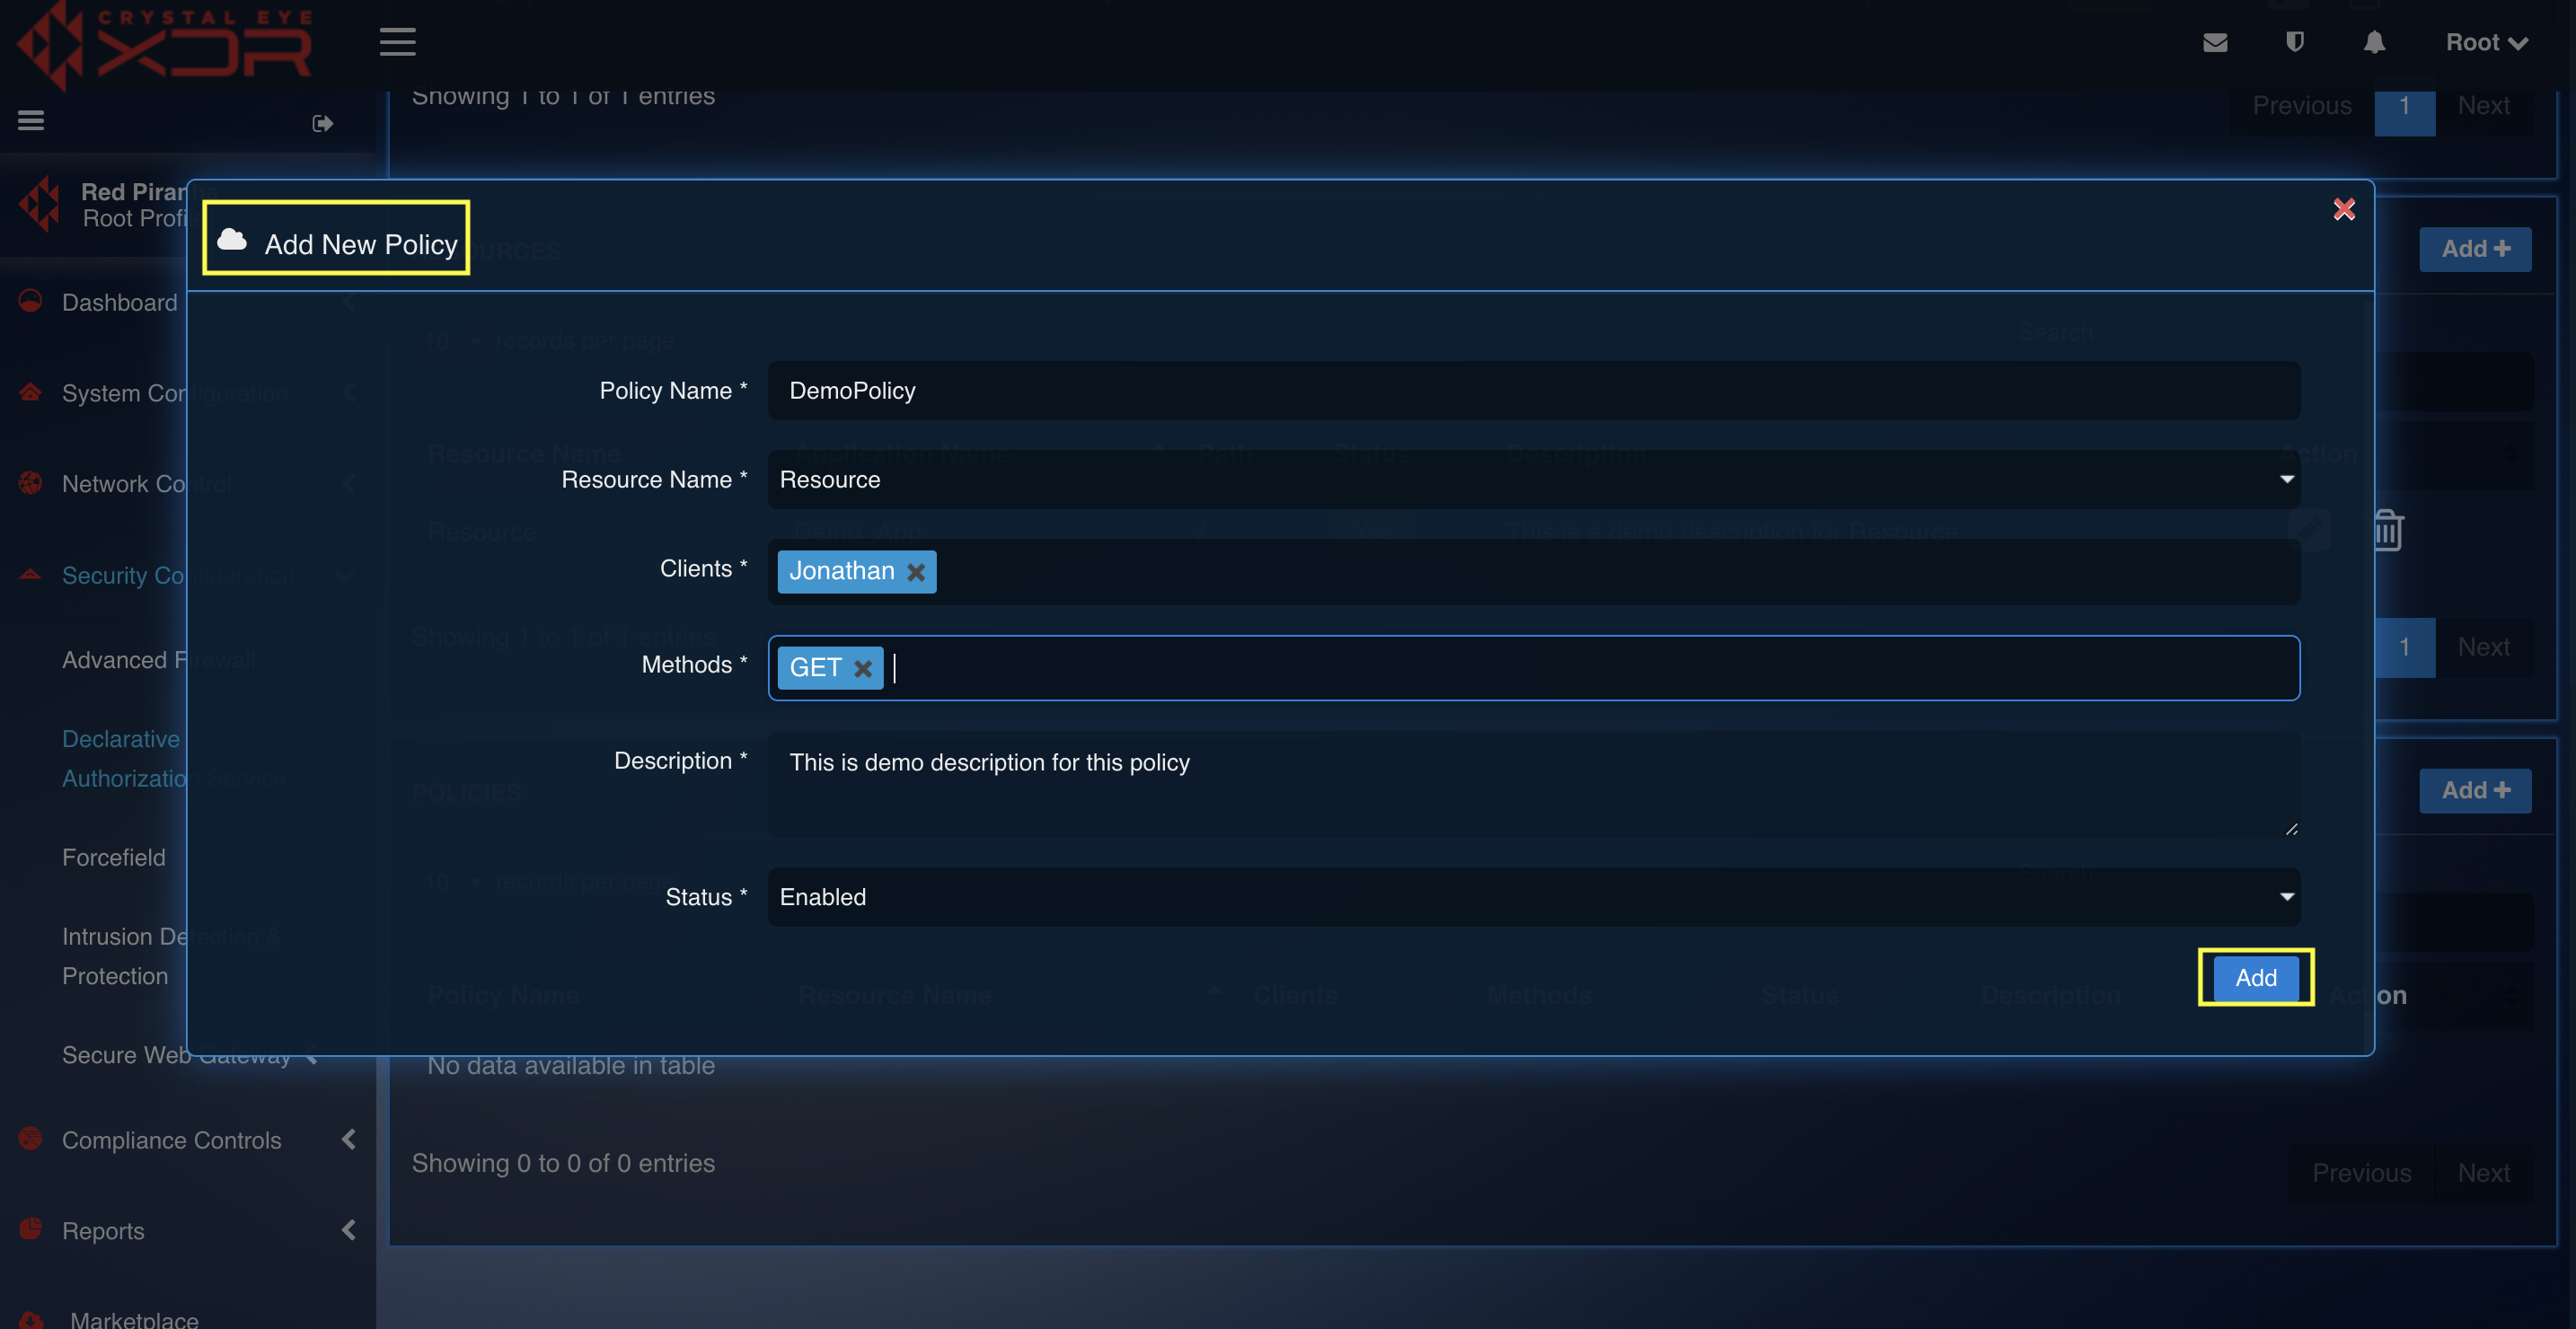
Step 2: You will now see Add New Resource Page. Fill in the Policy Name, Resource Name, Clients, Methods, Description and Status of the Policy as shown in the screenshot below and Click the Add button.
Step 3: You will now be directed to the Policies page. The newly added Policy will now be listed.
The DAS Configuration is completed once the above 4 Sections Tenant Configuration, Applications, Resources, and Policies are configured.
Reports
Crystal Eye XDRs Declarative Authorization Service Reports displays Timestamp, Method, Path, Prefix, Decision and Requested by Alerts uplifting monitoring and response capabilities.
Such optimized monitoring and response activities intended to find anomalies in the network through report Alerts reduces the risk of a breach and also ensures compliance with ISO 27002:2022 (Control 8.16 Monitoring Activities).
