Network Map
Overview
The Network Map application has advanced capabilities that provide enhanced visibility of connected devices in the Crystal Eye network. The app also enlists various options that could be used to manage devices on the Crystal Eye network.
The administrator can see all the devices connected to the Crystal Eye Network under the unmapped category of the Network app. These devices can be identified and then be mapped by assigning it device type, Device Nickname, and Vendor Name. After identifying a particular device on the Network Map application, the administrator can assign a Content Filter Policy to it.
User Identification in Crystal Eye XDR
User Identification in Crystal Eye XDR involves:
- Detecting devices connected to the network
- Creating new user and associated the users to mapped devices
- Providing privileges and access as per the user profile
- Monitoring the activities of the users
User Identification makes the monitoring of network easier and efficient. Once the users and devices have been identified, events can be traced back to the users thereby ensuring clarity and accountability. Identifying and maintaining a log of the devices and users connected to the network improves network visibility. Greater visibility of devices and users connected to the network helps in ensuring better control over the network.
Installation
The Network Map application is installed by default and can be accessed from the left-hand navigation panel.
Navigation to Network Map Application
Left-hand Navigation Panel > Network Control > Device Management > Network Map
Device Overview in the Crystal Eye XDR Network
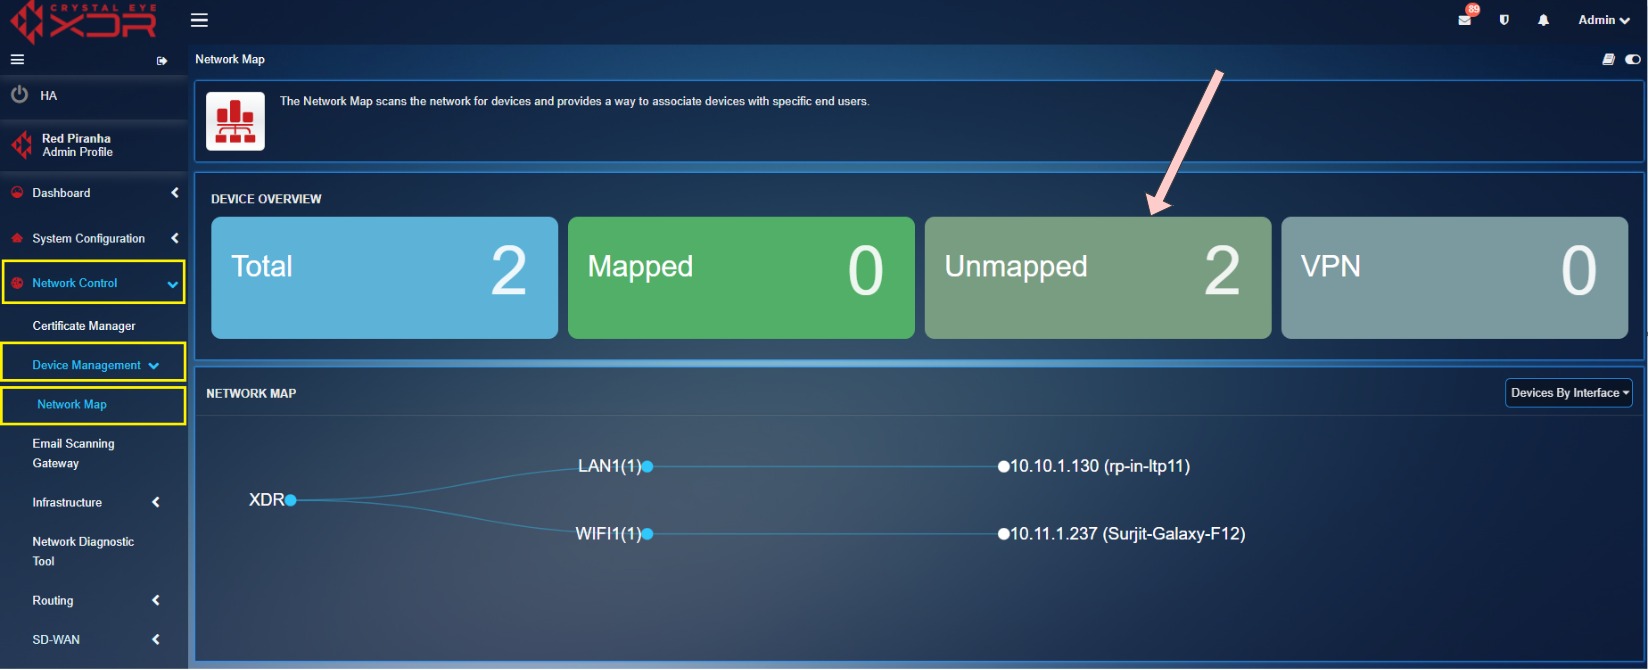
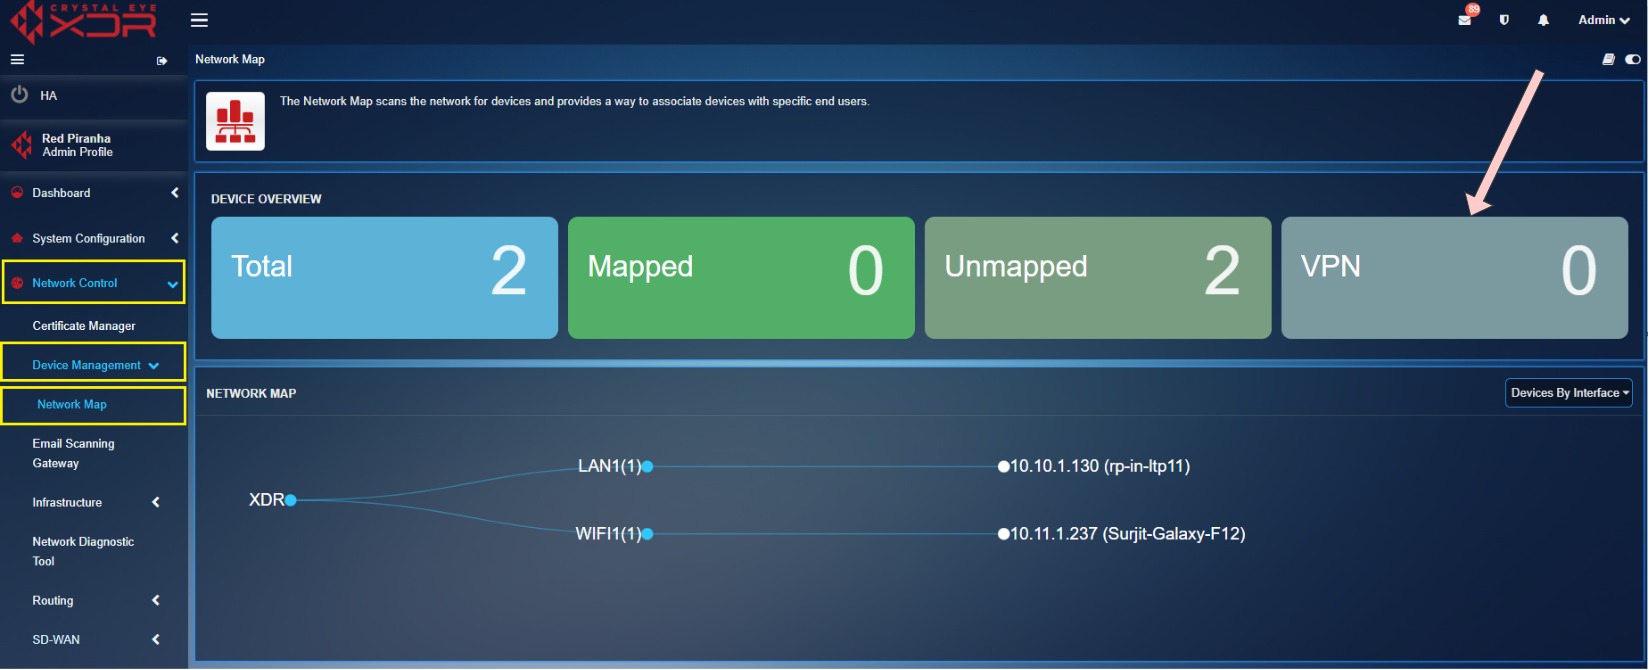
The device overview section provides a snapshot of the total number of devices connected to the network, total number of devices that are mapped with the CE XDR, total number of devices unmapped, and the total number of devices connected with the organisational network with SSL VPN.
Total number of devices connected to the network: View the total number of devices connected to the Crystal Eye XDR network.
Total number of devices that are mapped with the CE XDR: These are the devices which have a device type assigned to it. Learn more about mapping CE XDR devices here.
Total number of devices unmapped: This metric shows the total number of devices that are connected to the CE XDR network and are unmapped. Please note that, by default all devices connected to the CE XDR fall under the unmapped category.
Total number of devices connected with the organisational network with SSL VPN: This metric shows the total number of devices connected to the organisational network with the help of CE XDRs SSL VPN end-point application. Know how to deploy SSL VPN for users here
Mapping Devices on the Crystal Eye XDR Network
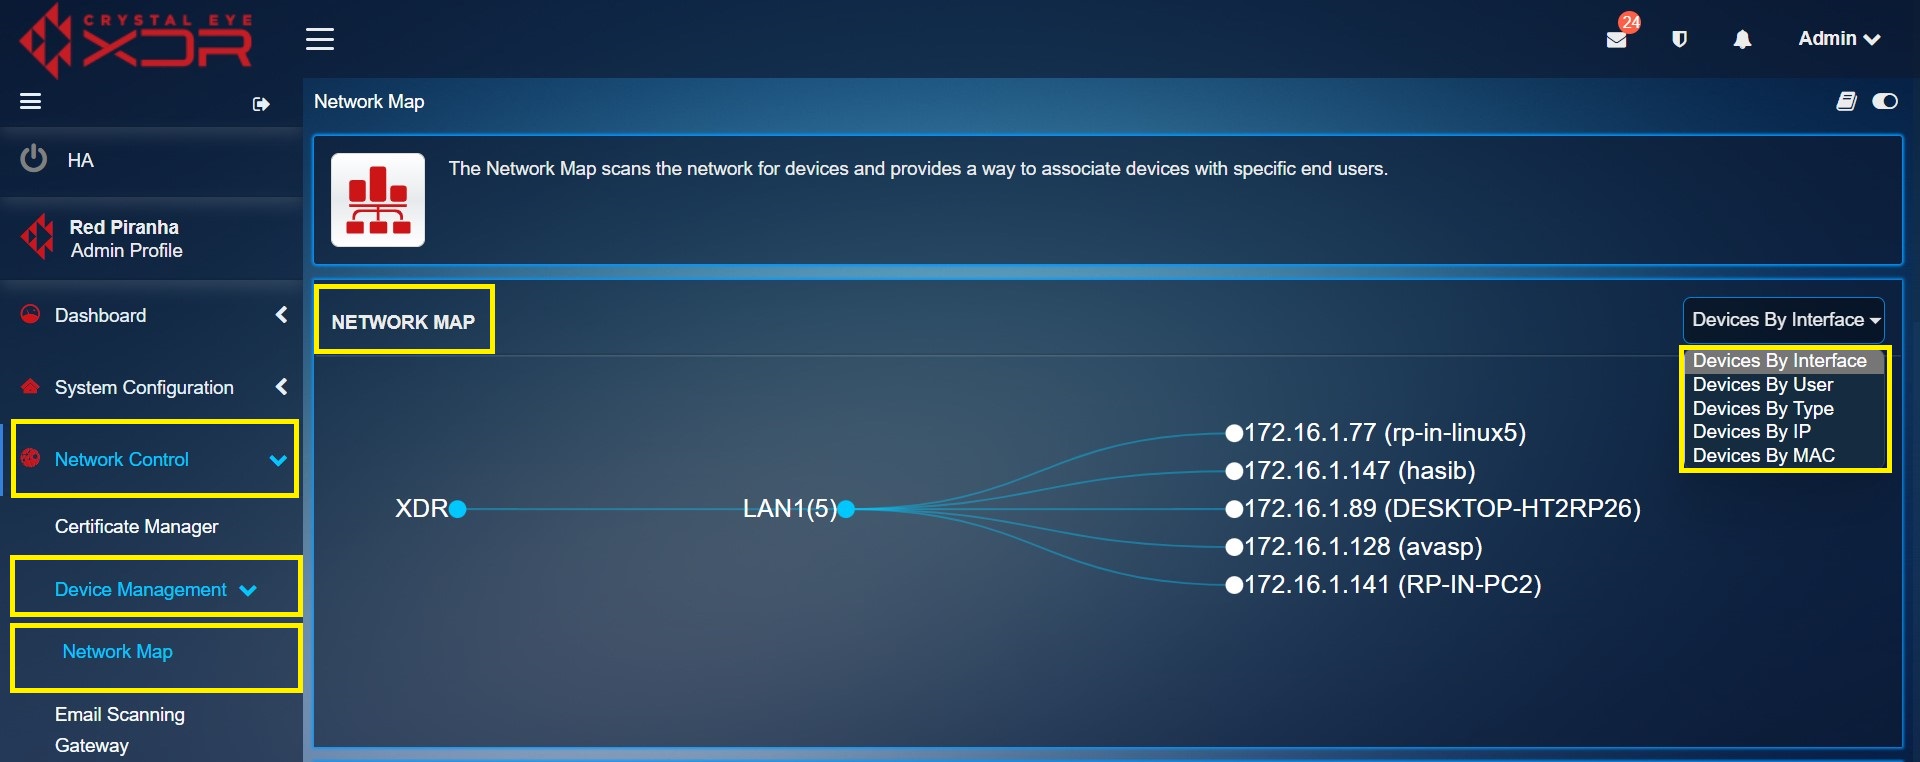
After a device is connected to the Crystal Eye XDR appliance, it is visually represented in the following manner. The user can view the devices in the CE XDR network on the basis of Interface, User, Type, IP or MAC Address.
Initially, all the devices connected to the Crystal Eye network will pop up in the Unmapped Network Devices category of the network map diagram. However, these unmapped devices can then be further categorized per device type. Once mapped the devices appear under the Mapped Network Devices Section.
How to Map the Devices in the CE XDR network?
Step 1: All the unmapped devices connected to the CE XDR network are visible under the Unmapped Network Devices section. We can map the devices connected to the CE XDR by clicking the Map button in the Unmapped Network Devices table.
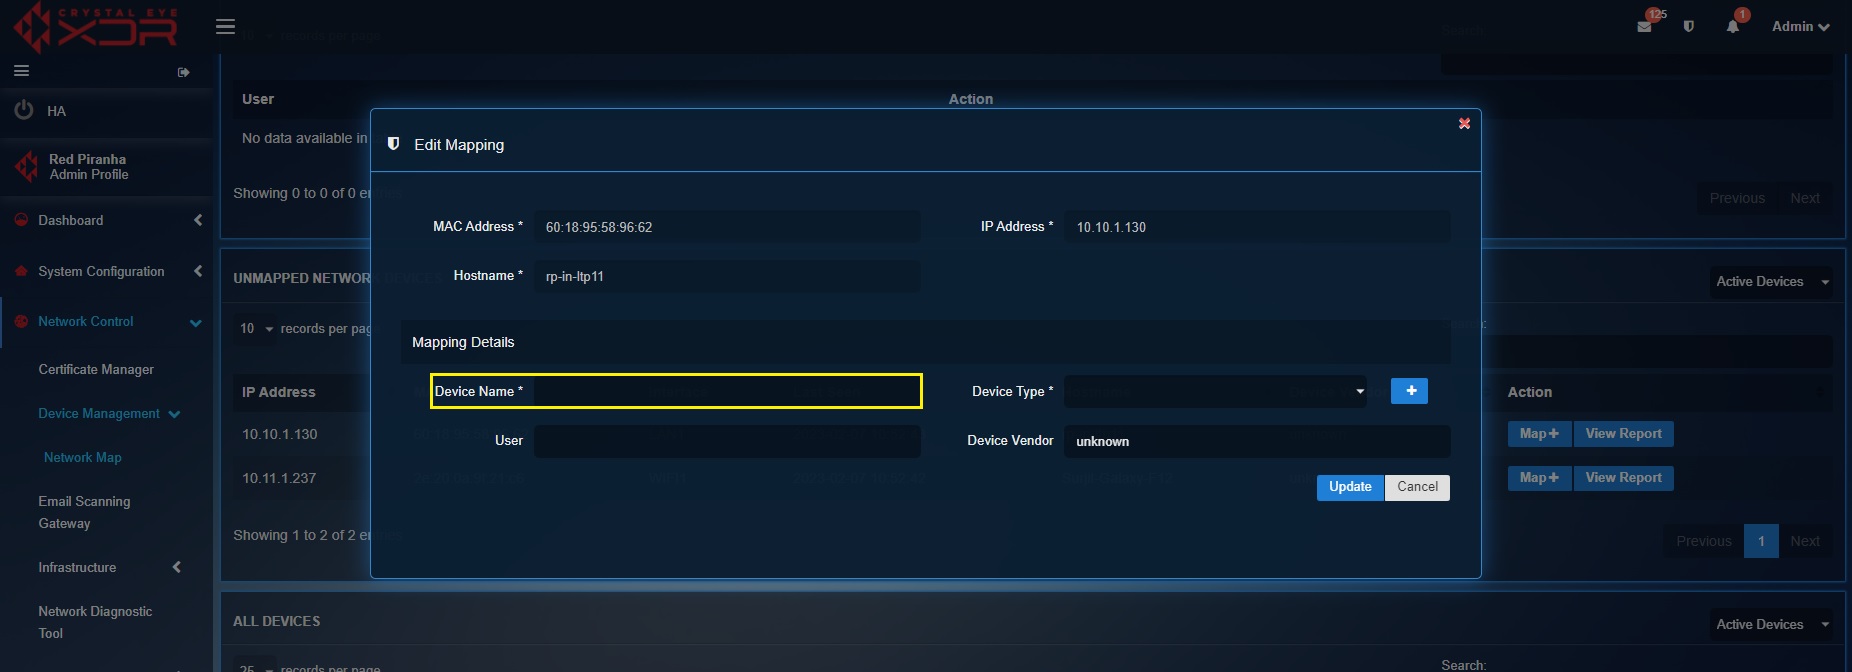
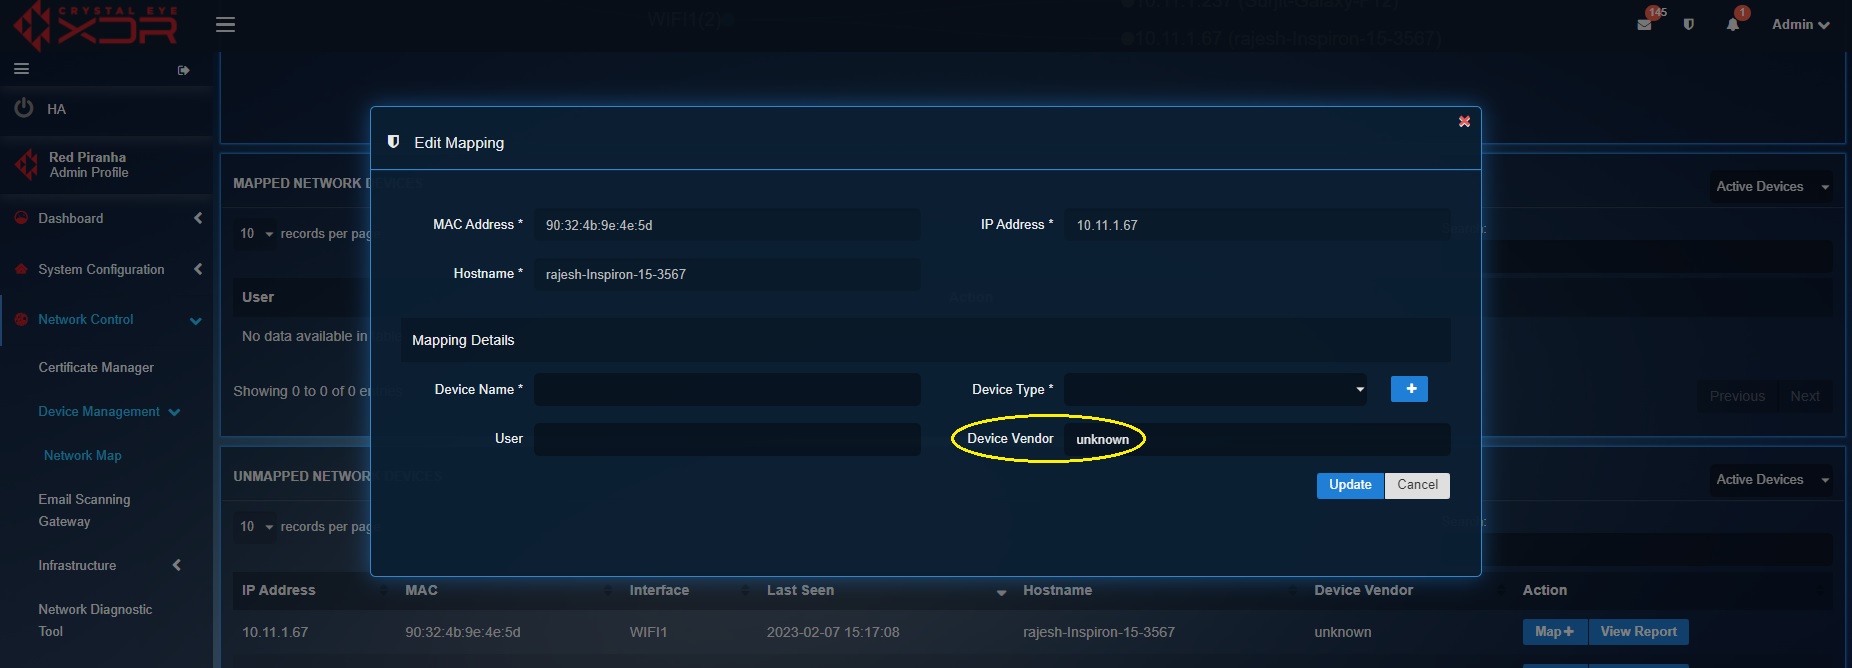
Step 2: You will now see the Edit Mapping pop-up. Enter the Device Name in the given textbox.
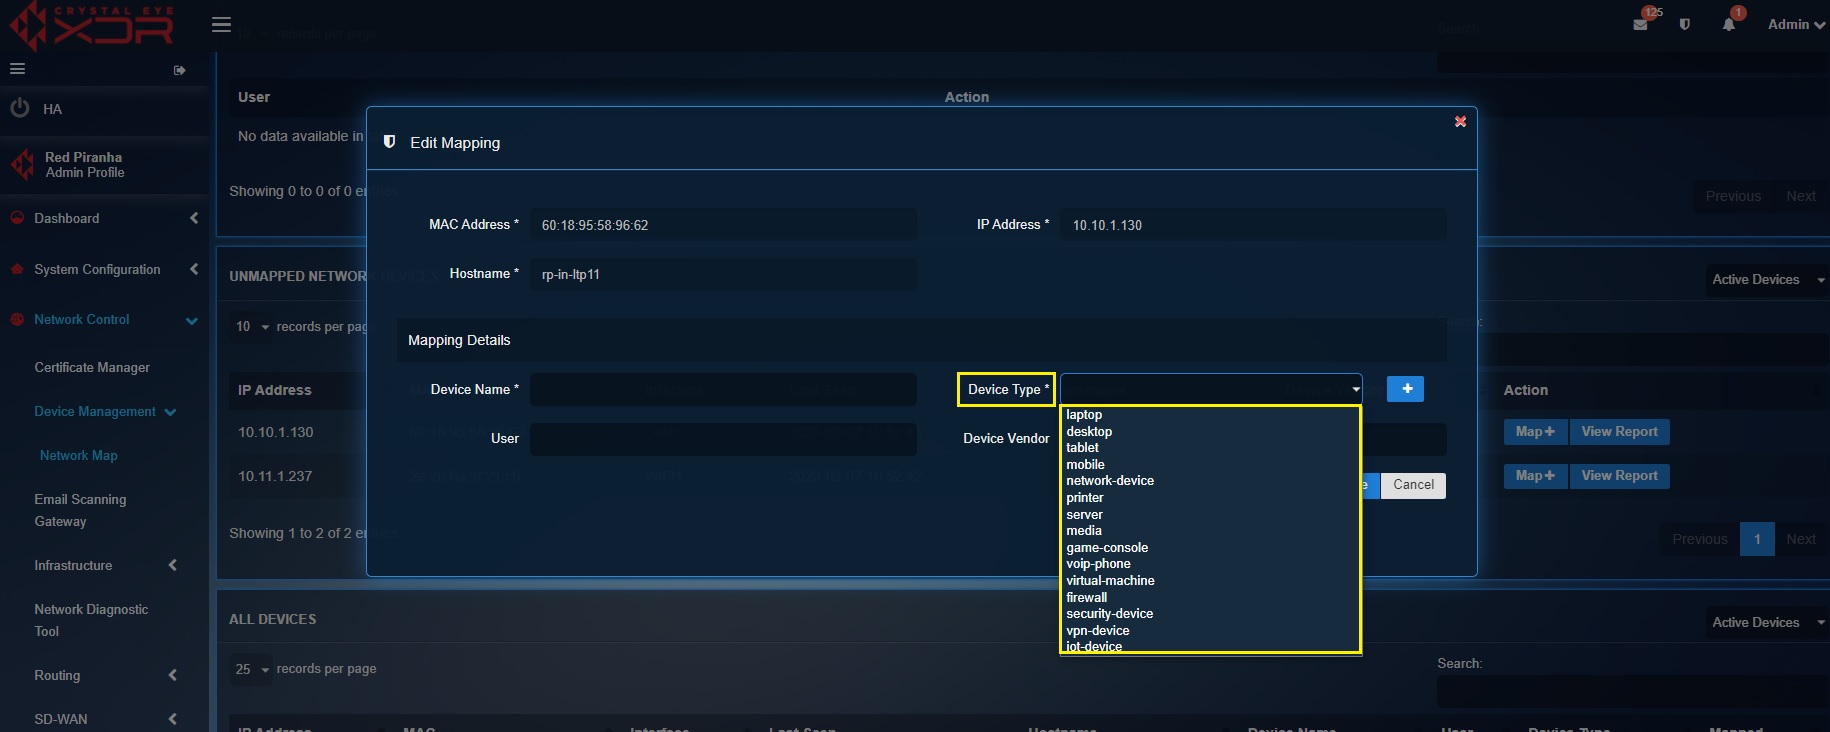
Step 3: Select a Device Type from the dropdown.
Note
The device mapping feature of the network map app allows users to create custom device type just in case the device type is not displayed as an option in the dropdown. This can be done by clicking the add device icon highlighted below. 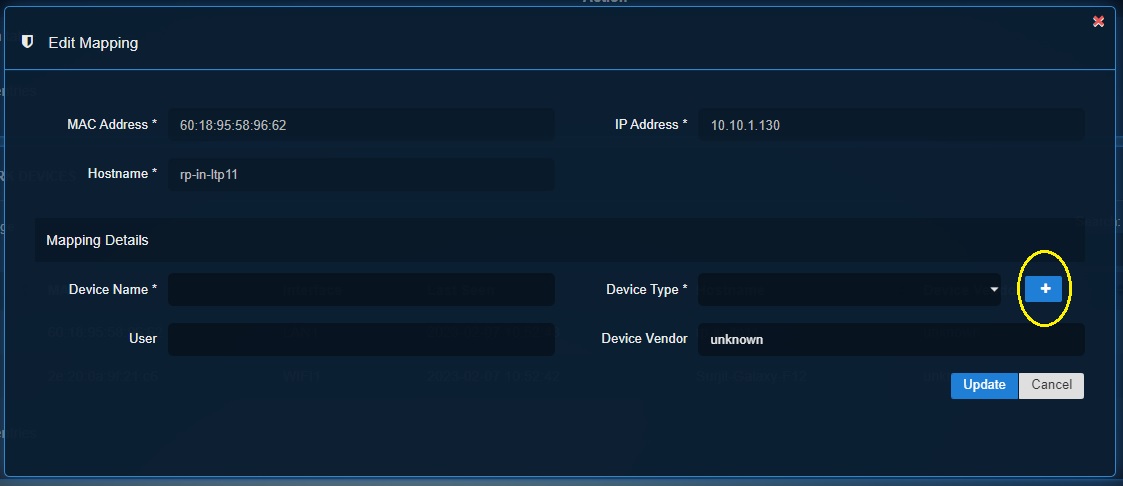
Step 4: Select the User from a dropdown list of Users created in the system.
Note
Username can be selected from a drop-down which contains the list of users previously created through User Manager feature in User application.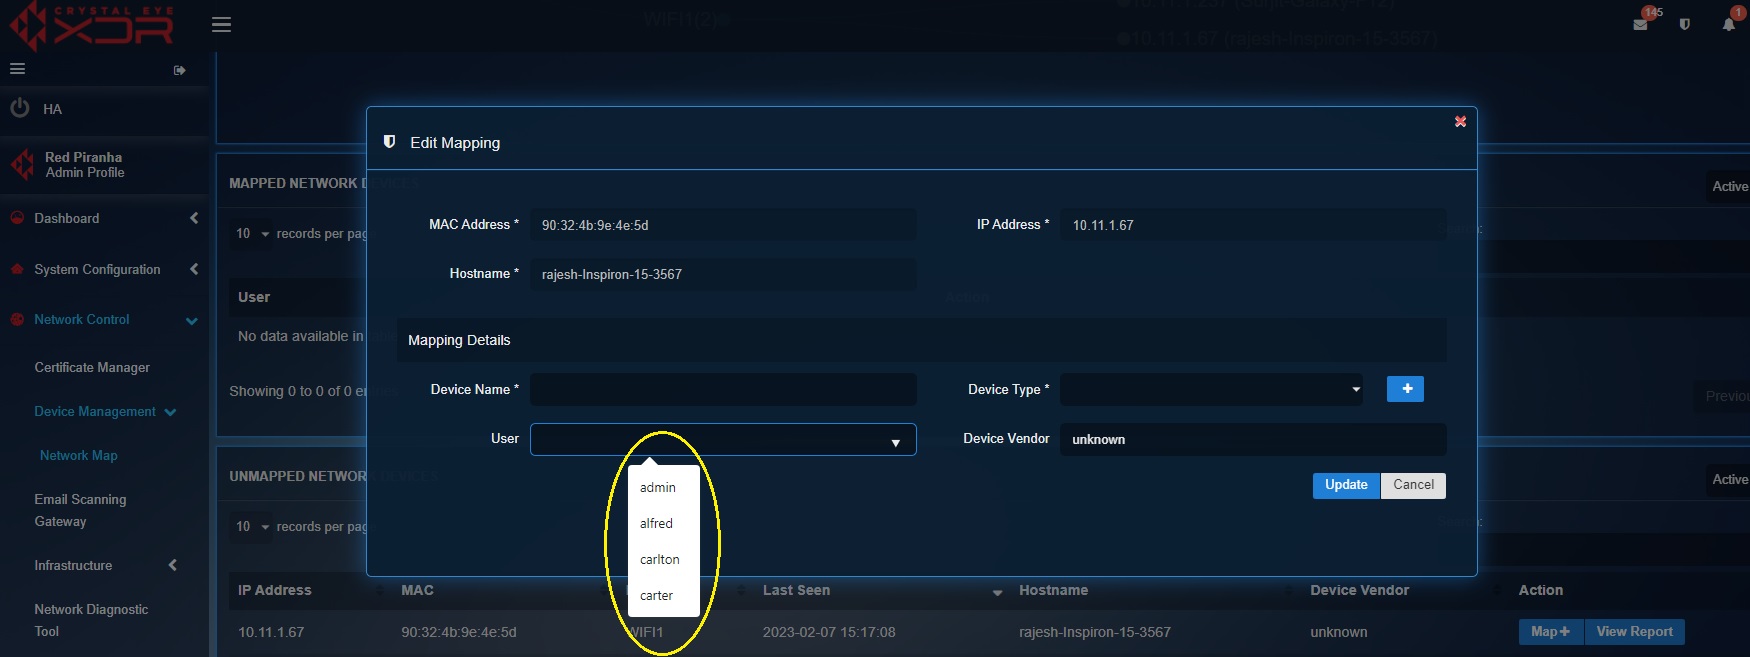
Step 5: Enter the Device Vendor in the textbox and click the Edit button.
Alternative Way to Map Devices in Crystal Eye XDR:
Step 1: In the Network Map diagram under the Network Map section, click Unmapped Devices icon.
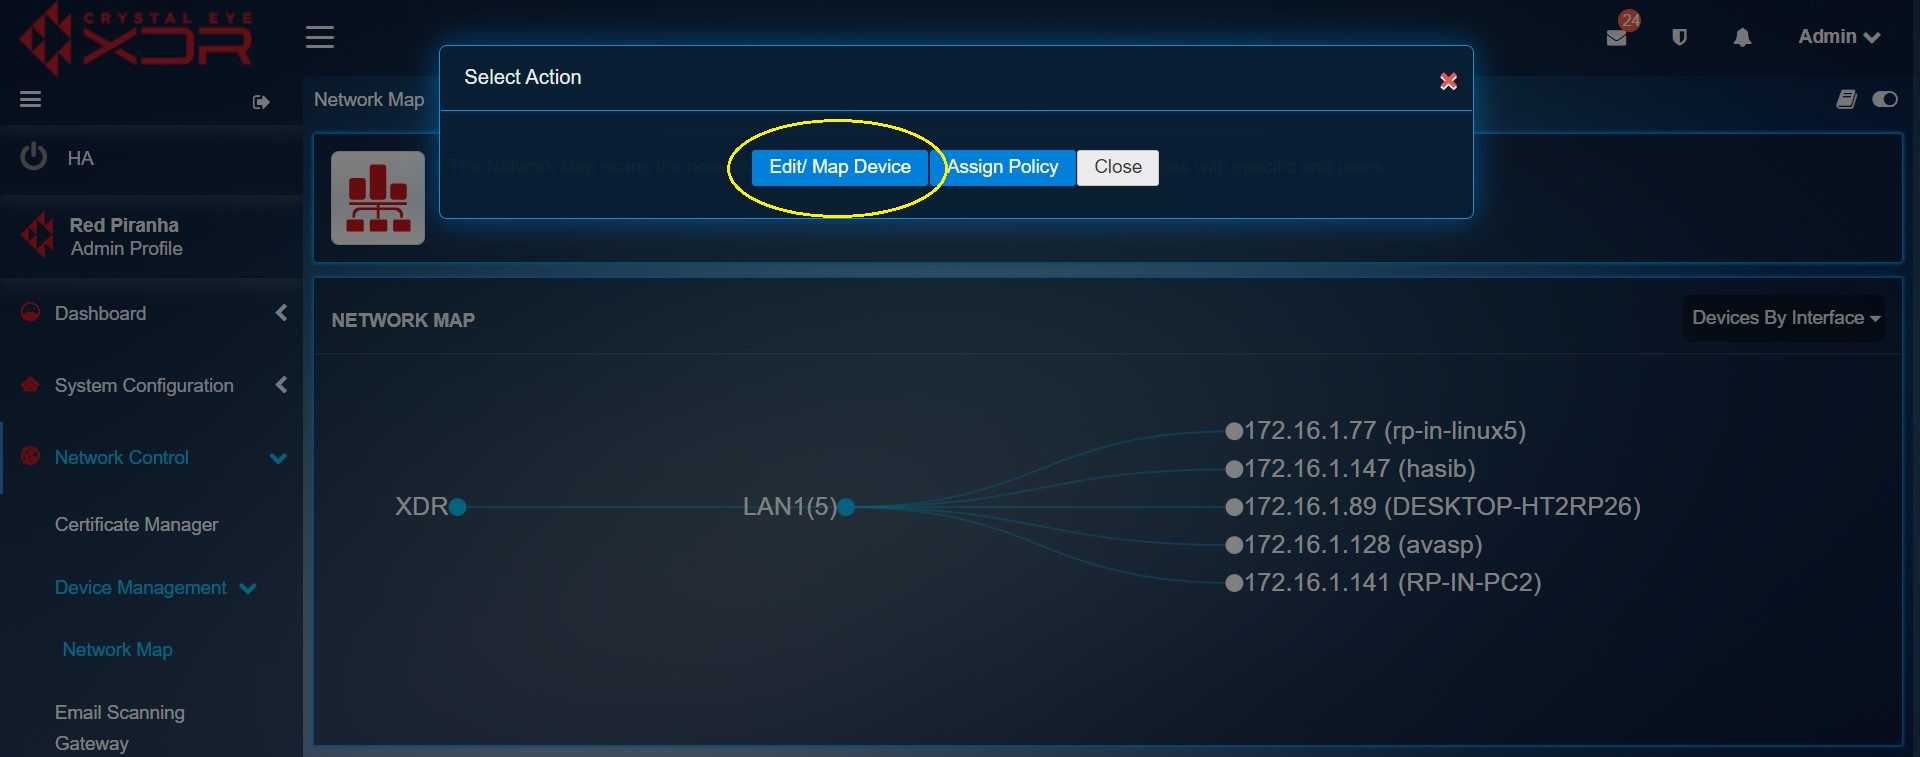
Step 2: You will now see a Select Action pop-up. Click the Edit/Map Device button.
Step 3: You will now see the Map Device pop-up. Select the Username, Device Type, Device Nickname and Device Vendor in the text box and enter the details as required. Click Add button.
Note
Username can be selected from a drop-down which contains the list of users previously created through User Manager feature in User application. 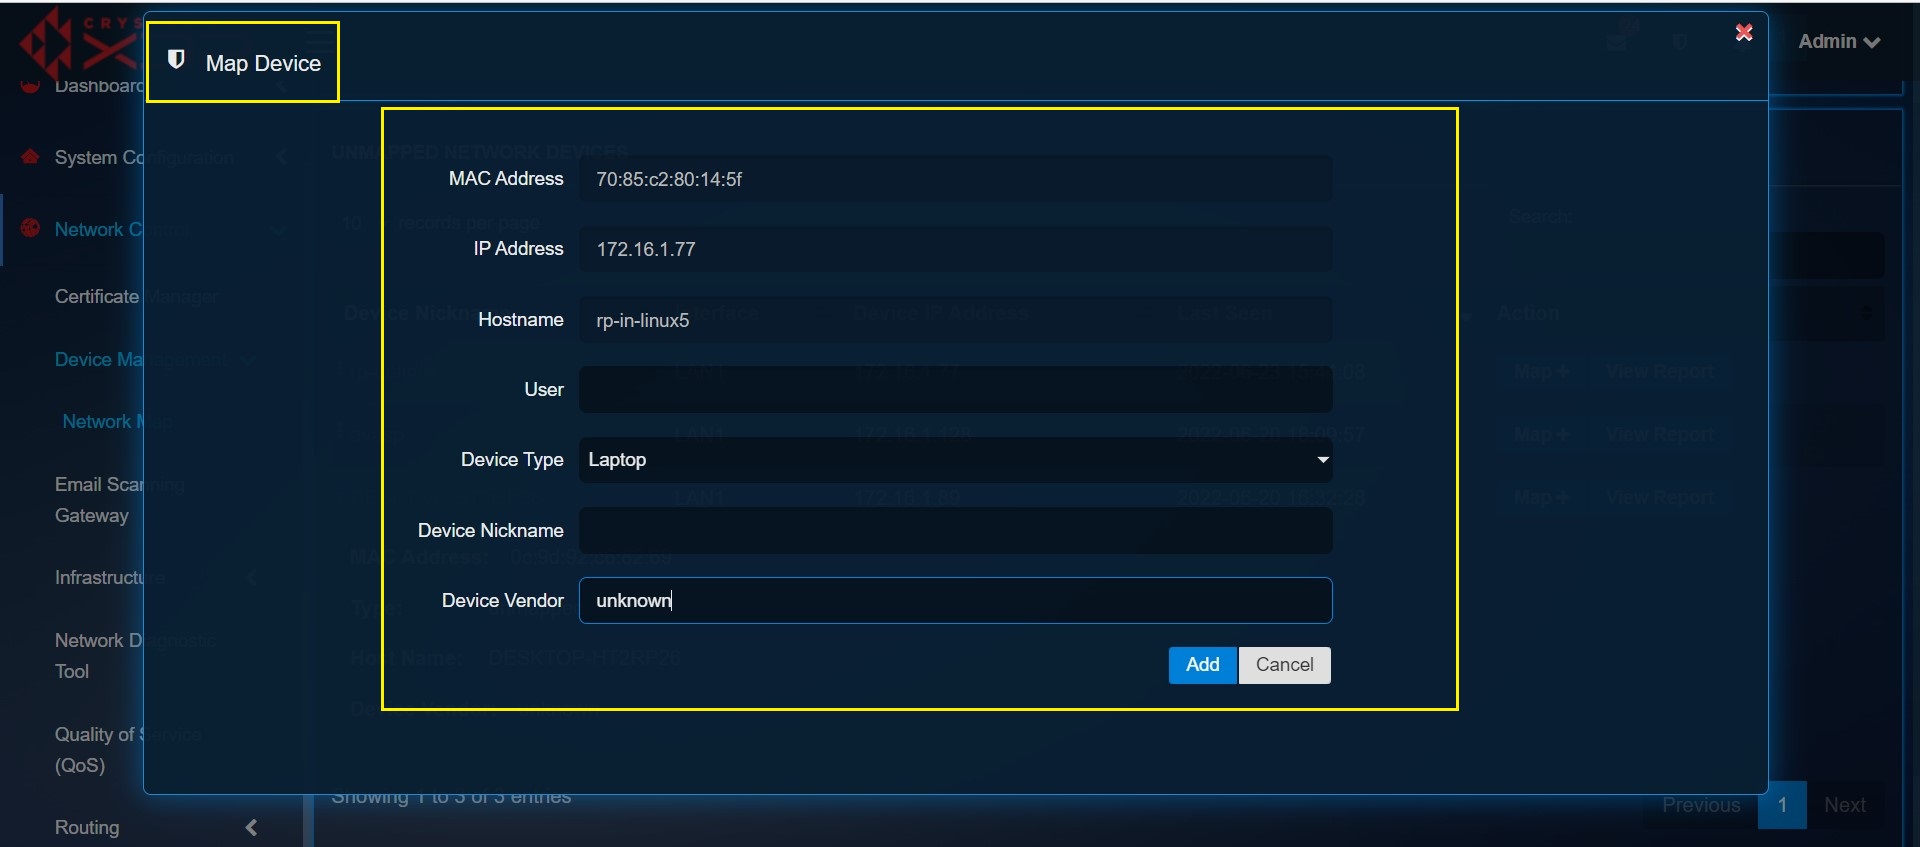
Assigning Web Filter Policies
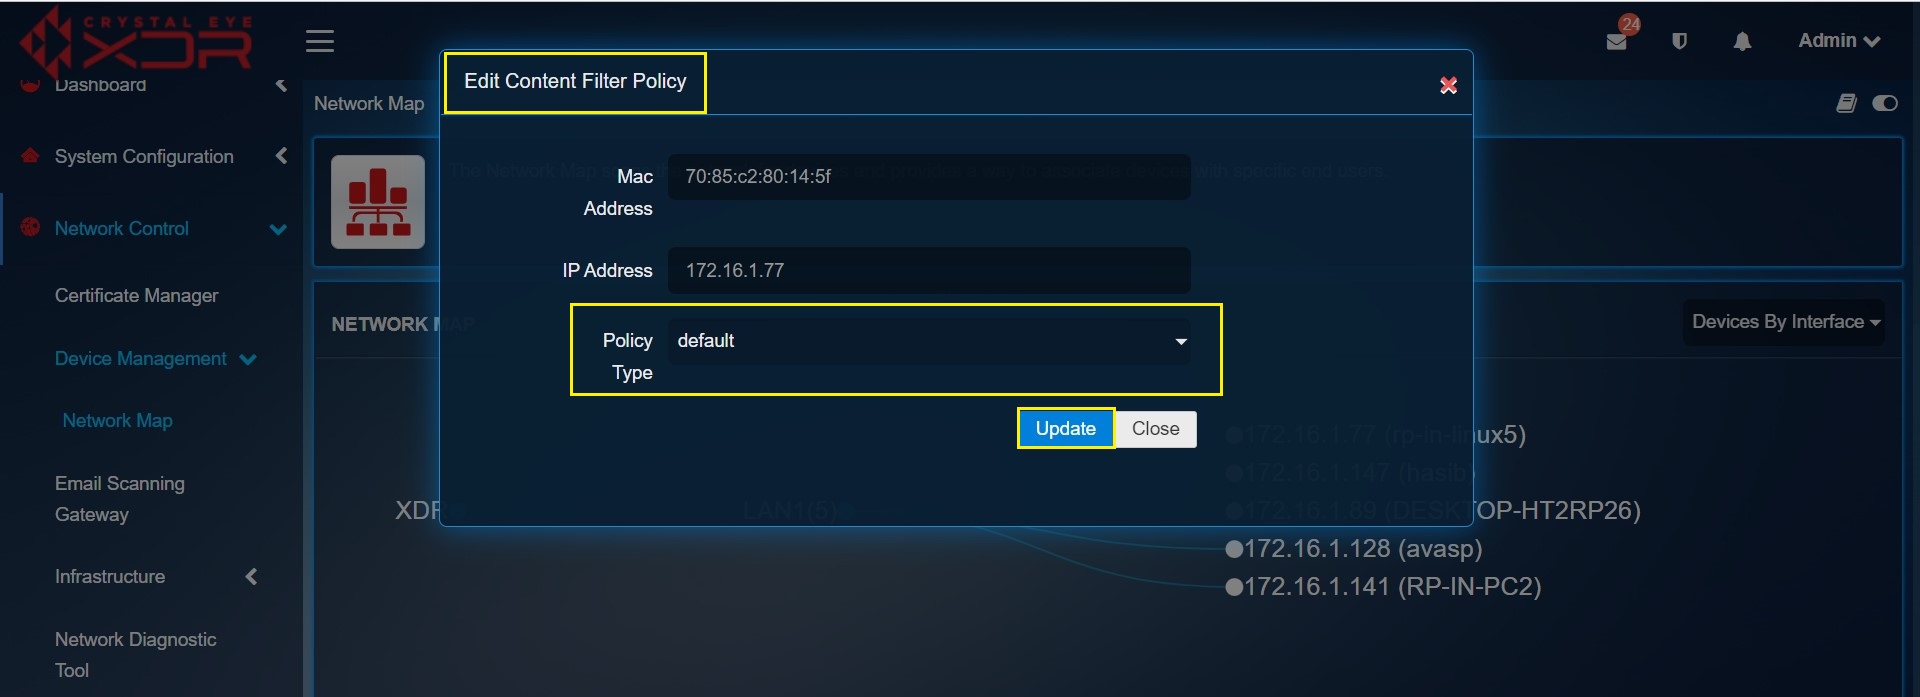
Administrators can easily map and then assign content filter policies to a particular device shown in the network map diagram. The policies that pop-up as options to choose from are the ones that were created in the Content Filter Engine App in the Security Configuration Category.
How to Assign a Web Filter Policies Using the Network Map Diagram in Crystal Eye XDR Network?
Step 1: In the Network Map diagram under the Network Map section, click the icon of the device you want to assign the policy to. The icon description will change to show the IP address. Click the icon again.
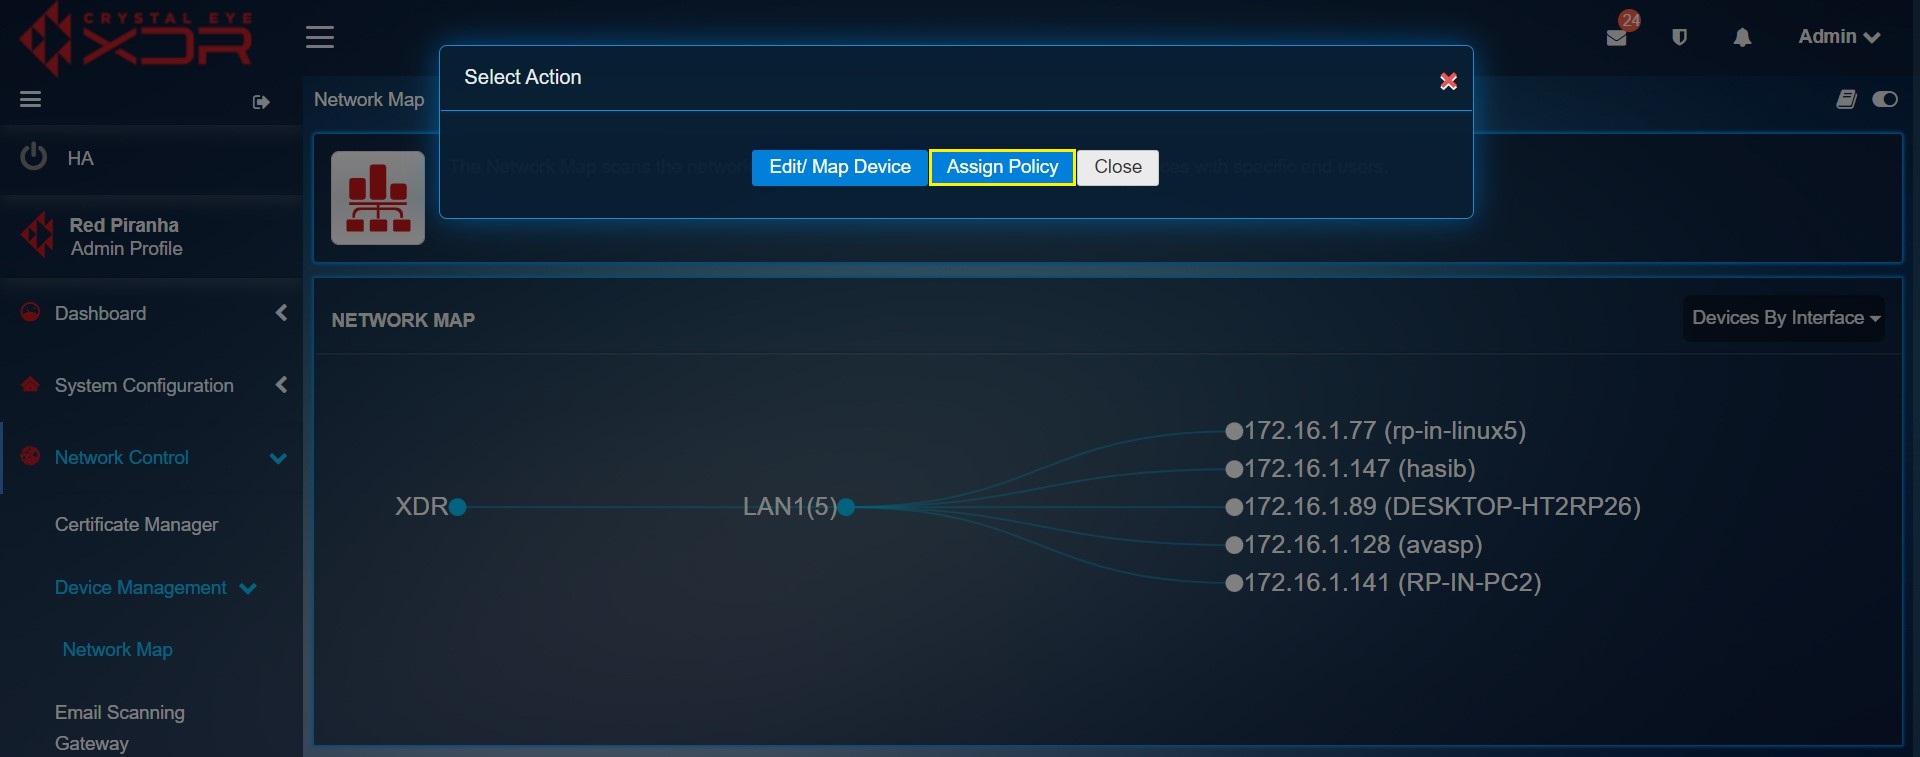
Step 2: You will now see a Select Action pop-up. Click the Assign Policy button.
Step 3: You will now see the Edit Content Filter Policy pop-up. Select the Policy Type from the dropdown and click the Update button.
Note
The policies that are shown as options in the Edit Content Filter Policy pop-up are the policy names created in the Web Filter application.


