Network Map
Overview
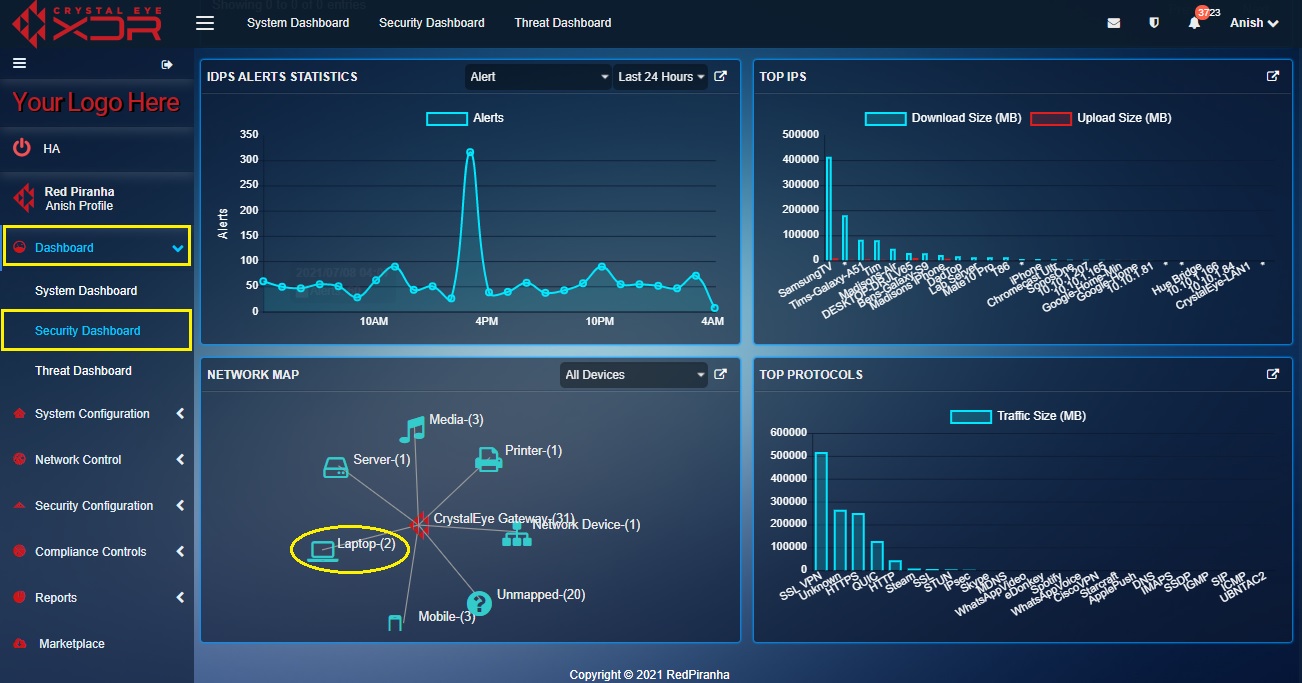
The Network Map widget shows a diagrammatic presentation of the device types and the devices connected to the Crystal Eye XDR Network. Visual depiction of the Crystal Eye XDR network is done through a hub and spoke diagram where the hub is the Crystal Eye XDR (network gateway) and the spokes are the device types connected to the Crystal Eye XDR network.
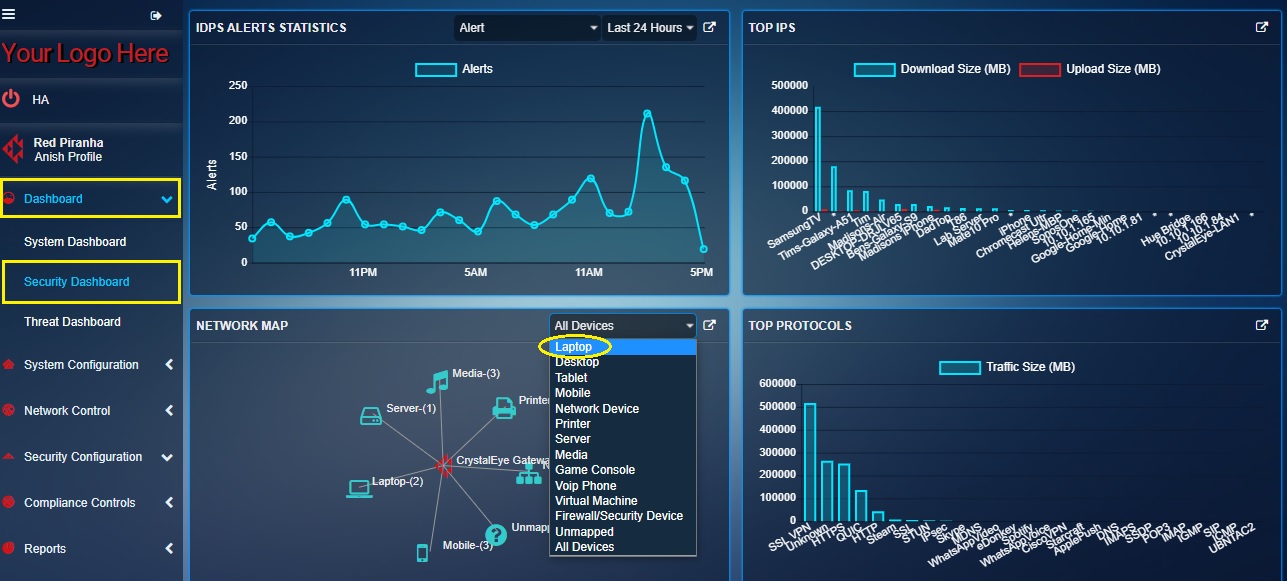
In the above screenshot of the Network Map widget, you would observe that there are 3 Laptops connected to the Crystal Eye network. The total number of devices connected to the Crystal Eye network is shown in Crystal Eye gateway.
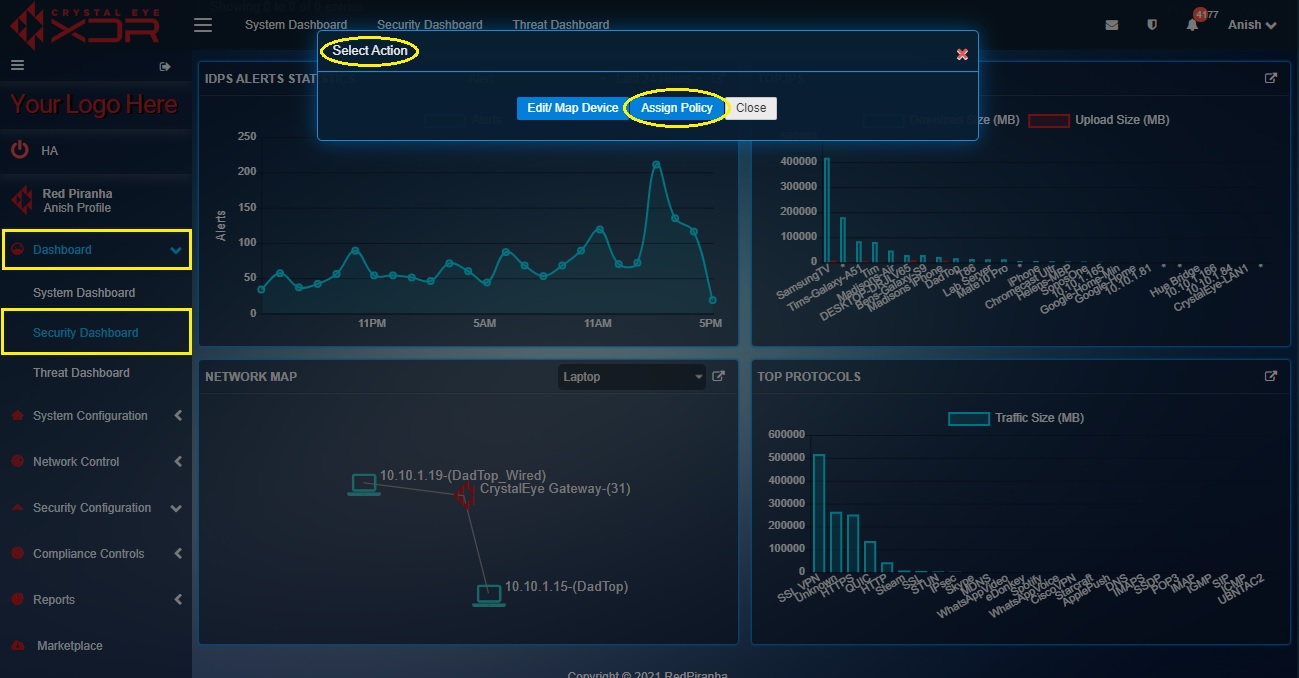
The Network Map widget has multiple functionalities built into it that facilitates device mapping and assigning content filter policy to the device. Mapping devices to the Crystal Eye network includes assigning username, nickname, vendor, IP address, and the device type.
Note
As a matter of convenience, you can map devices and assign content filter policies from the Network Map application alternatively. To go to Network Map application from the Security Dashboard, click the link icon in the top panel of the Network Map widget (Refer to the screenshot below). 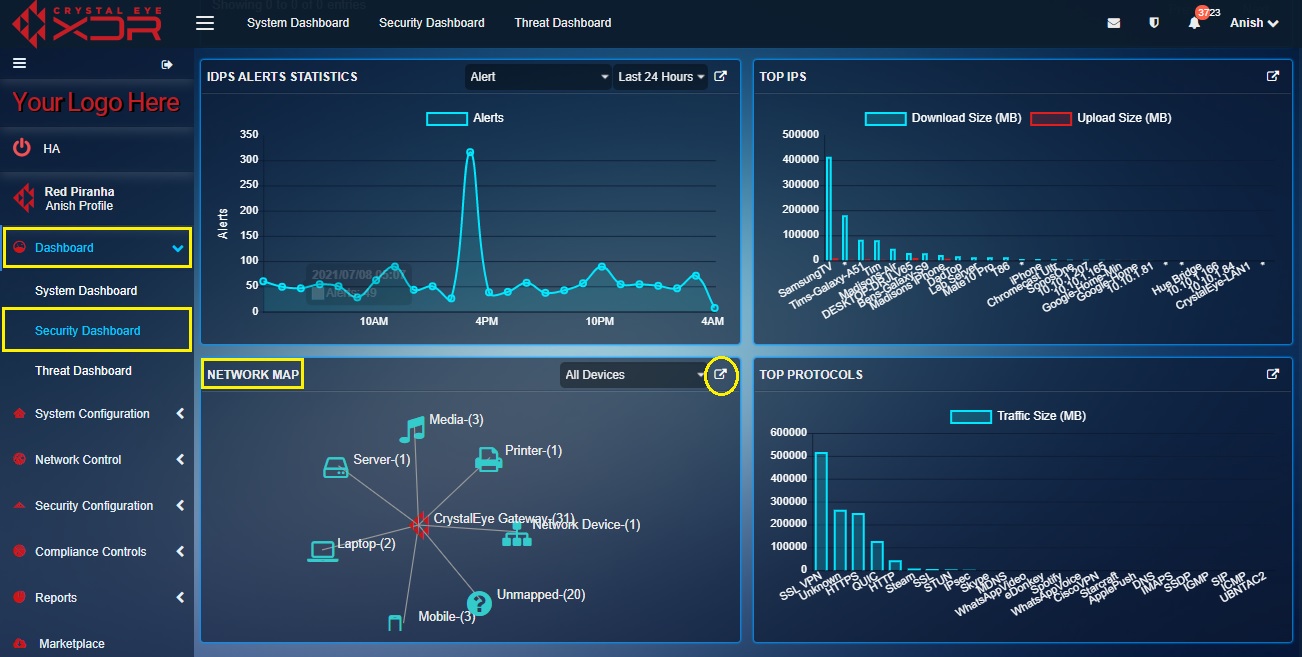
How to identify various devices and view its IP address in the Network Map widget?
Step 1: In the Security Dashboard, click the device type category on the hub and spoke diagram under the Network Map widget. In the screenshot below, we will click the device type Laptop.
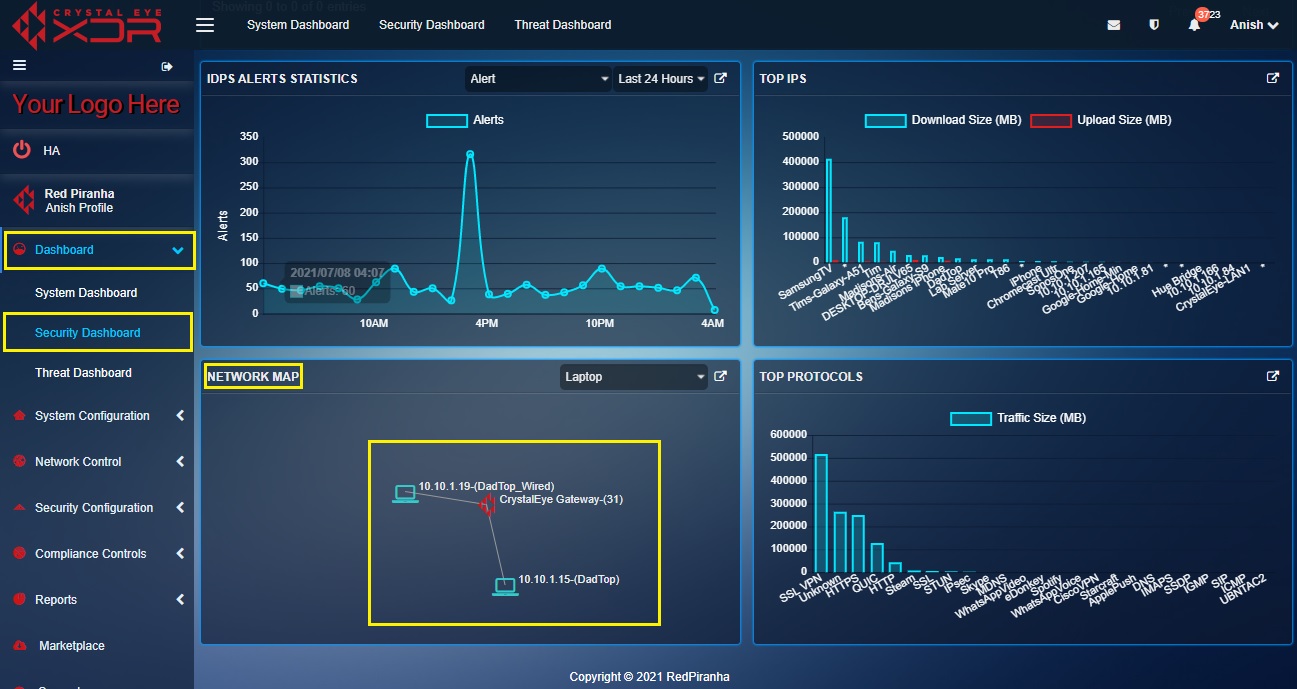
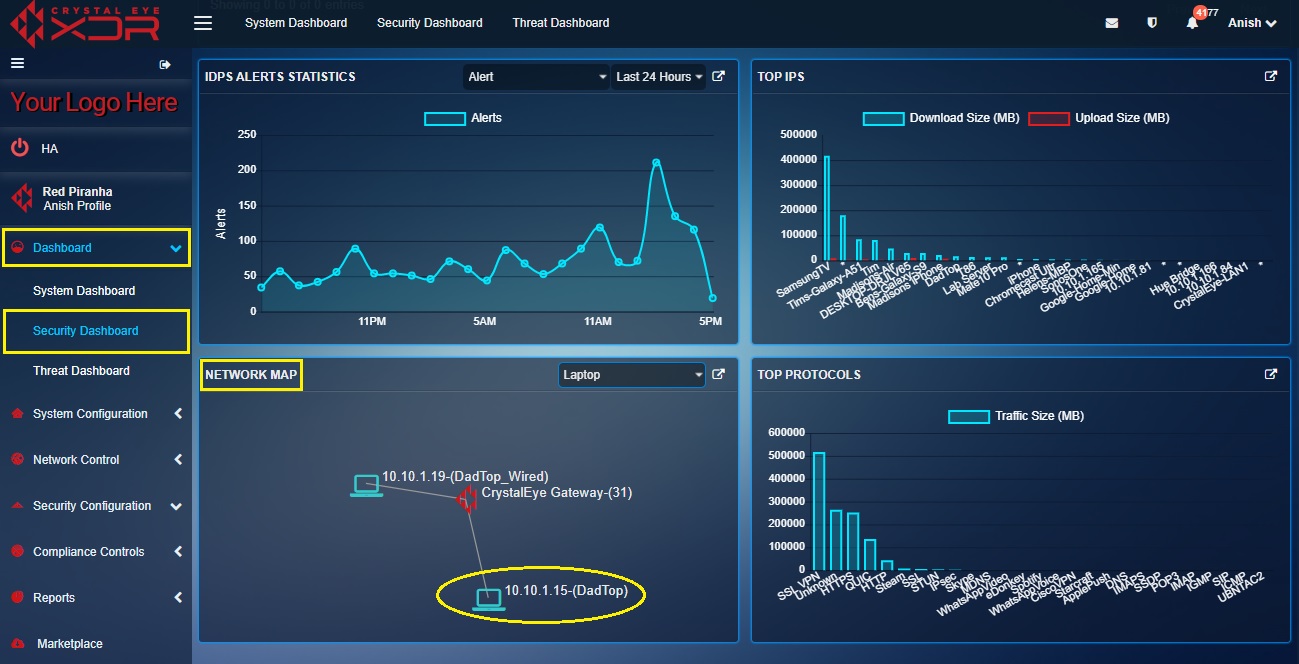
Step 2: You will now see the IP address of all the Laptops connected to the Crystal Eye XDR network.
Note
In the above screenshot, there are three IP addresses of three laptops connected to the Crystal Eye network.
How to map a device on the Crystal Eye XDR network with the help of the Network Map widget?
Mapping a device on the Crystal Eye XDR network involves assigning a Username, Nickname, Vendor, IP Address, and the Device Type. This can also be done with the help of CE XDR’s Network Map application. Know more about how to map devices on the Crystal Eye network alternatively from the Network Map application.
Note
In the procedure discussed below we will map an unmapped device connected to the Crystal Eye XDR network.
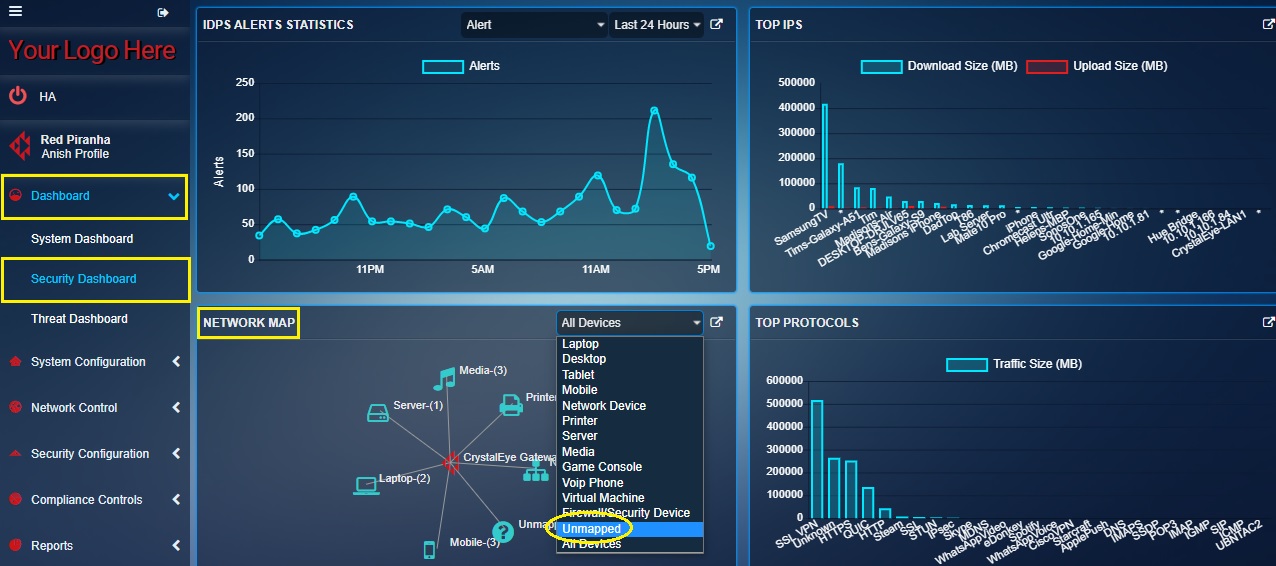
Step 1: In the Security Dashboard, select Unmapped from the dropdown on the top panel of the Network Map widget.
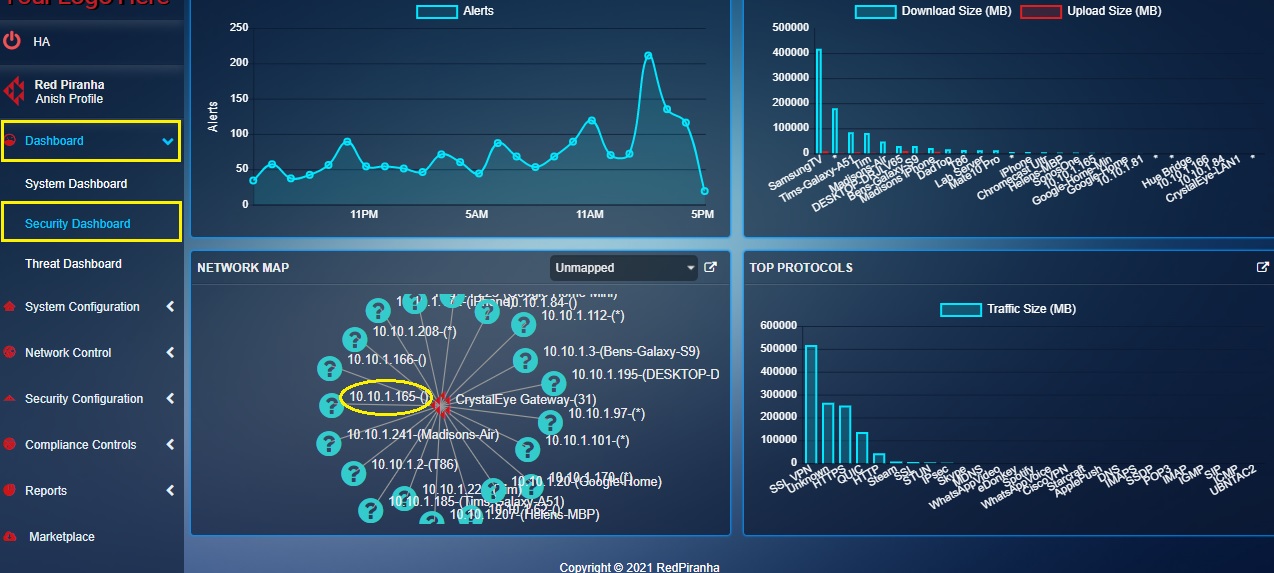
Step 2: You will now see the IP address of all the unmapped devices connected to the Crystal Eye network with a question mark icon next to it.
Step 3: Click the device IP address which requires to be mapped.
Note
In the above screenshot we have clicked 10.10.1.165.
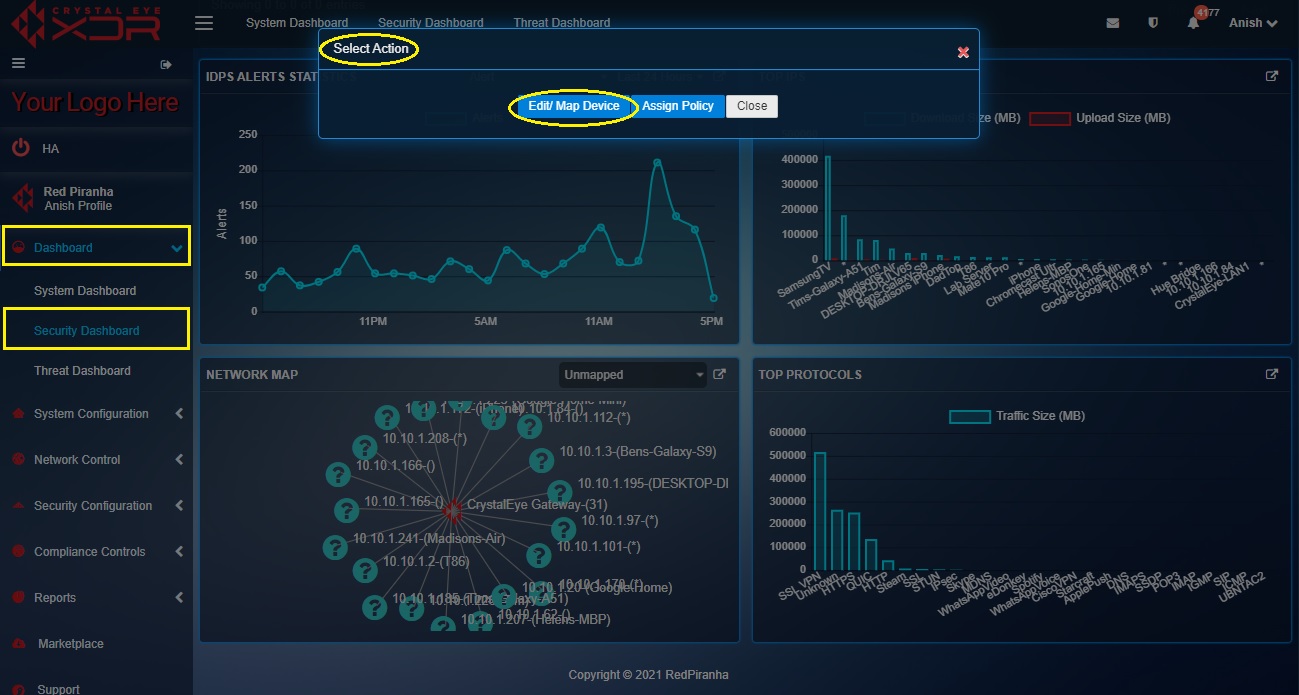
Step 4: You will now see a Select Action pop-up. Click the Edit/Map Device button.
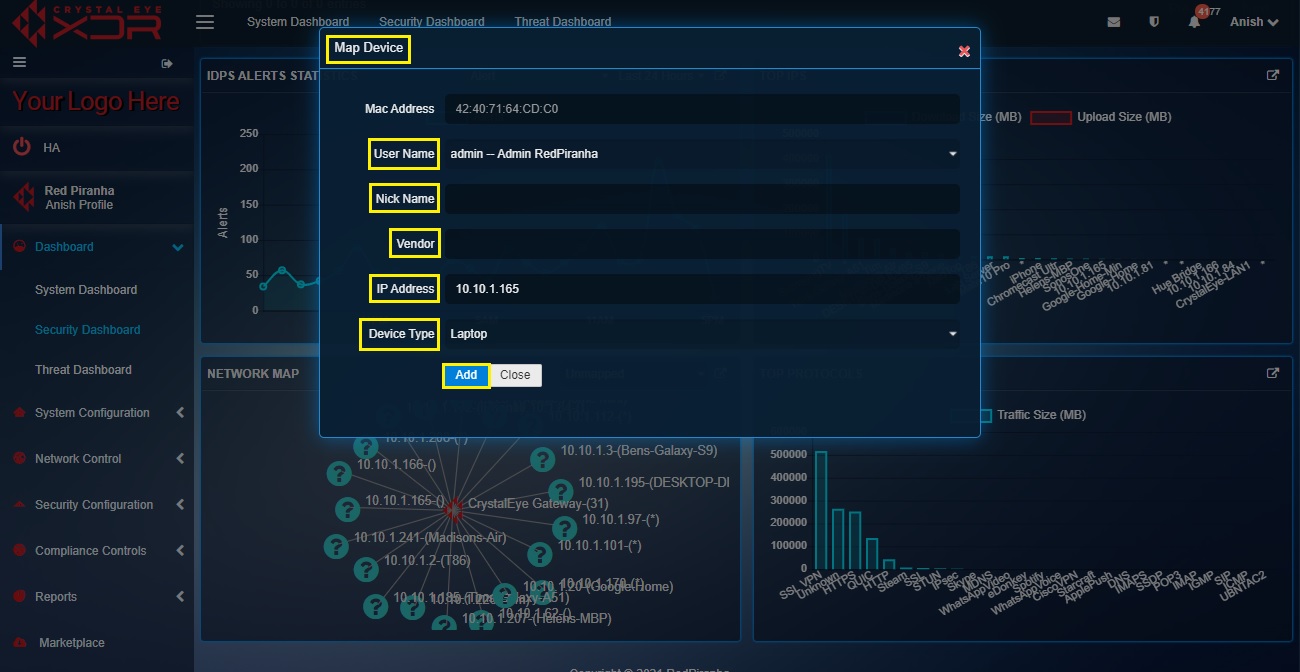
Step 5: You will now be directed to the Map Device pop-up. Assign the Username, Nickname, Vendor (of the device), IP Address, and Device Type and click the Add button.
How to assign a web filter policy to a particular device from the network map widget in the security dashboard?
Note
Apart from the Network Map widget, the web filter policy can also be assigned to a particular device in the Crystal Eye XDR network from the Network Map application and the Web Filter application.
In the steps mentioned below, we have already mapped the laptop device that requires a Web filter policy assigned to it.
Step 1: In the Security Dashboard, select any mapped device category. In this case, we will select Laptop from the dropdown in the top panel.
Step 2: You will now see the IP address and device name of all the devices connected to the Crystal Eye XDR network.
Step 3: Click the device on the Network Map widget for which you wish to assign the web filter policy.
Step 4: You will now see the Select Action pop-up. Click the Assign Policy button.
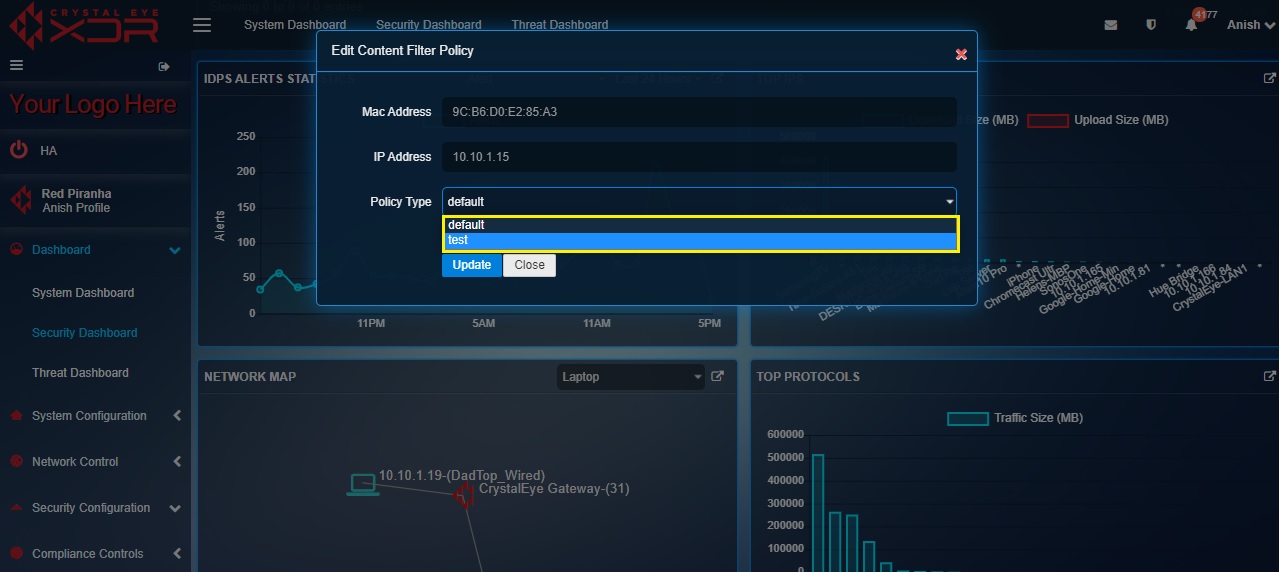
Step 5: You will now be directed to the Edit Web Filter Policy pop-up. Select the Policy Type from the dropdown and click the Update button.

