Users & Groups
Overview
The Users & Groups widget can effectively be utilized to create new CE XDR users and groups. The widget also shows the number of users and groups that have been created in the Crystal Eye XDR on-premise.
Various CE XDR network defence policies can be applied to the users and groups in the CE XDR. All the new users created using this widget can be aligned to one or more groups. These groups can further be categorized by CE administrators to implement various Crystal Eye security policies.
Note
Users & Groups can also be created using the User Application and the Groups Application. However, the Users & Groups widget in the System Dashboard of the Crystal Eye appliance provides a short cut to create User & Groups.
Why Create Users & Groups on the Crystal Eye Appliance?
SSL VPN can only be activated for the users who have been granted permission. Click here to know how to configure SSL VPN application.
In order to view user based threat hunt reports CE xDR administrators must create the users and then map them to the designated devices in the network. Click here to know how to Configure User Identification and Generate User Based Threat Hunt Dashboard Data.
How to Know the Number of Users and Groups Created in the Crystal Eye XDR on-premise?
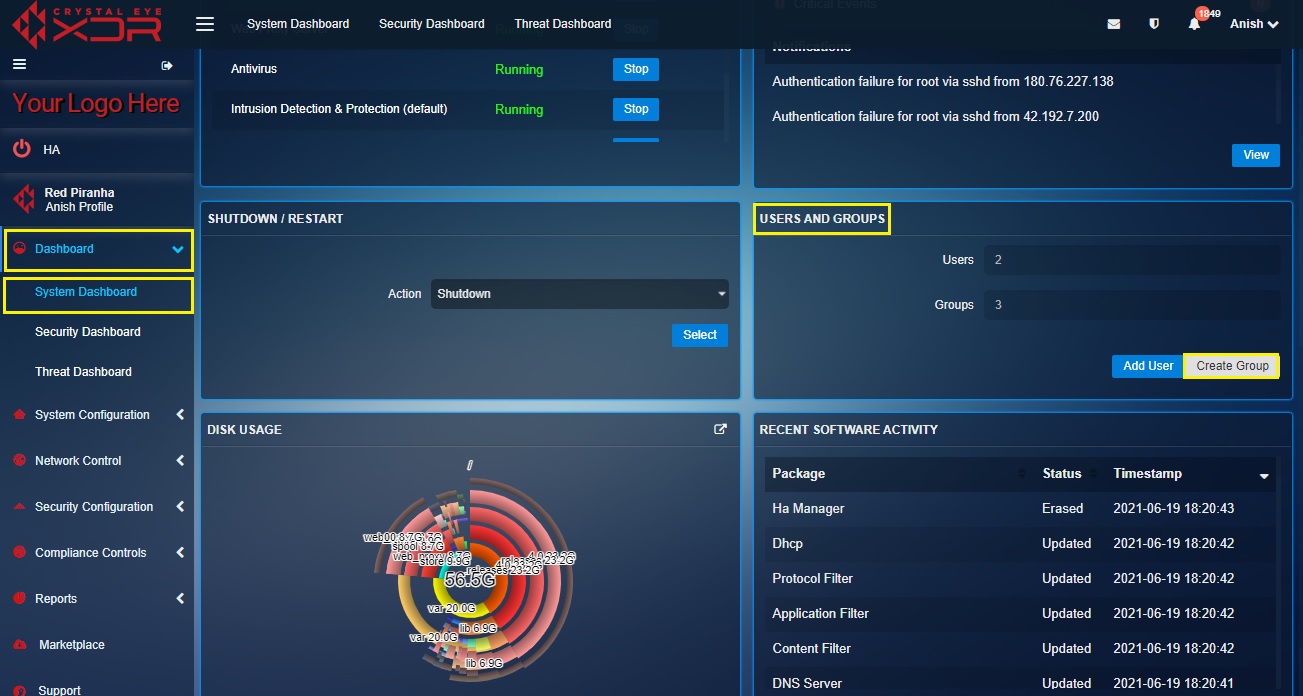
The number of users and groups created in the Crystal Eye XDR on-premise is highlighted in the widget screenshot below:
How to Create Groups Using the Users & Groups Widget?
Step 1: In the Users & Groups widget, click the Create Group button.
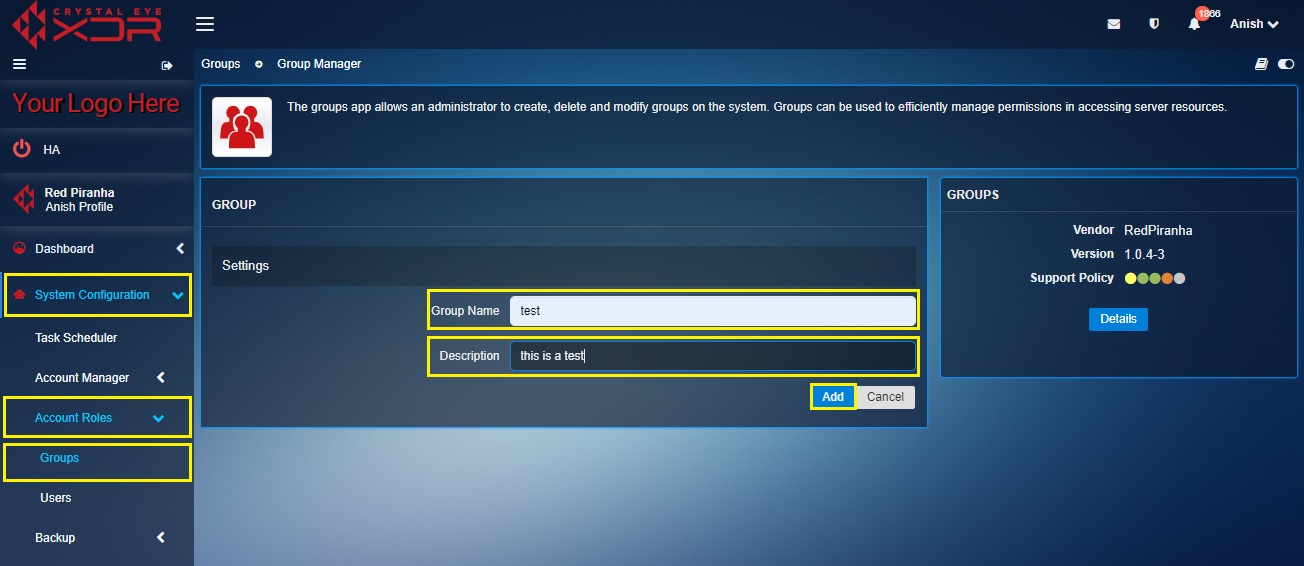
Step 2: You will now be directed to the Group Settings page of the Groups application. Enter the Group Name and Description in the textbox and click the Add button.
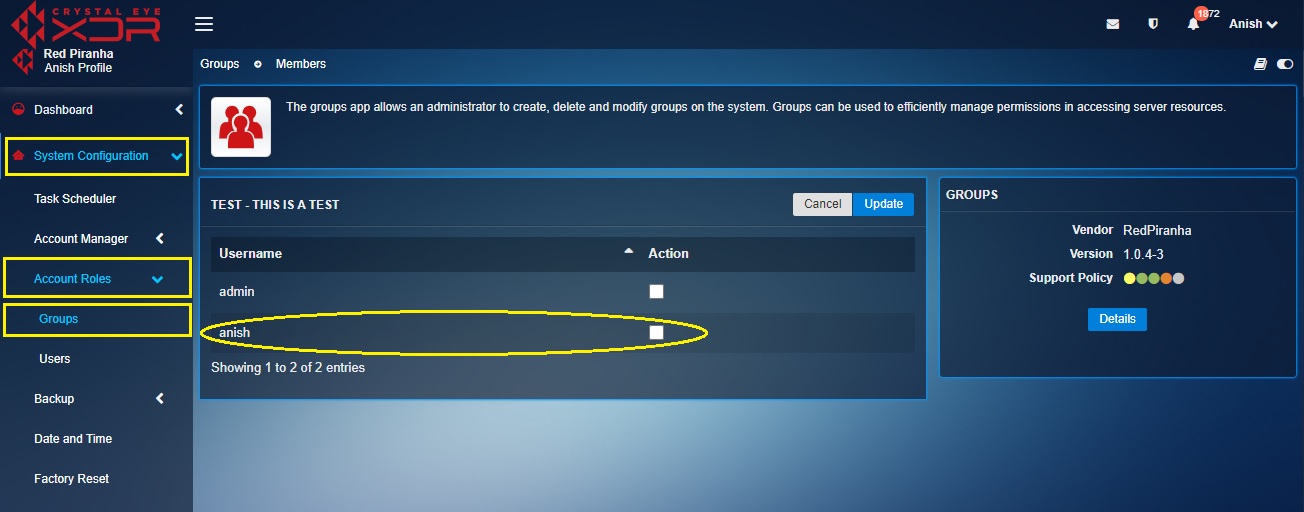
Step 3: You will now be directed to group page. Select the users that need to be added to the group and click the Update button.
Note
In this case as mentioned in the screenshot above a user named 'anish' has been added to the group.
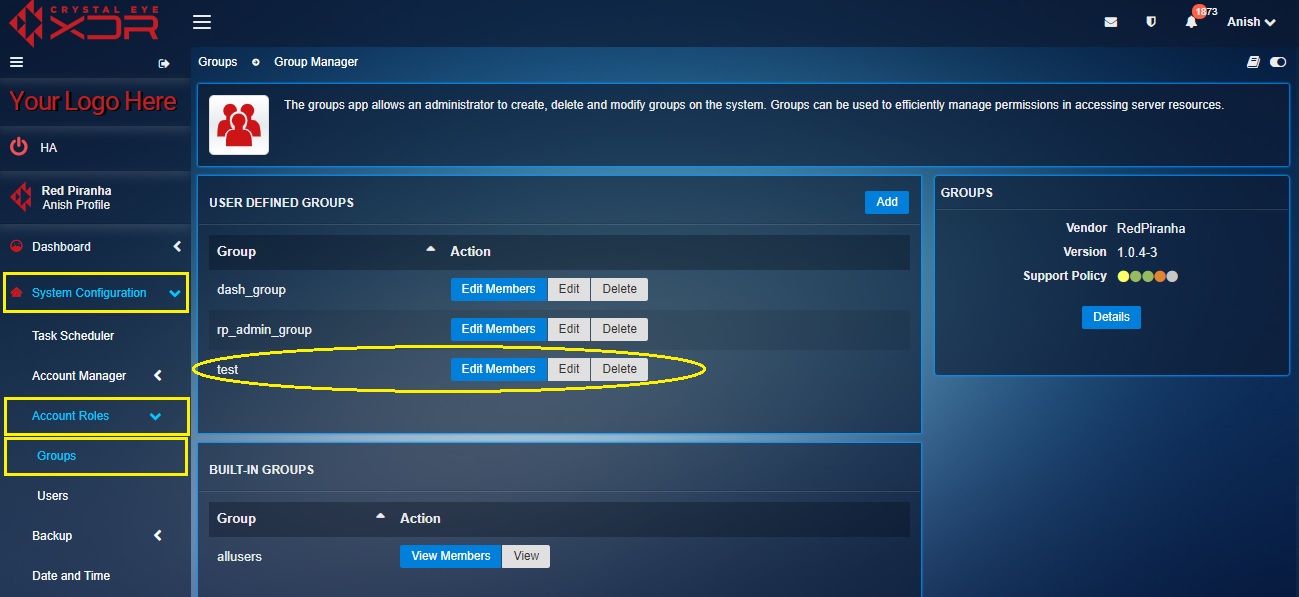
Step 4: You will now see the group name mentioned under the User Defined Groups section.
How to Add Users Using the Users & Groups Widget?
Step 1: In the Users & Groups widget, click the Add User button.
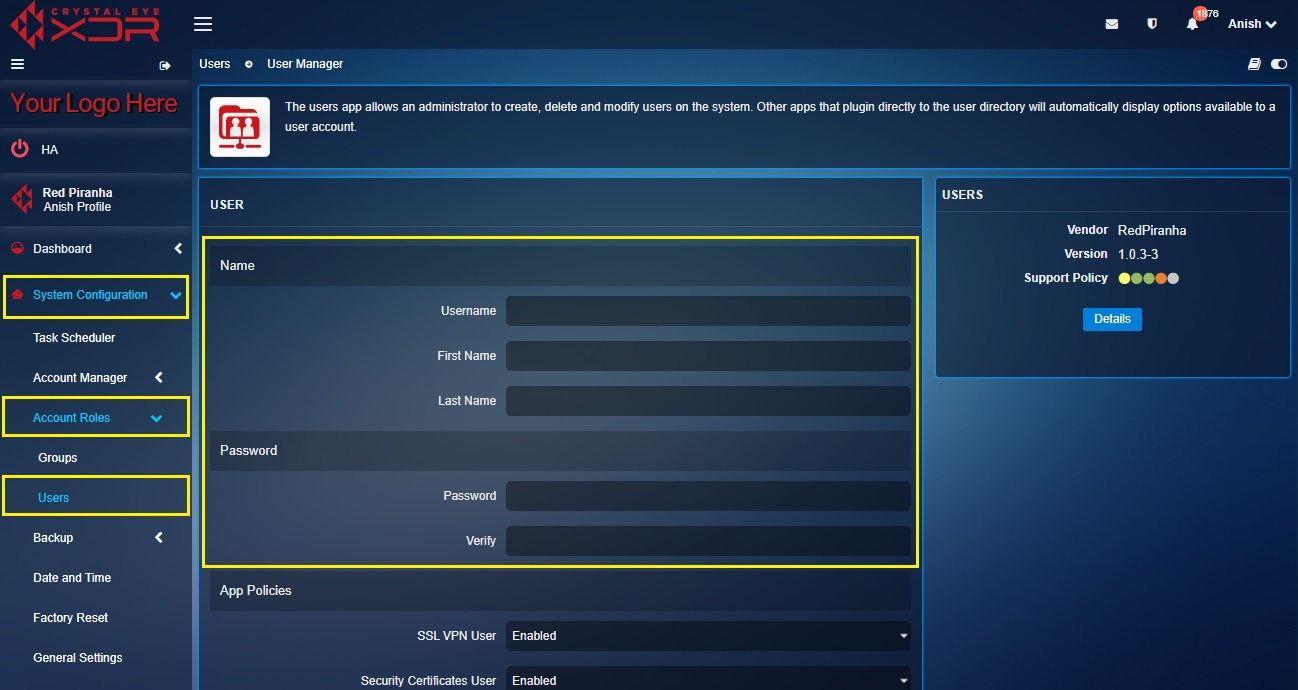
Step 2: You will now be directed to the User page. Enter the Name and Password.
Step 3: Select the groups you want the user to be a part of in the Groups section and click the Add button.

