Dynamic Routing
Overview
Crystal Eye XDR’s Dynamic Routing application offers the ability to recover from routing failures portraying high standards to manage networks that require fault tolerance.
One of the most important benefits of having dynamic routing offering a Border Gateway Protocol (BGP) environment is that it develops the ability of routing an IP space across multiple links. The dynamic routing application essentially allows redundancy and route redistribution.
Note
There isn’t a well-defined recommended best practice to implement a BGP environment using the dynamic routing application as there could be plenty of ways to implement it.
Video Resources
Installation
The Dynamic Routing application is installed by default and can be accessed from the left-hand navigation panel.
Navigation to Dynamic Routing Application
Left-hand Navigation Panel > Network Control > Routing > Dynamic Routing Application
Pre-requisites
- WAN IP address of both head office (H.O.) and branch office (B.O.) Crystal Eye XDR’s.
- IP addresses of the LAN networks (including SSL VPN and Wi-Fi subnet)
- AS numbers assigned to both the XDR’s
Use Case Scenario
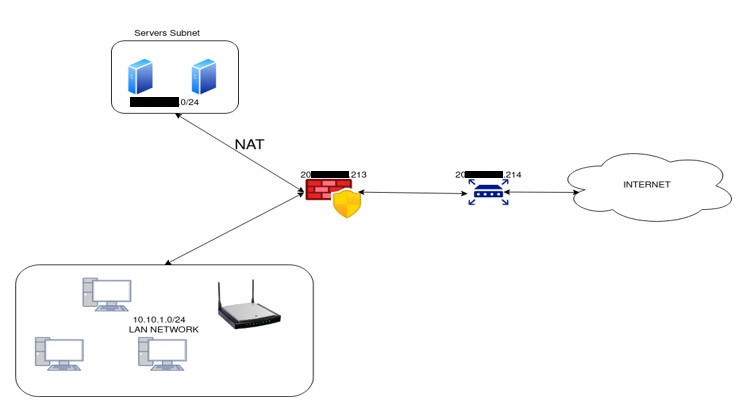
In this scenario we will make the Crystal Eye XDR to advertise routing table updates to neighbouring autonomous systems whenever any part of CE XDR routing table changes.
About Border Gateway Protocol (BGP)
Border Gateway Protocol (BGP) refers to a gateway protocol that enables the internet to exchange routing information between autonomous systems (AS).
Let’s Setup the above scenario by pursuing the following steps:
Step 1: In the Dynamic Routing application page, click the Add button in the Global Configuration section.
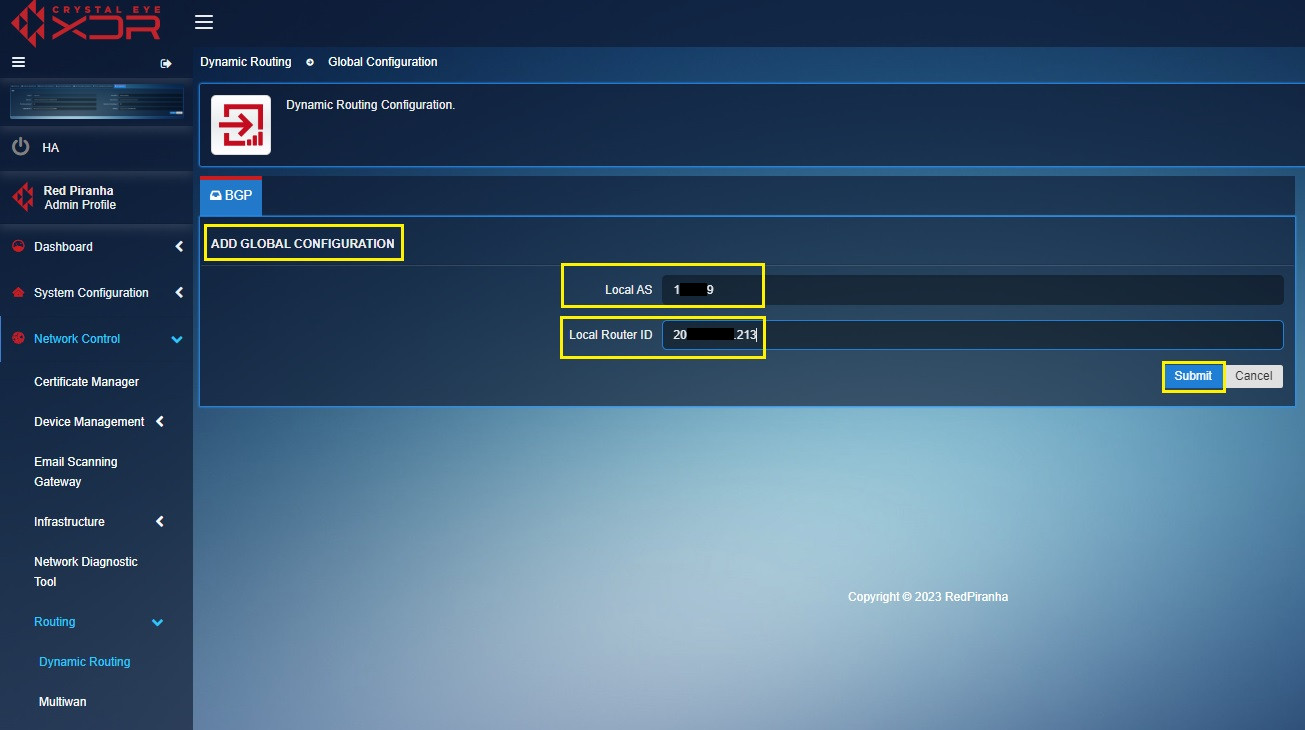
Step 2: You will see the Add Global Configuration page. Enter the Local AS (This AS is a local autonomous number which CE XDR appliance is part of), Local Router ID (external IP address of the CE XDR) and click the Submit button.
Note
In addition to its real AS, the local-AS feature allows a router to appear to be a member of a second autonomous system (AS).
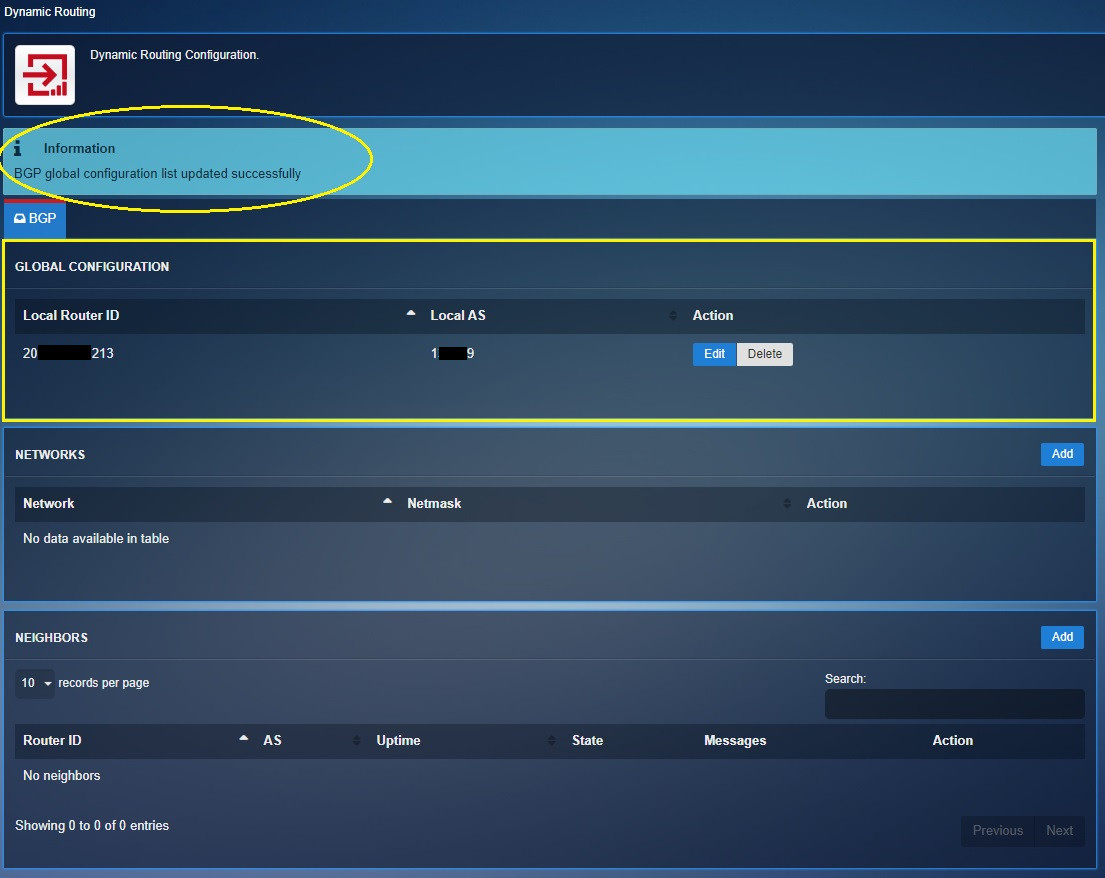
Step 3: You will now be directed to the Dynamic Routing page.
-
A message will be displayed on the top stating that, “BGP global configuration list updated successfully”.
-
The updated global configurations will be visible.
Step 4: Click the Add button in the Networks section.
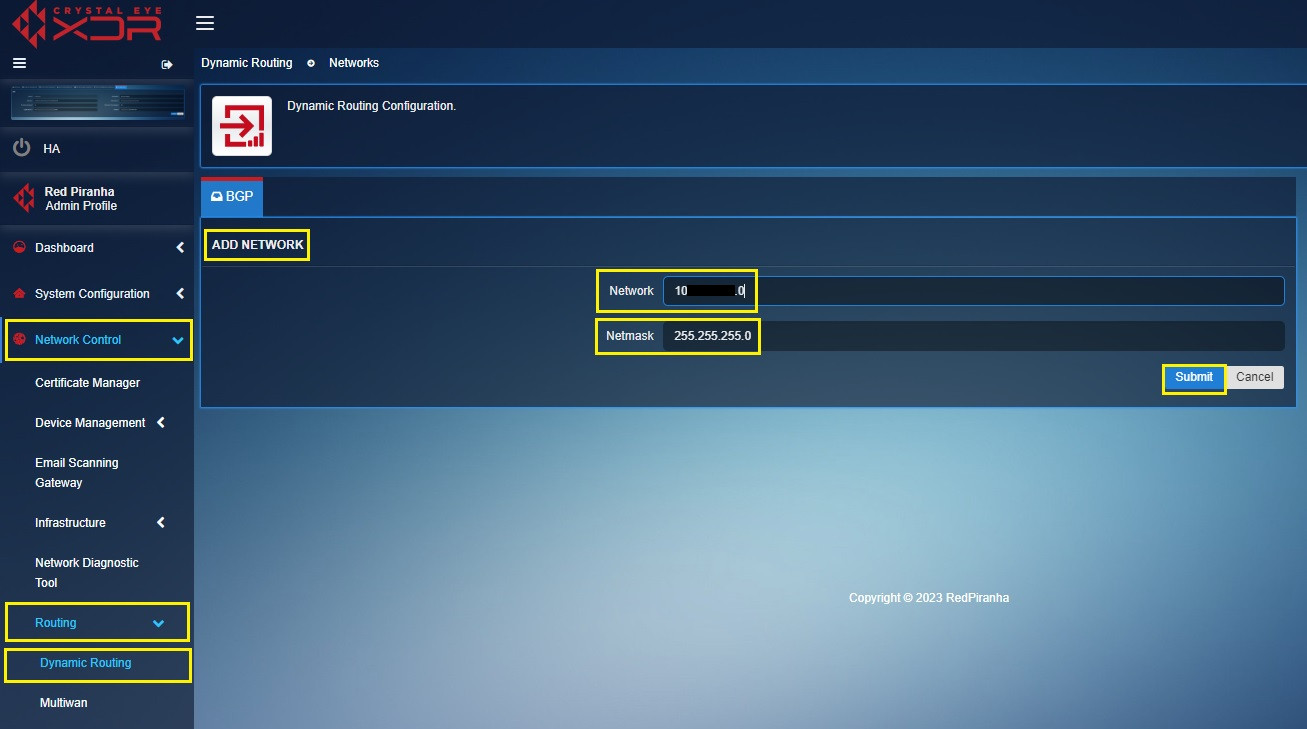
Step 5: You will see the Add Network page. Enter your IPV4 subnets in the Network textbox, Netmask text box and click the Submit button.
Note
You will see a message stating that, “the BGP network list is updated successfully” with the updated details in the Networks section.

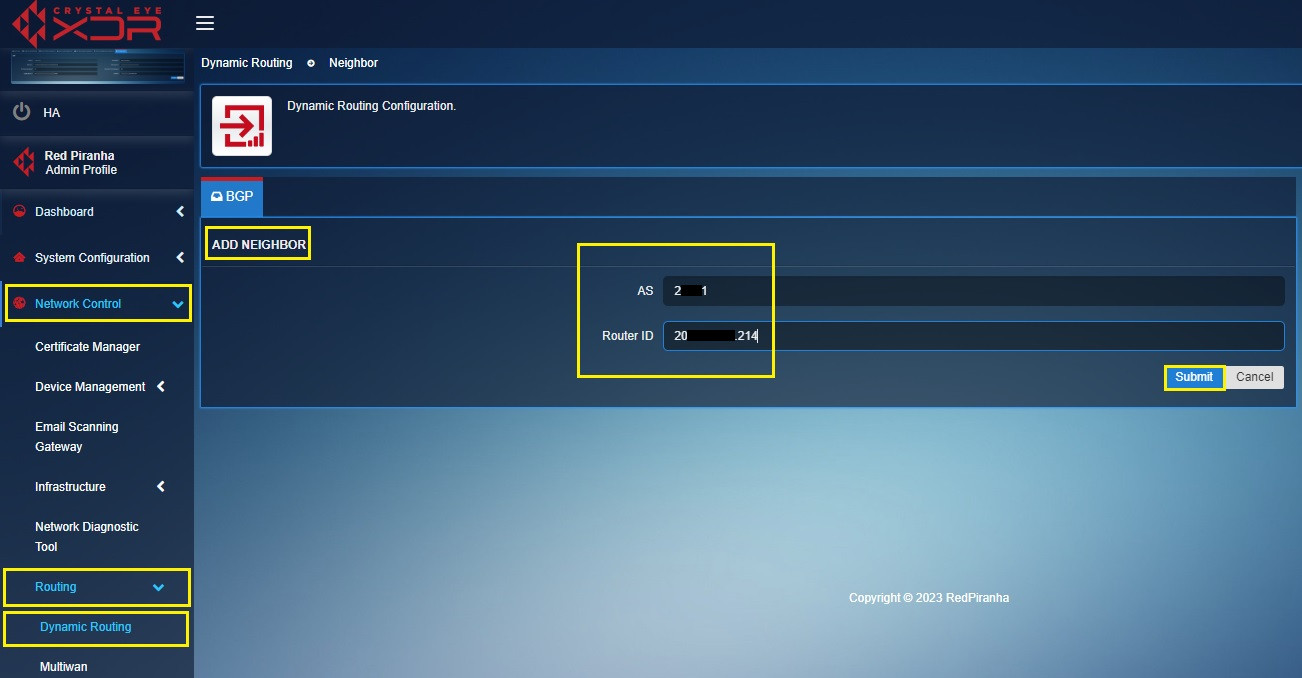
Step 6: Now click the Add button in the Neighbours section.
Step 7: You will now see the Add Neighbour section. Add Neighbouring router/Next Hop details in Neighbours section and its AS number.
The Neighbour State will now be displayed as Established and you will be able to see the Uptime details (see screenshot below)

