Wireless Access Point
Overview
Crystal Eye’s Wireless Access Point application configures and manages wireless network interface on the network. Using this app, the CE administrator can essentially establish a Wi-Fi network which can be used to gain access to the internet using Wi-Fi devices.
There are various parameters that can be controlled and defined through the settings section of the application.
The app configurations allow users to assign a static or a dynamic IP address for the wireless interface. It has a dedicated section which can be used to assign custom or default zones of the CE XDR network.
Note
By default, the Wi-Fi interface falls under the LAN Zone and is assigned a Static IP address.
Other parameters that can be controlled from the Wireless Access Point application are:
- Maximum Transmission Unit (MTU)
- Gateway for the wireless interface traffic
- SSID
- Passphrase
- Netmask
- Channel
The list of devices connected to Crystal Eye’s Wi-Fi is shown with the help of a ‘hub and spook diagram’. The diagram also shows the name of the device and its LAN IP address. The details of the device connected to the Crystal Eye network also appears in a table which captures the Hostname, Device IP Address, MAC Address, Active Details, Signal Strength (in decibel milliwatts).
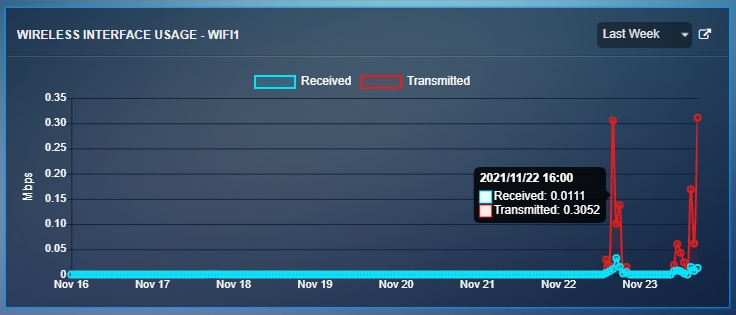
A Wireless Interface Usage details is also shown graphically which sheds light on the data packets that has been received and transmitted.
Installation
The Wireless Access Point application is not available by default. It can be installed from Marketplace in the left-hand navigation panel.
Navigation to Wireless Access Point Application Page
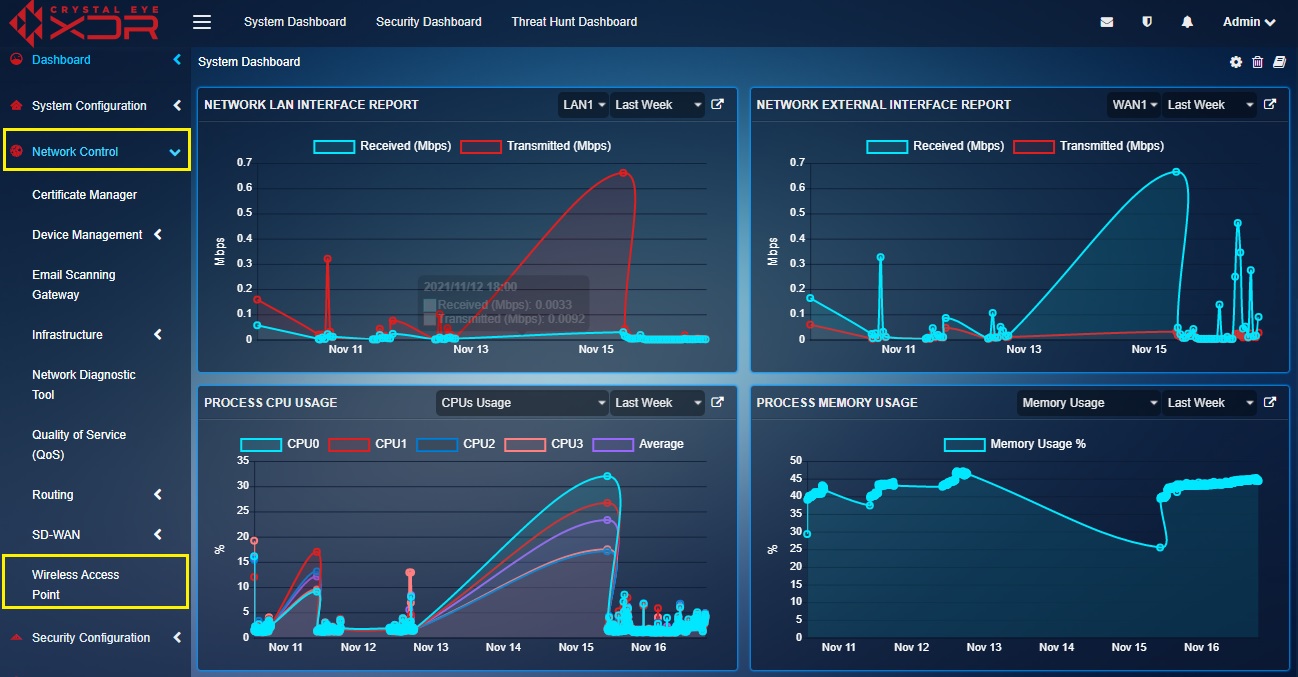
Left-hand Navigation Menu > Network Controls > Wireless Access Point
Installing and Configuring Wireless Access Point
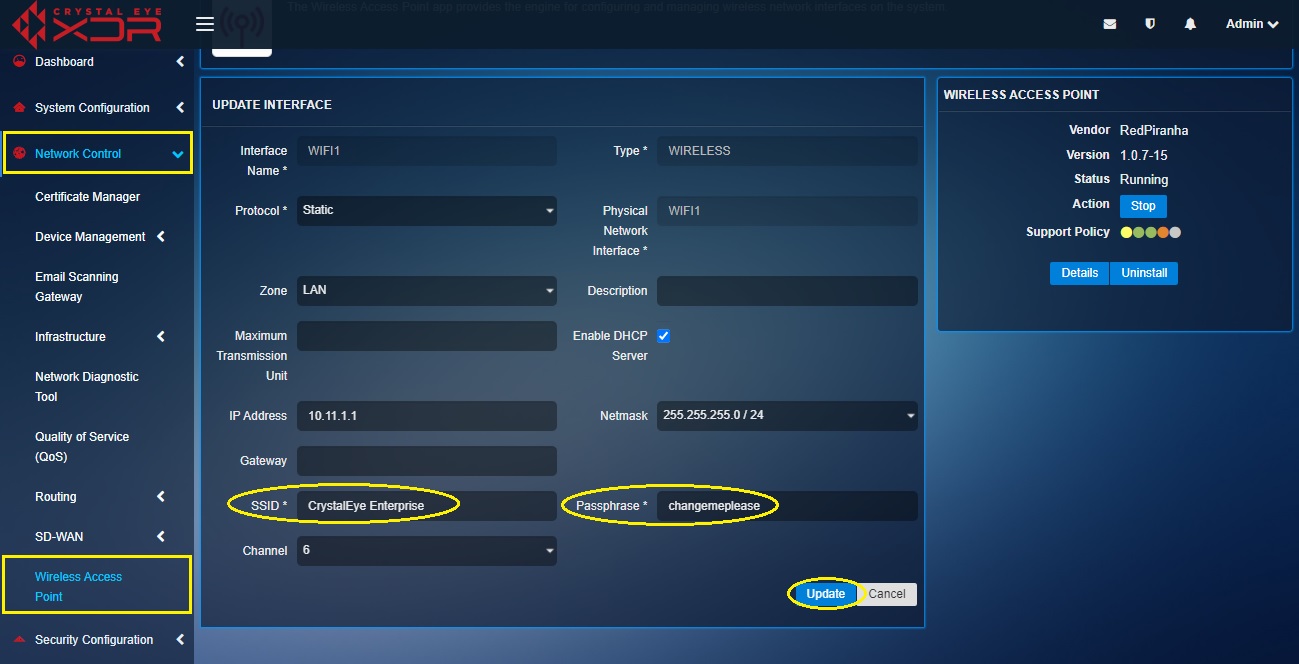
The Wireless Access Point application is not a default Crystal Eye application and henceforth it must be installed from the marketplace. After the application is installed, it needs to be started from the GUI followed by resetting the SSID and passphrase.
How to activate the Wi-Fi module of the Crystal Eye XDR?
Step 1: Go to Marketplace in the left-hand navigation menu.
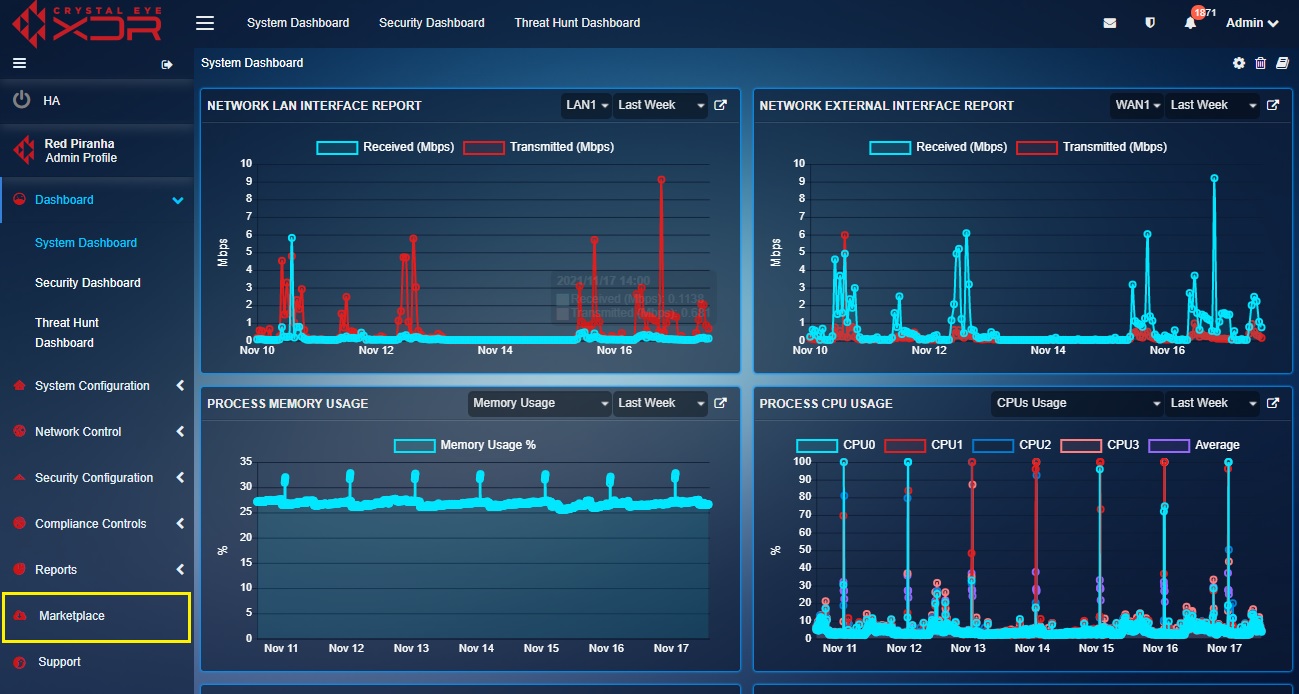
Step 2: You will be directed to the Marketplace page. Select Network Controls from the category dropdown.

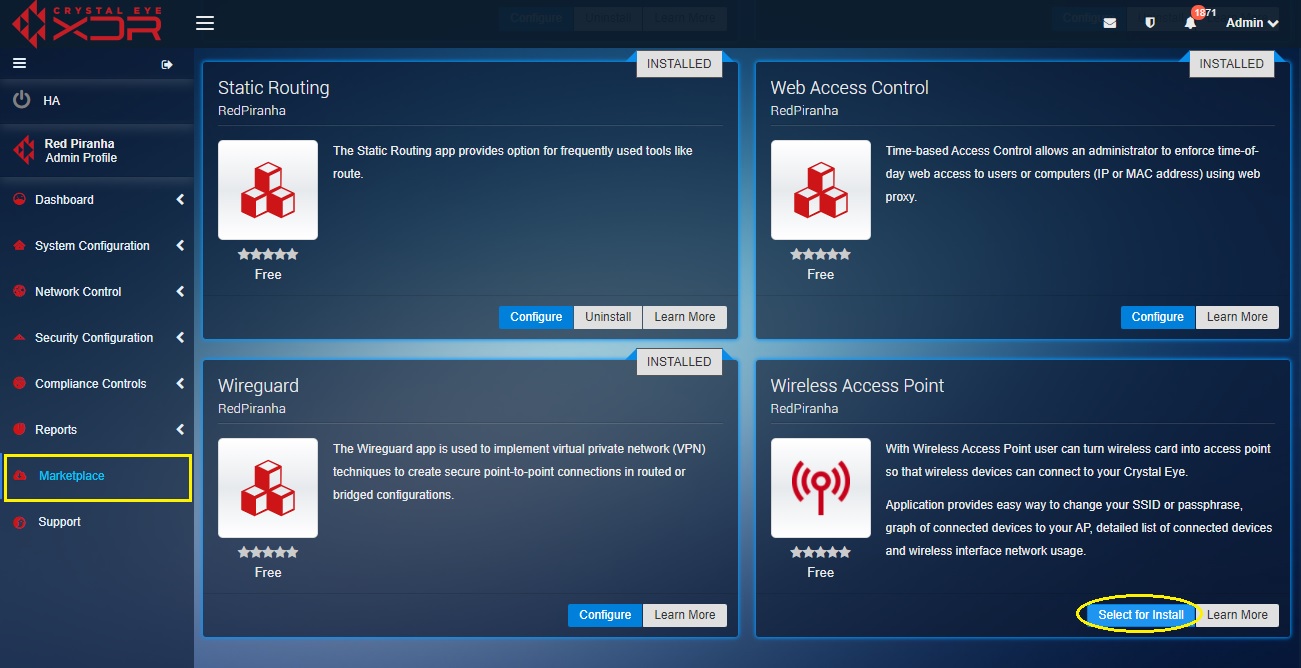
Step 3: Scroll down and look for Wireless Access Point application. Click the Select for Install button.
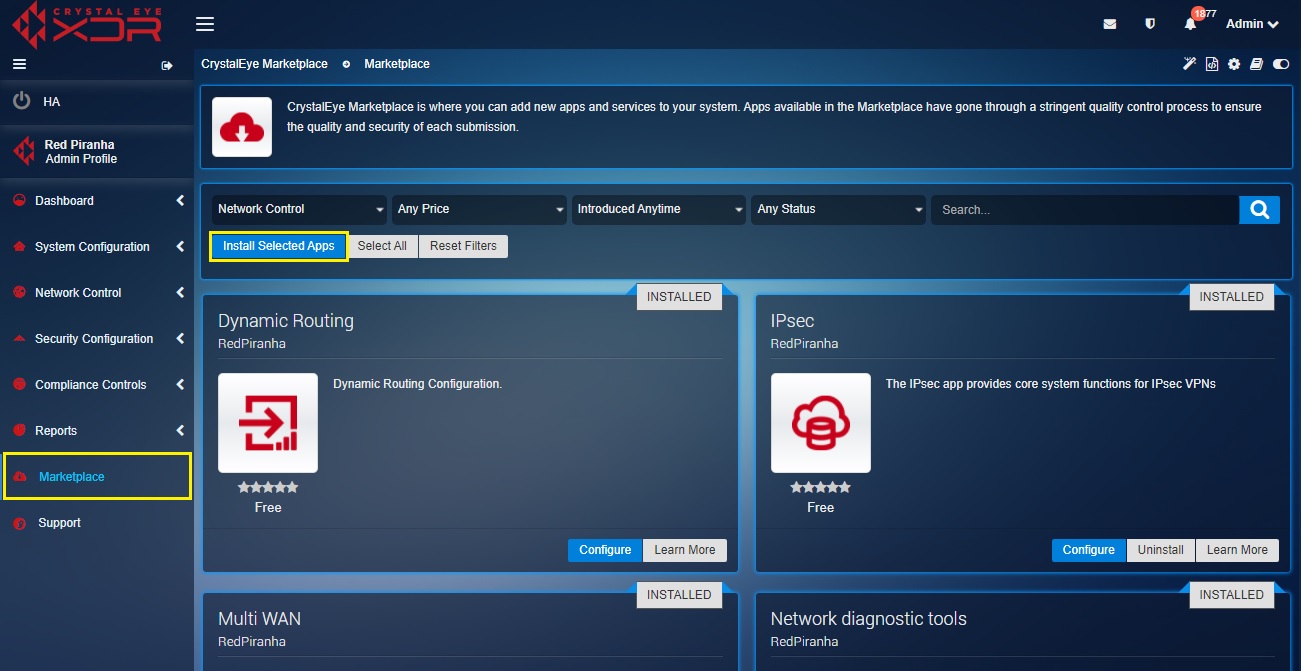
Step 4: Now scroll up and click the Install Selected Apps button.
Step 5: You will now be directed to the App Install List page. Click the Download and Install button.

Step 6: You will see the Processing CrystalEye Marketplace Order pop-up box.
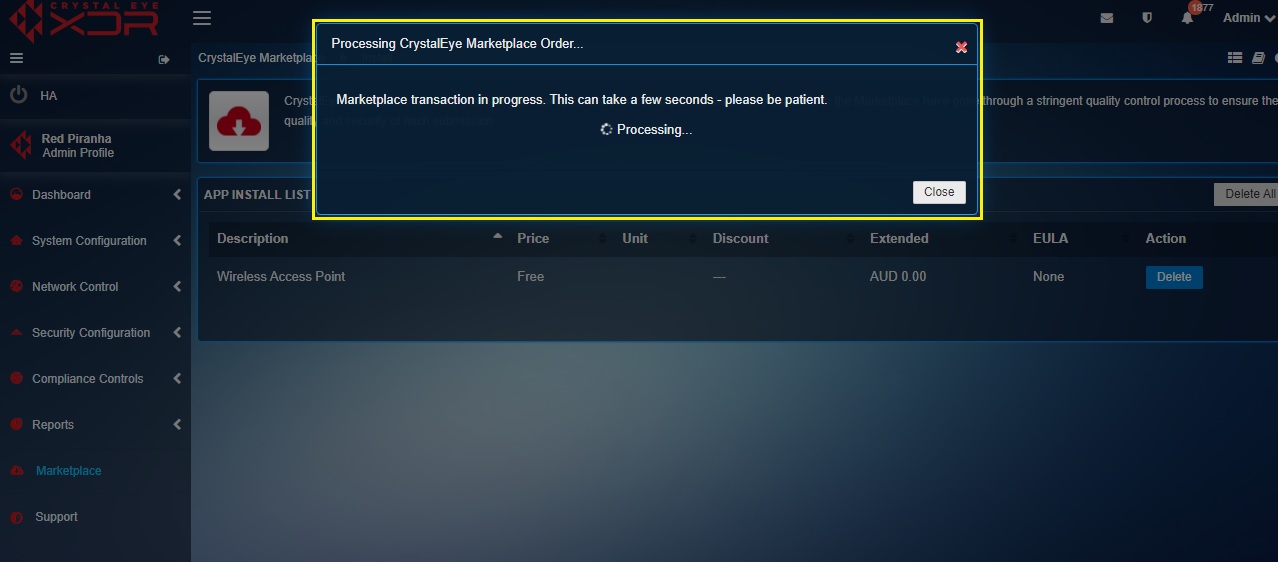
Step 7: Wait for the app to be installed. This might take a few seconds.
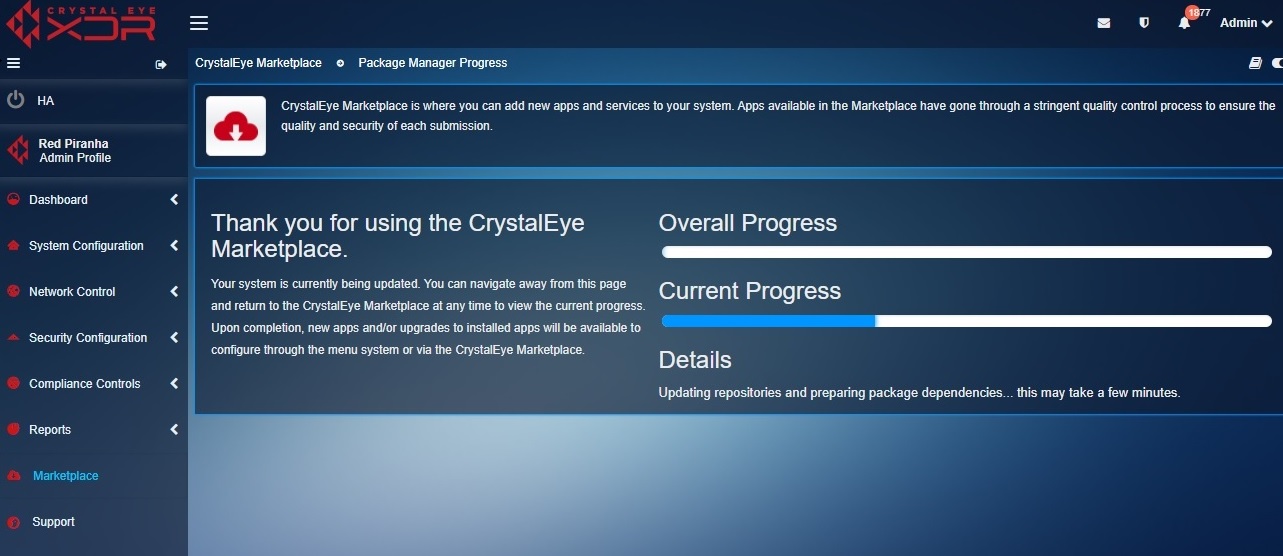
Step 8: The navigation button will get displayed below the progress bar once the app is installed. Click the Move to Dashboard button.

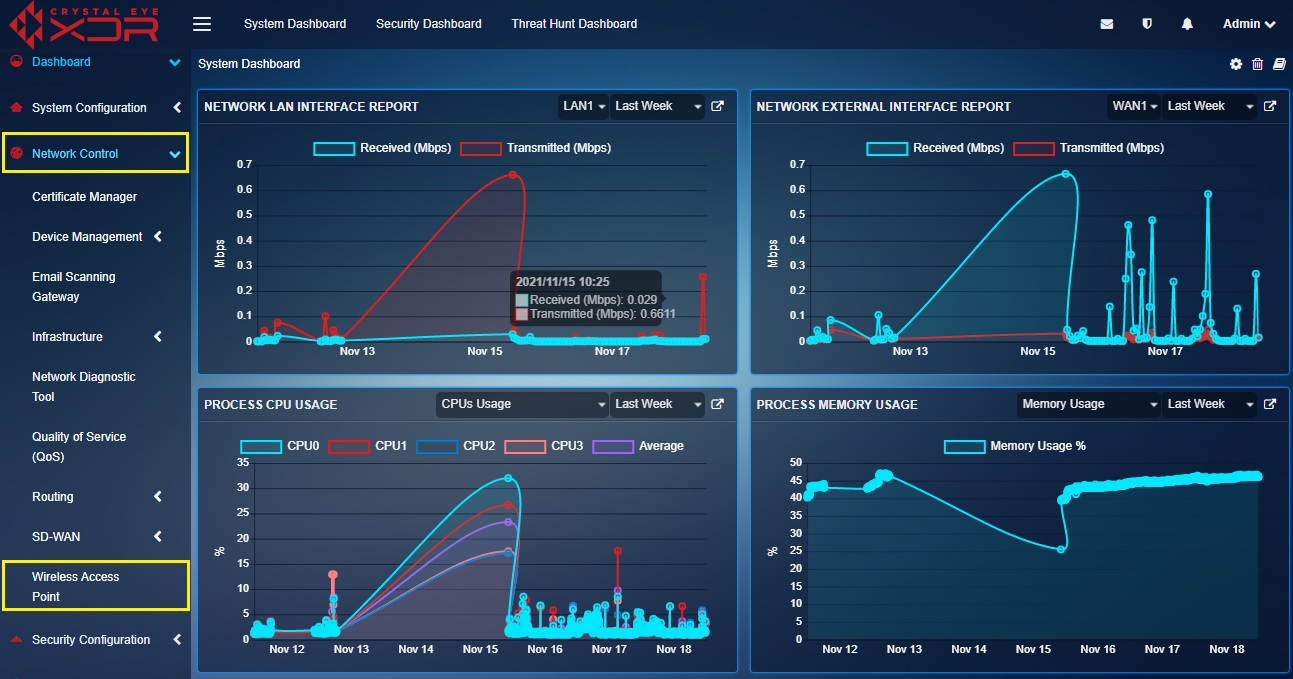
Step 9: The Wireless Access Point application will appear on the left-hand navigation menu. Go to Network Control > Wireless Access Point.
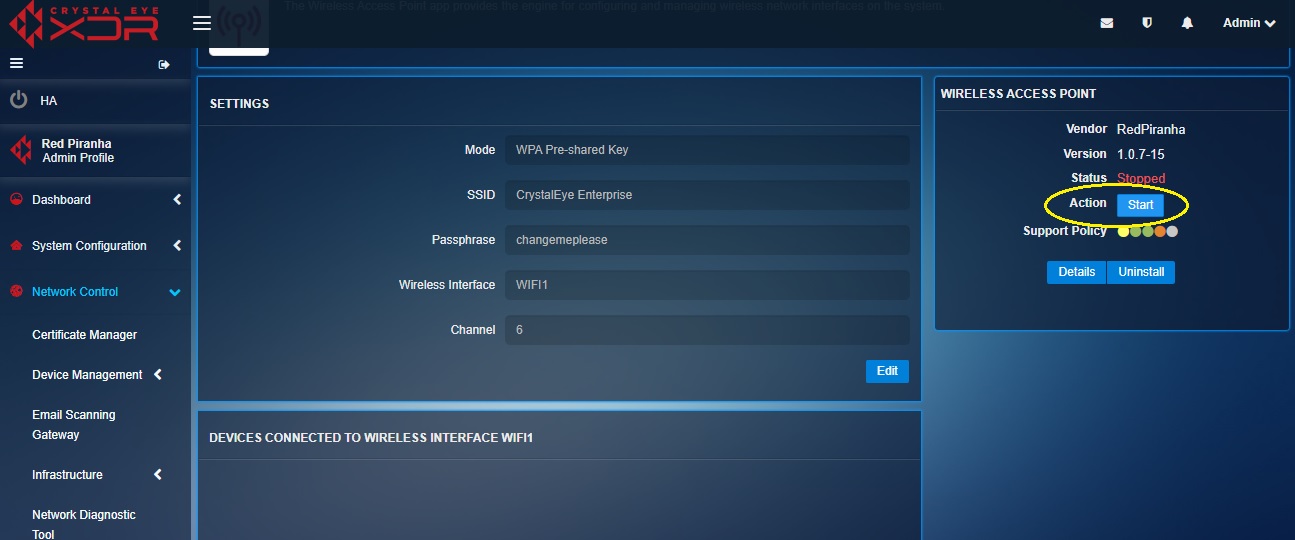
Step 10: You will see the Wireless Access Point application page. Check whether the application is running on the right-hand app details panel. If not click the start button. Please consider this a trouble shooting step just in case the app isn’t working.
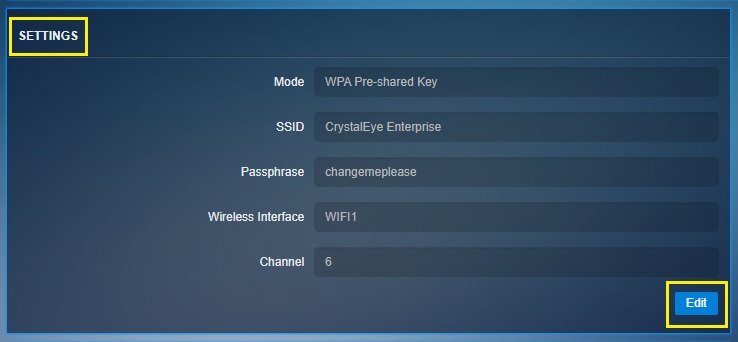
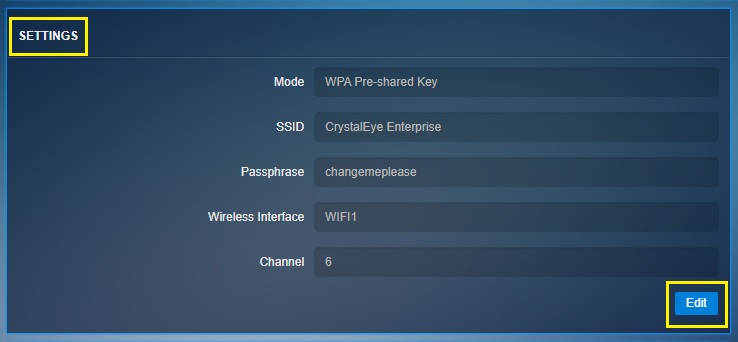
Step 11: In the Settings section, click the Edit button.
Step 12: You will now be directed to the Update Interface page. Reset the SSID, the Passphrase and click the Update button.
Assigning Static/Dynamic IP Address to Wi-Fi Interface
The Wireless Access Point application has a dedicated set of configurations which can be used for assigning both Static and Dynamic IP address to the Wi-Fi interface.
Note
The Wi-Fi interface of the CE XDR network is assigned with a static IP address by default.
How to Assign a Static IP Address for the Wi-Fi interface?
Step 1: Go to Network Control > Wireless Access Point application.

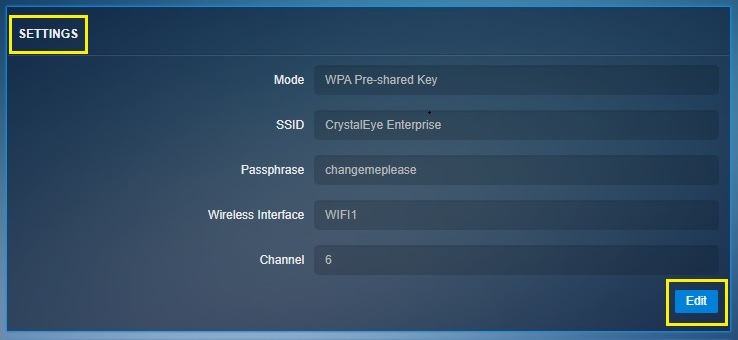
Step 2: You will now be directed to the Wireless Access Point application. Click the Edit button in the Settings section.
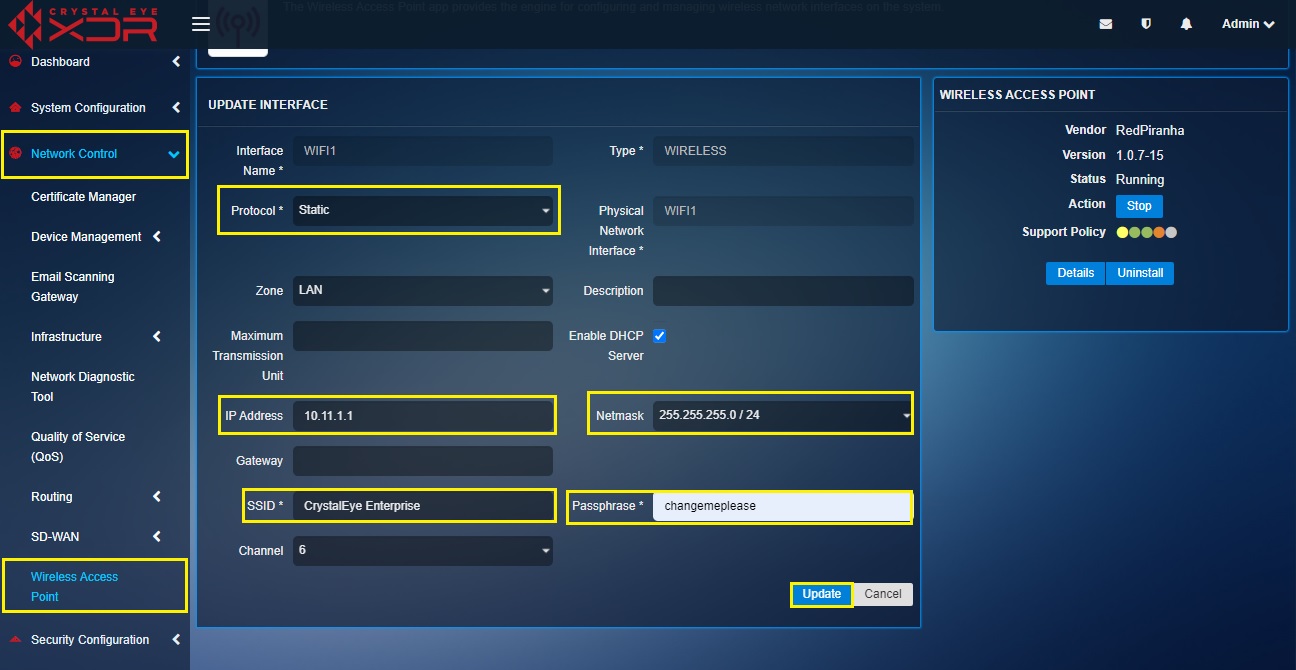
Step 3: You will see the Update Interface page. Select Static from the Protocol dropdown, enter the IP address in the textbox, select the appropriate Netmask and click the Update button.
Note
Once you set a static IP address for the Wi-Fi interface the configuration details will reflect in the Network Settings application.
How to Assign a Dynamic IP Address for the Wi-Fi interface?
Step 1: In the Settings section of the Network Settings application, click the Edit button.

Step 2: You will now see the Update Interface page. Select DHCP from the Protocol dropdown and click the Update button.

Assigning Zones to Wi-Fi Interface
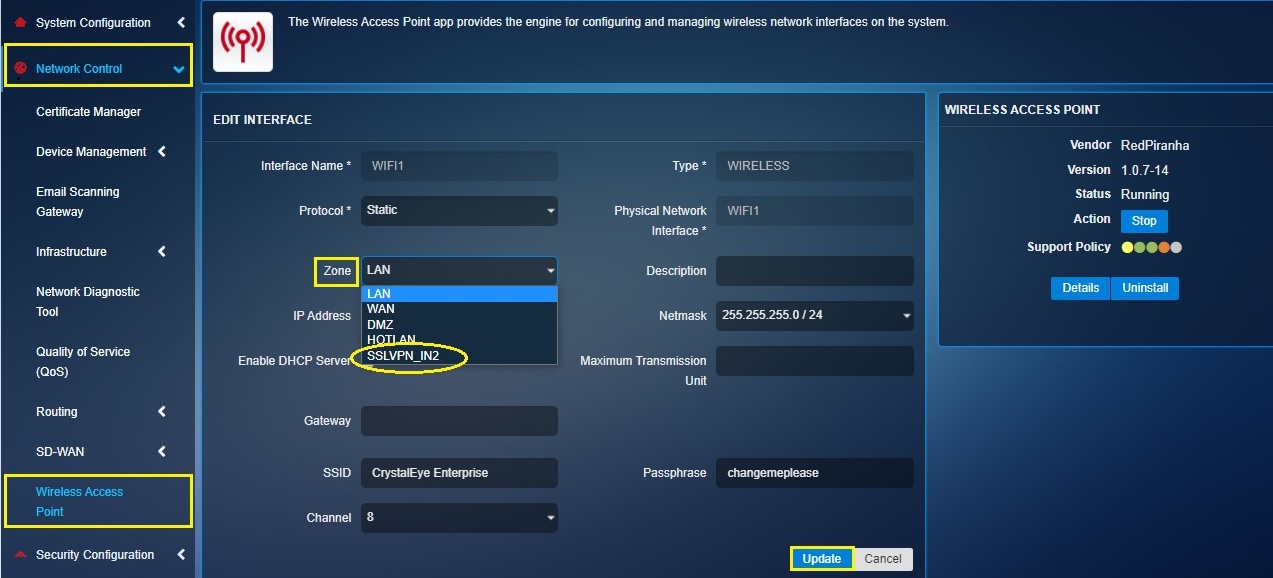
Assigning a zone to the Wi-Fi interface of the CE XDR purely depends on the way the CE administrator intends to segment the network. The Crystal Eye offers explicit settings to assign default and custom zones to the Wi-Fi interface. Aligning a zone to the Wi-Fi interface makes it easy to assign zone-based firewall rules for the Wi-Fi traffic. The default zones that the CE administrator can choose from are LAN, WAN, DMZ and HOTLAN.
Note
By default, the Wi-Fi interface of the CE XDR is assigned to the LAN Zone.
How to Assign a Default CE XDR Zone to Wi-Fi interface?
Step 1: In the Wireless Access Point application page, click the Edit button under the Settings page.
Step 2: Select the default zones from the dropdown.

How to Assign a Custom CE XDR Zone to Wi-Fi interface?
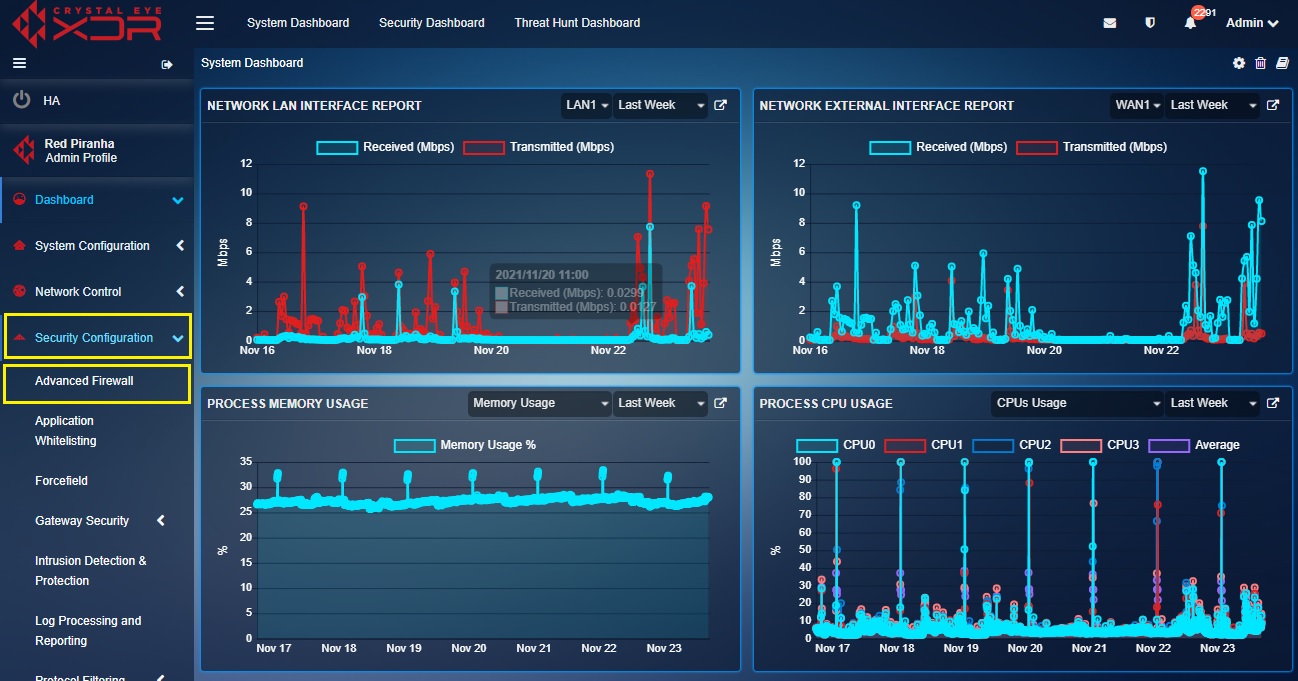
Step 1: Go to Security Configuration > Advanced Firewall application.
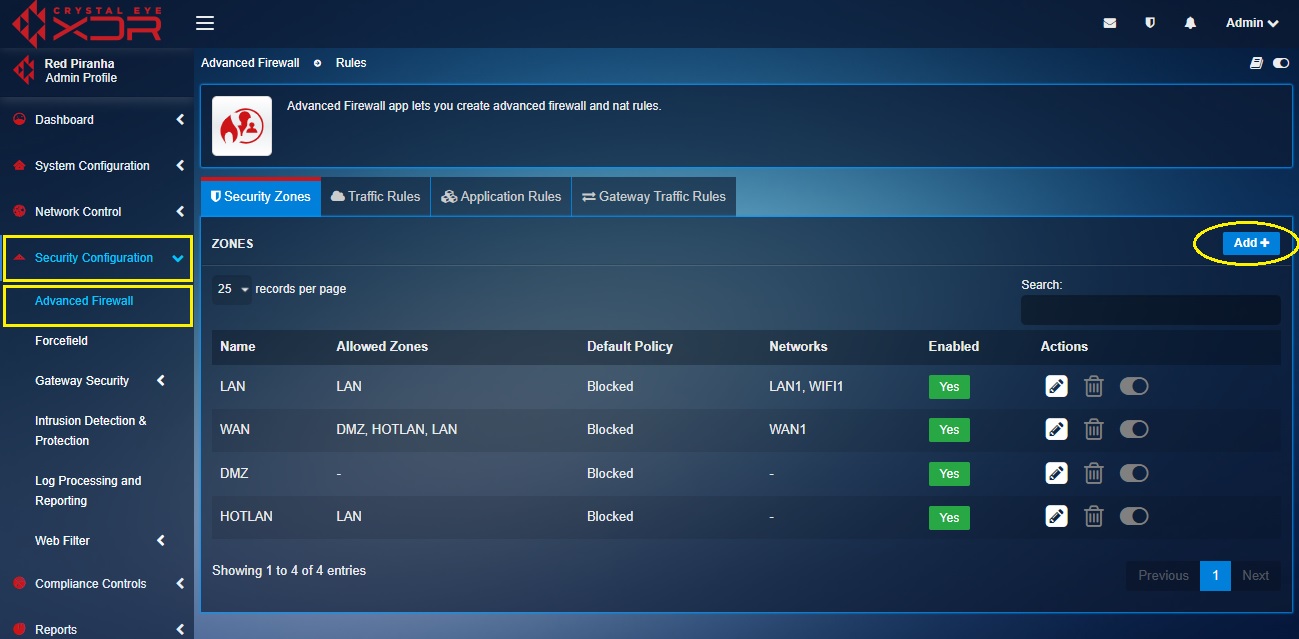
Step 2: You will be directed to the Security Zones section of the Advanced Firewall. Click the Add button in the Zones section.
Step 3: You will now see the Add New Zone pop-up. Refer to the link below to know how to create a custom zone.
https://docs.redpiranha.net/security-configuration/advanced-firewall/#custom-security-zones
Please note that in our case, we have created a custom zone and named it SSLVPN_IN1.
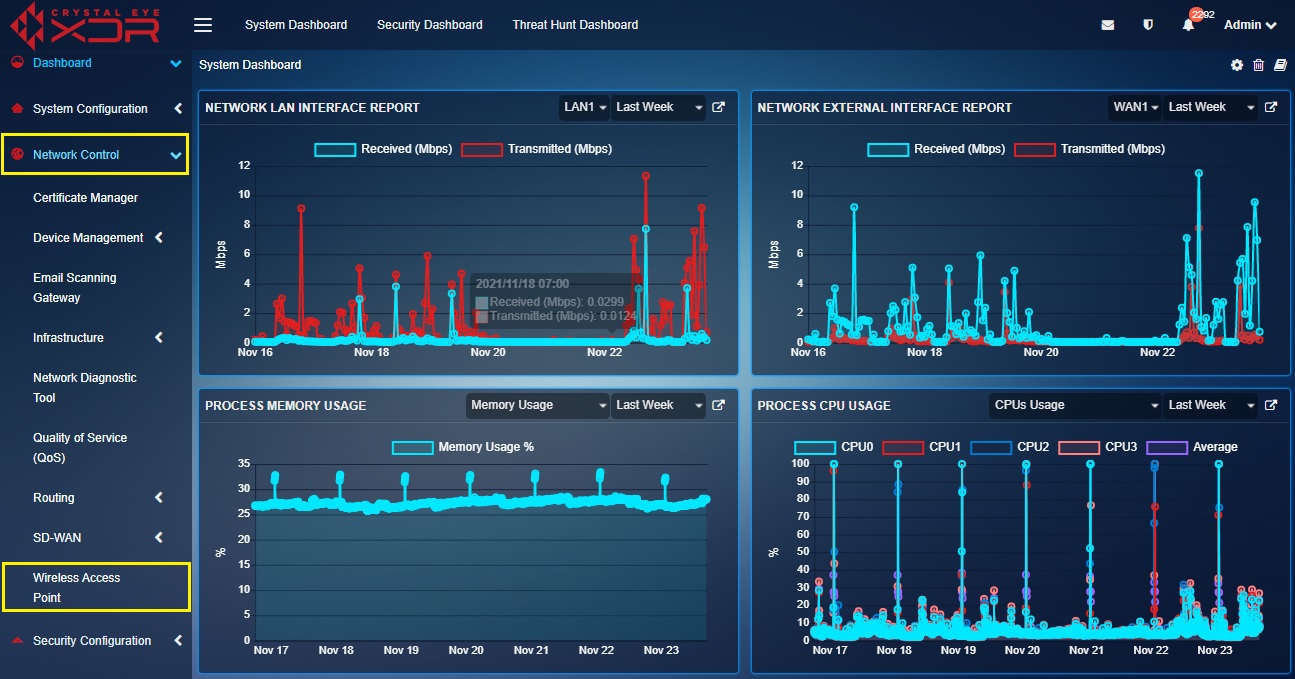
Step 4: Go to Network Control > Wireless Access Point application.
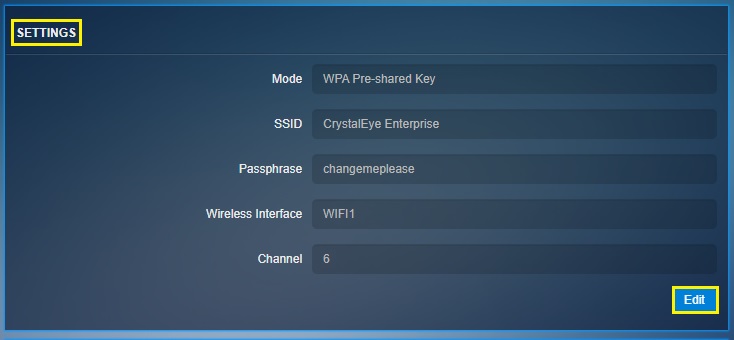
Step 5: You will see the Wireless Access Point app page. Click the Edit button.
Step 6: Select the custom zone SSLVPN_IN2 from the Zone dropdown and click the Update button.
Setting Maximum Transmission Unit
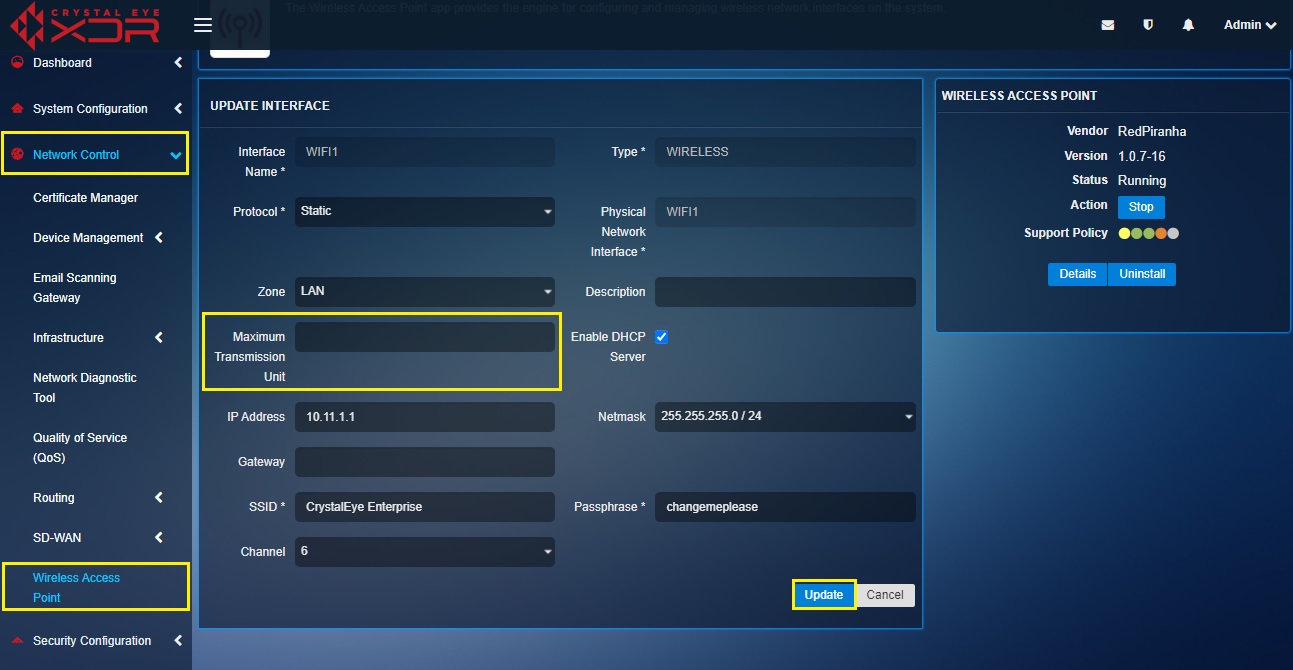
The CE XDR’s Wireless Access Point Application offers explicit configuration options to set Maximum Transmission unit (MTU). The MTU defines the largest size packet that can be delivered in bytes without fragmentation through the Wi-Fi interface.
How to set Maximum Transmission Unit (MTU) in the Wi-Fi interface?
Step 1: Click the Edit button in the Settings section of the Wireless Access Point application page.

Step 2: You will see the Edit Interface page. Enter the required MTU value in the Maximum Transmission Unit textbox and click the Update button.
Wireless Interface Visualization
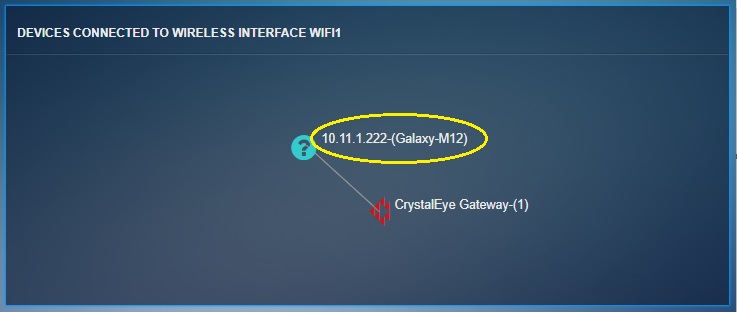
The Wireless Interface visualization section displays the LAN IP address and the Hostnames of the devices connected to the Wi-Fi network (See screenshot below).
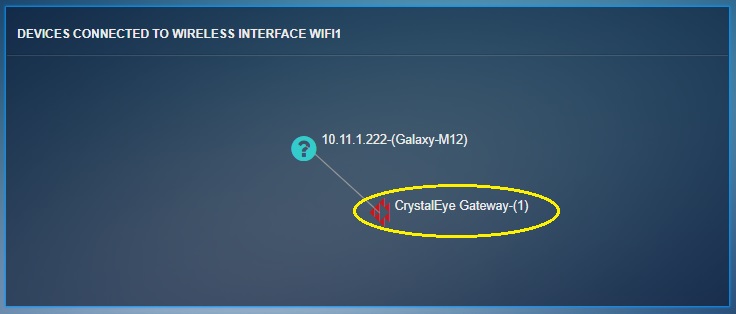
The total count of the devices connected to the wireless interface of the CE XDR can also be seen next to Crystal Eye Gateway icon (See screenshot below).
Wireless Interface Information Table
The Wireless Interface Information Table displays the list of devices connected to the Wi-Fi network.
The Wireless Interface Information Table displays the following information:

Hostname: The app picks the default hostname of the device and displays it in the Wireless Interface Visualization Hub-Spoke diagram and the Information table.
Device IP Address: This is the IP address assigned to the device based on whether a static or a dynamic IP address was assigned to the wireless interface network. Learn how to assign a Static/Dynamic IP Address to Wi-Fi Interface.
MAC Address: The Wireless Access Point picks the MAC address of the devices connected to the wireless interface of the CE XDR.
Inactive Since: This column shows since when the device is connected to wireless interface of the CE XDR.
Signal: It shows the signal strength fetched by the device connected to the wireless interface of the CE XDR. The signal strength is represented and measured in decibels per milliwatt (DBm).
Wireless Interface Usage Graph
The Wireless Interface Usage Graph provides insights on the network bandwidth and throughput measured in Megabits per second (Mbps).
