Data Loss Protection
Overview
The Data Loss Protection application allows organizations to boost their DLP program designed to provide protection from getting breach.
The DLP app is utilized by DLP program implementers to reduce risks derived from poor business processes. The overall features of the DLP app works as an excellent tool to help organizations comply with ISO 27002:2022 framework, Control 8.12 – Data Leakage Prevention.
An effective DLP program must be built in-line with the controls put in place to classify information based on confidentiality, integrity and availability.
Crystal Eye XDRs DLP application policies can be configured to both Reject and Alert mode providing control over the movement of sensitive data that have been labeled to be protected against exfiltration.
Once the DLP feature is enabled it searches all files located in various computers in the CE network for structured data formats involving credit card numbers and social security numbers (SSN). Thereon, the DLP apps in-built default functionality triggers an alert every time Credit Card Numbers and Social Security Numbers (SSN) are extruded outside CE XDR networks.
Gartner Peer Reviews
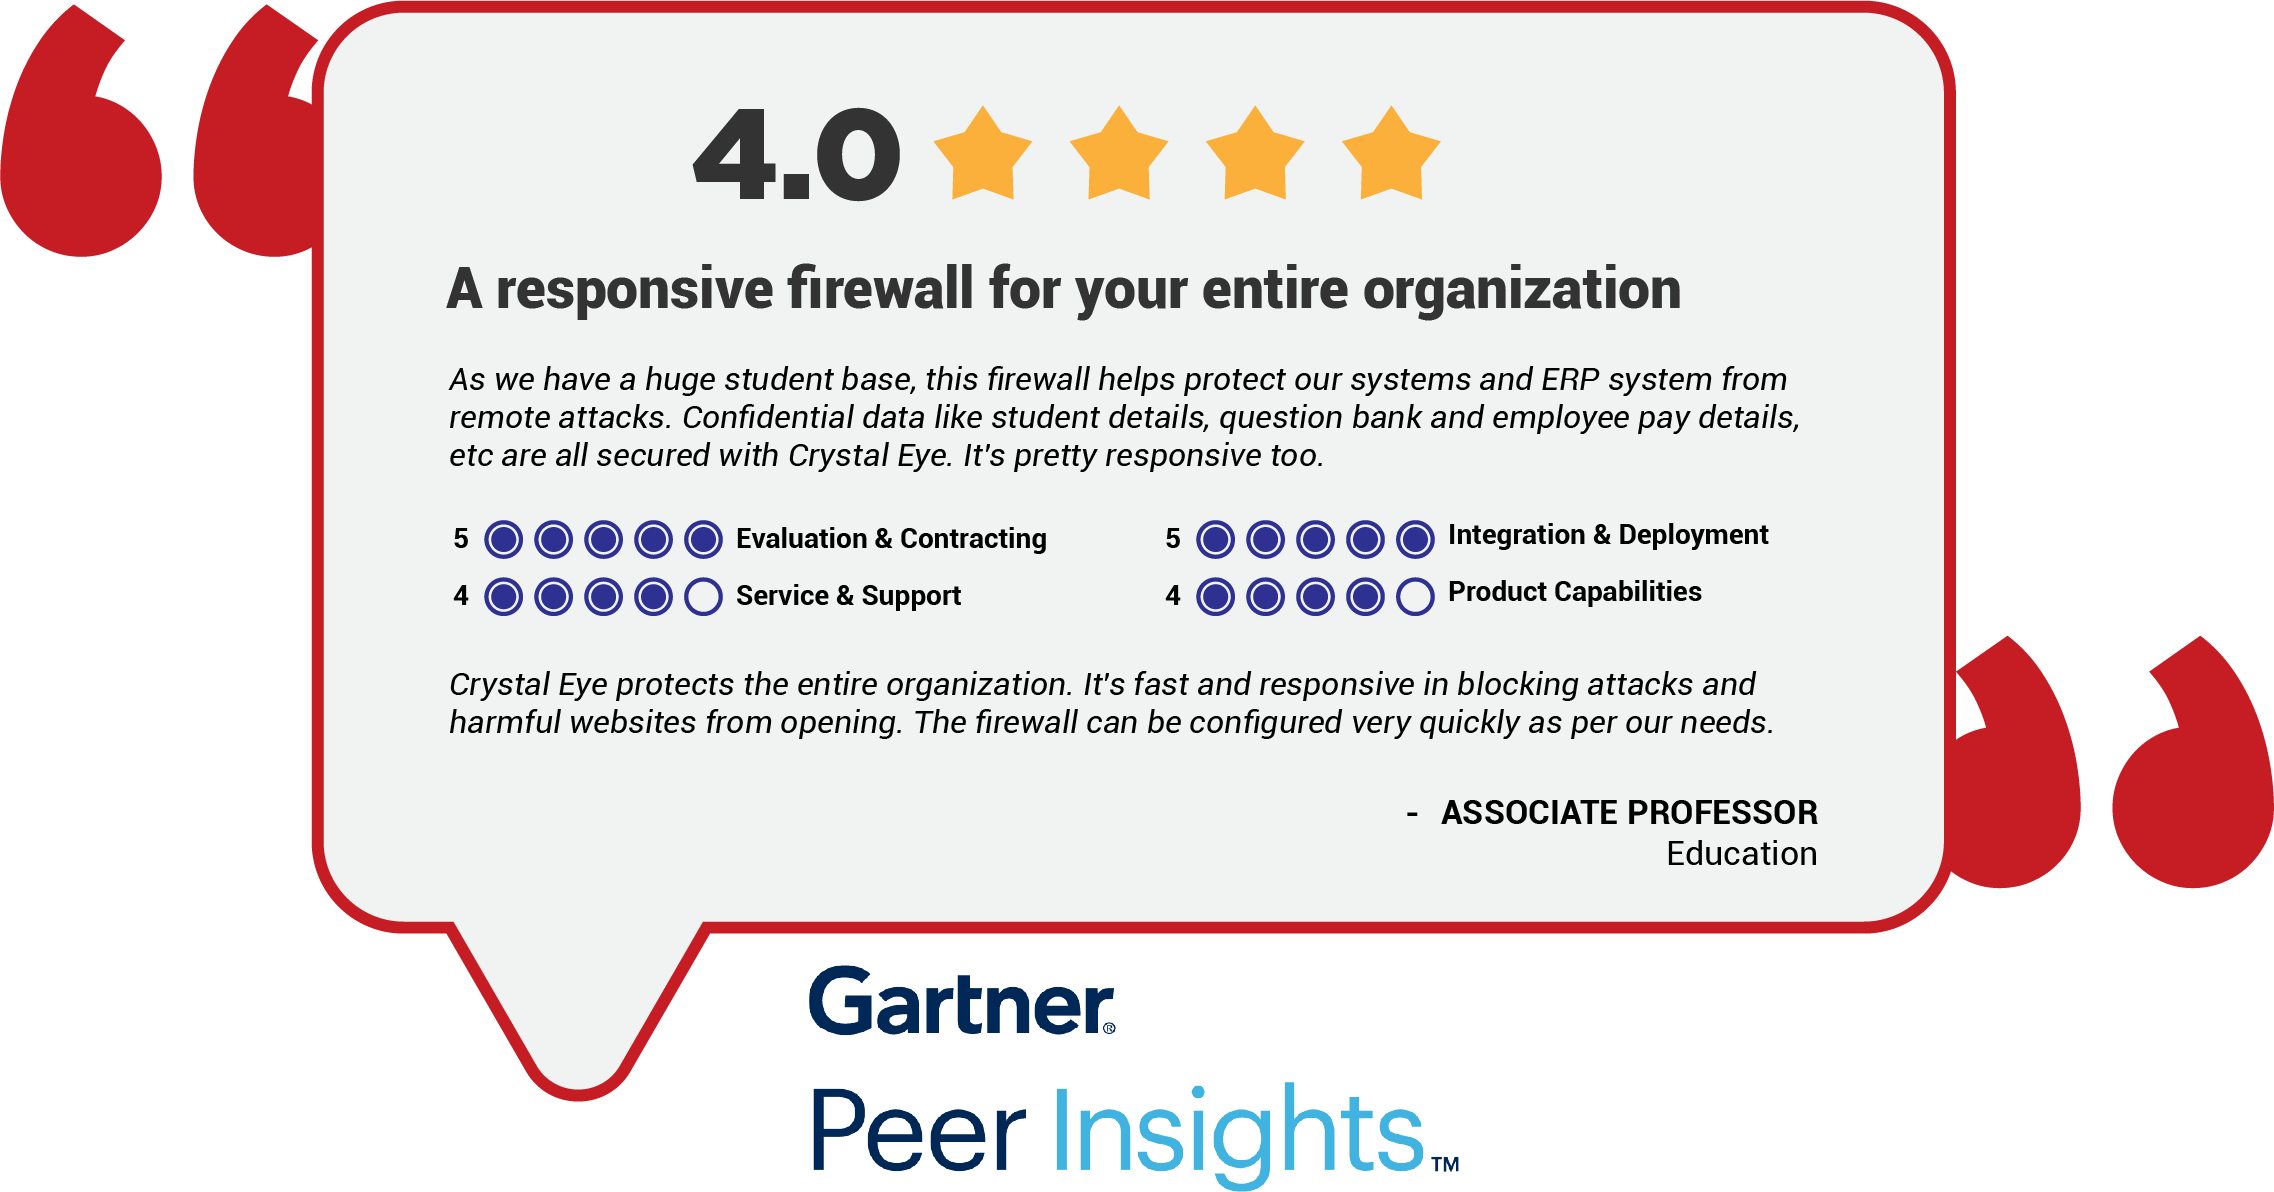 Explore more Red Piranha Customer Reviews on Gartner Peer Insights
Installation
The Data Loss Protection application is installed by default and can be accessed from the left-hand navigation panel.
Video Resources
Navigation to Data Loss Protection Application Page
Left-hand navigation Panel > Compliance > Data Loss Protection
Safeguarding Personally Identity Information (PII)
By default, DLP app searches various computers and servers in the CE network for structured data formats involving credit card numbers and social security number, and creates alerts upon movement of the files containing these numbers.
Note
Crystal Eye's Data Loss Protection application blocks credits card numbers and social security numbers mentioned in a particular data format. DLP will block the file only if the credit card number format is xxxx-xxxx-xxxx-xxxx and the social security number format is xxyyzzzz or xxx-yy-zzzz.
The DLP app must be enabled from the Settings section for the alerts to be generated. The administrator can also set the minimum credit card numbers and social security numbers that would trigger an alert or even reject the exfiltration based on the set mode.
How to set a threshold to block exfiltration of credit card and social security numbers?
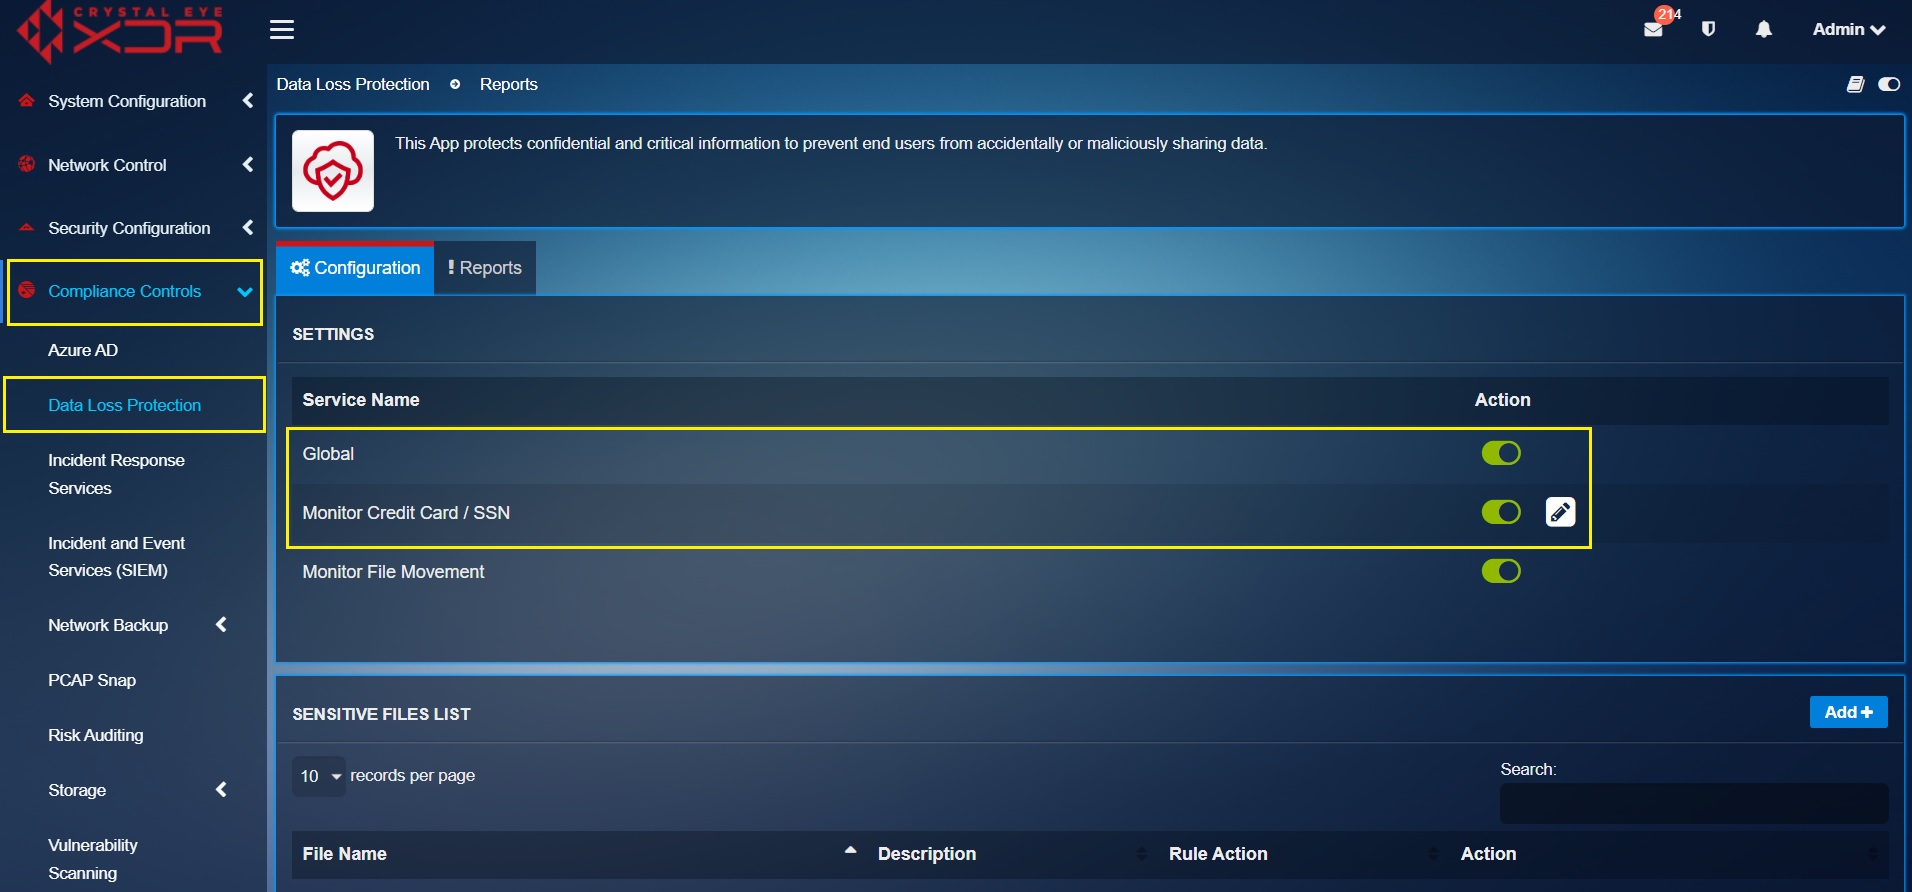
Step 1: In the Data Loss Protection page, enable Global settings and Monitor Credit Card/SSN under the Settings section.
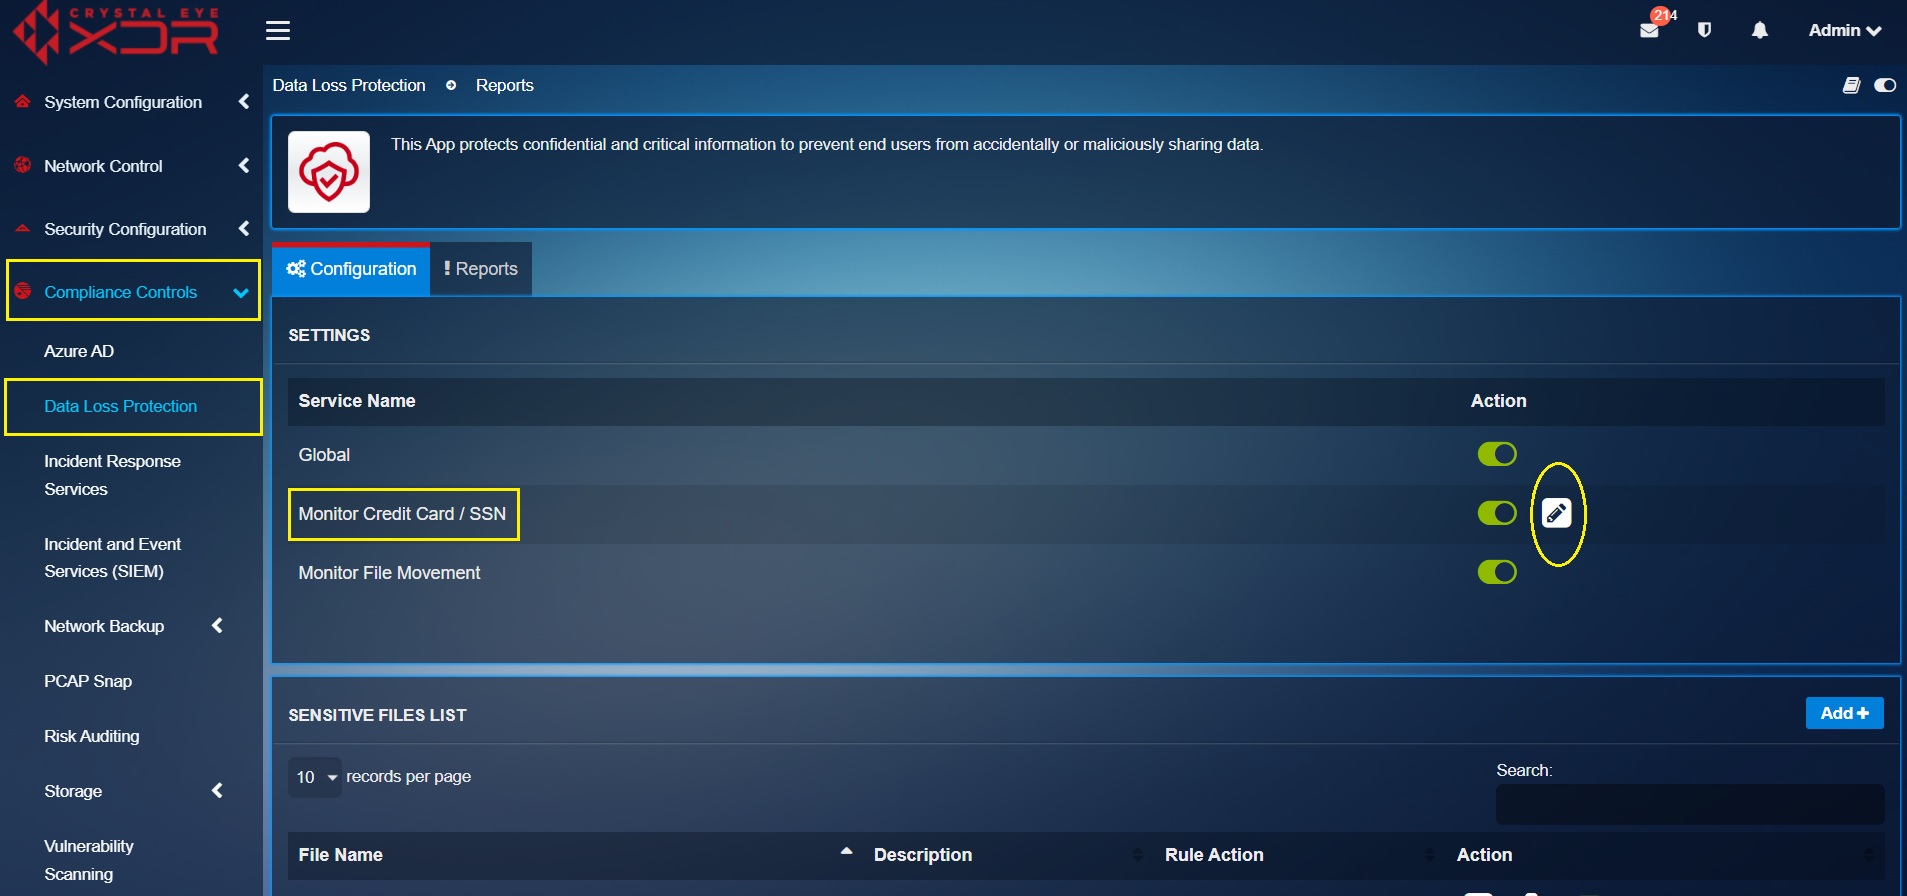
Step 2: Click the Edit button.
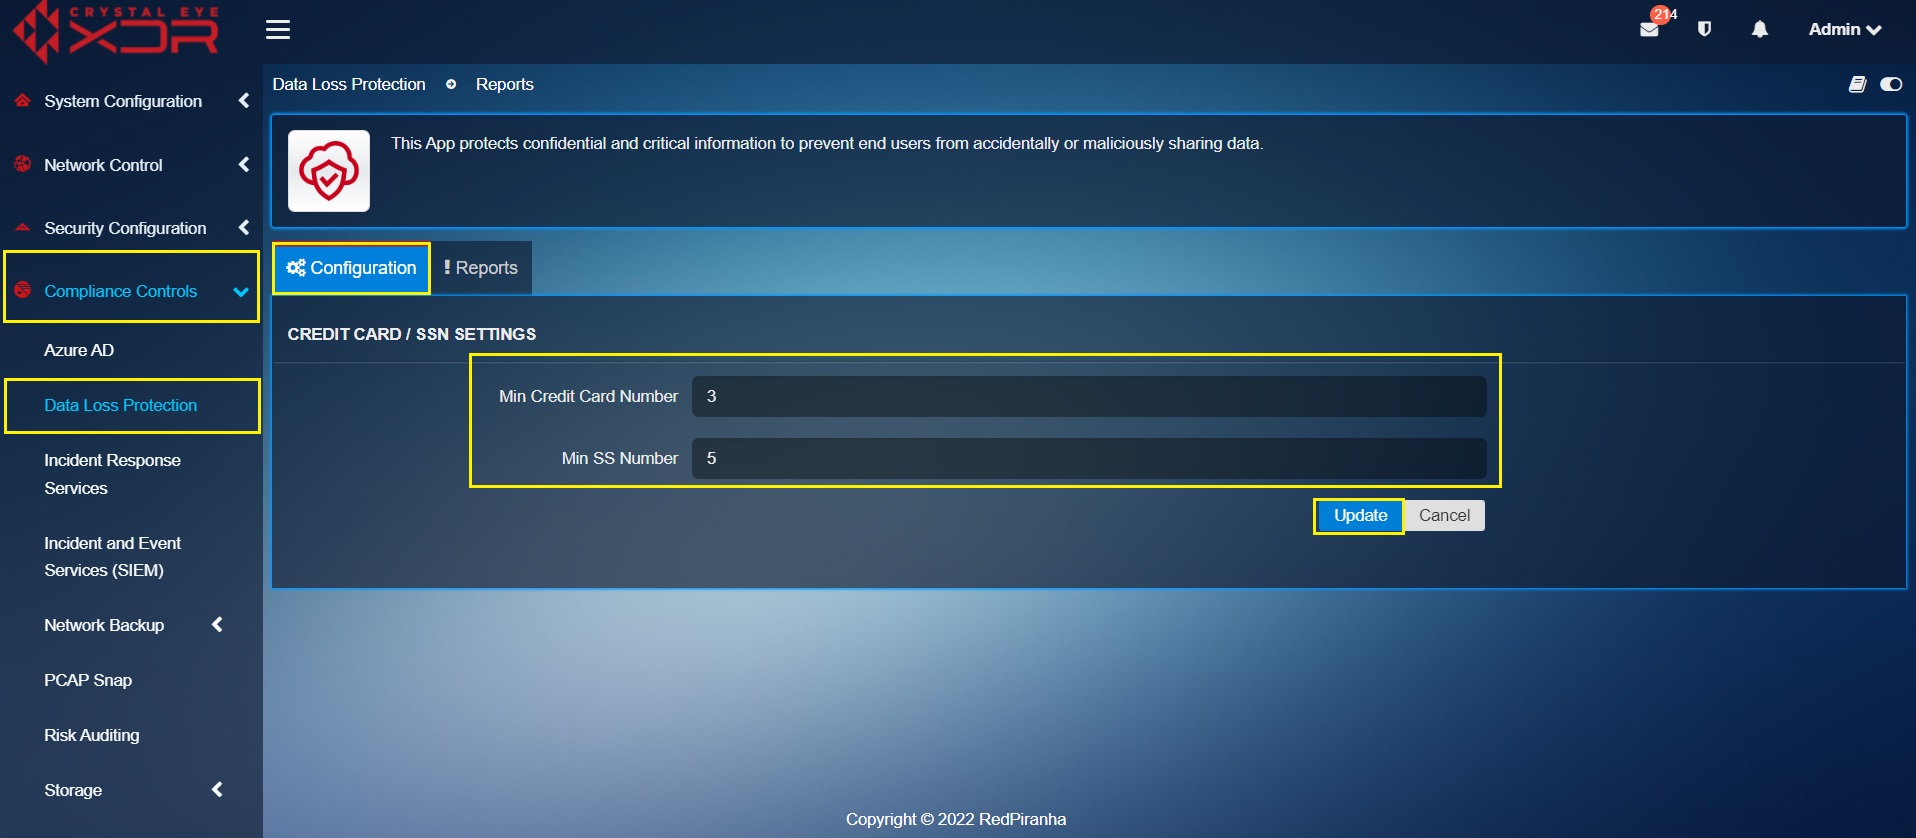
Step 3: You will see the Credit Card/SSN settings page. Enter the threshold for credit card and SSN exfiltration in the textbox. Click the Update button. If you have mentioned the threshold as 3 for the credit card and 5 for SSN, then if CC and SSNs are transferred over WAN more than the threshold will get rejected by the DLP app.
Alert or Reject File Movement | DLP Report
The DLP app can be configured to alert or reject file movement. In both cases the DLP report will display file movement details.
The goal here is to detect & prevent data breaches and exfiltration by:
[A] Identifying the files in the network that are classified as confidential.
[B] Uploading these confidential files to the Sensitive File List section of the DLP module of the Crystal Eye XDR.
[C] Monitor file movement using the DLP file movement dashboard.
The screenshot above shows the DLP report which displays the timestamp, file name, source IP, destination IP, country, HTTP Referrer, and file size. This info is displayed as soon as the CE XDRs DLP module identifies file movement.
Note
Once the files are uploaded to the Sensitive File List section, the DLP program implementer will prompt the user to specify the DLP rule action which can either be “Alert” or “Reject”.
Important
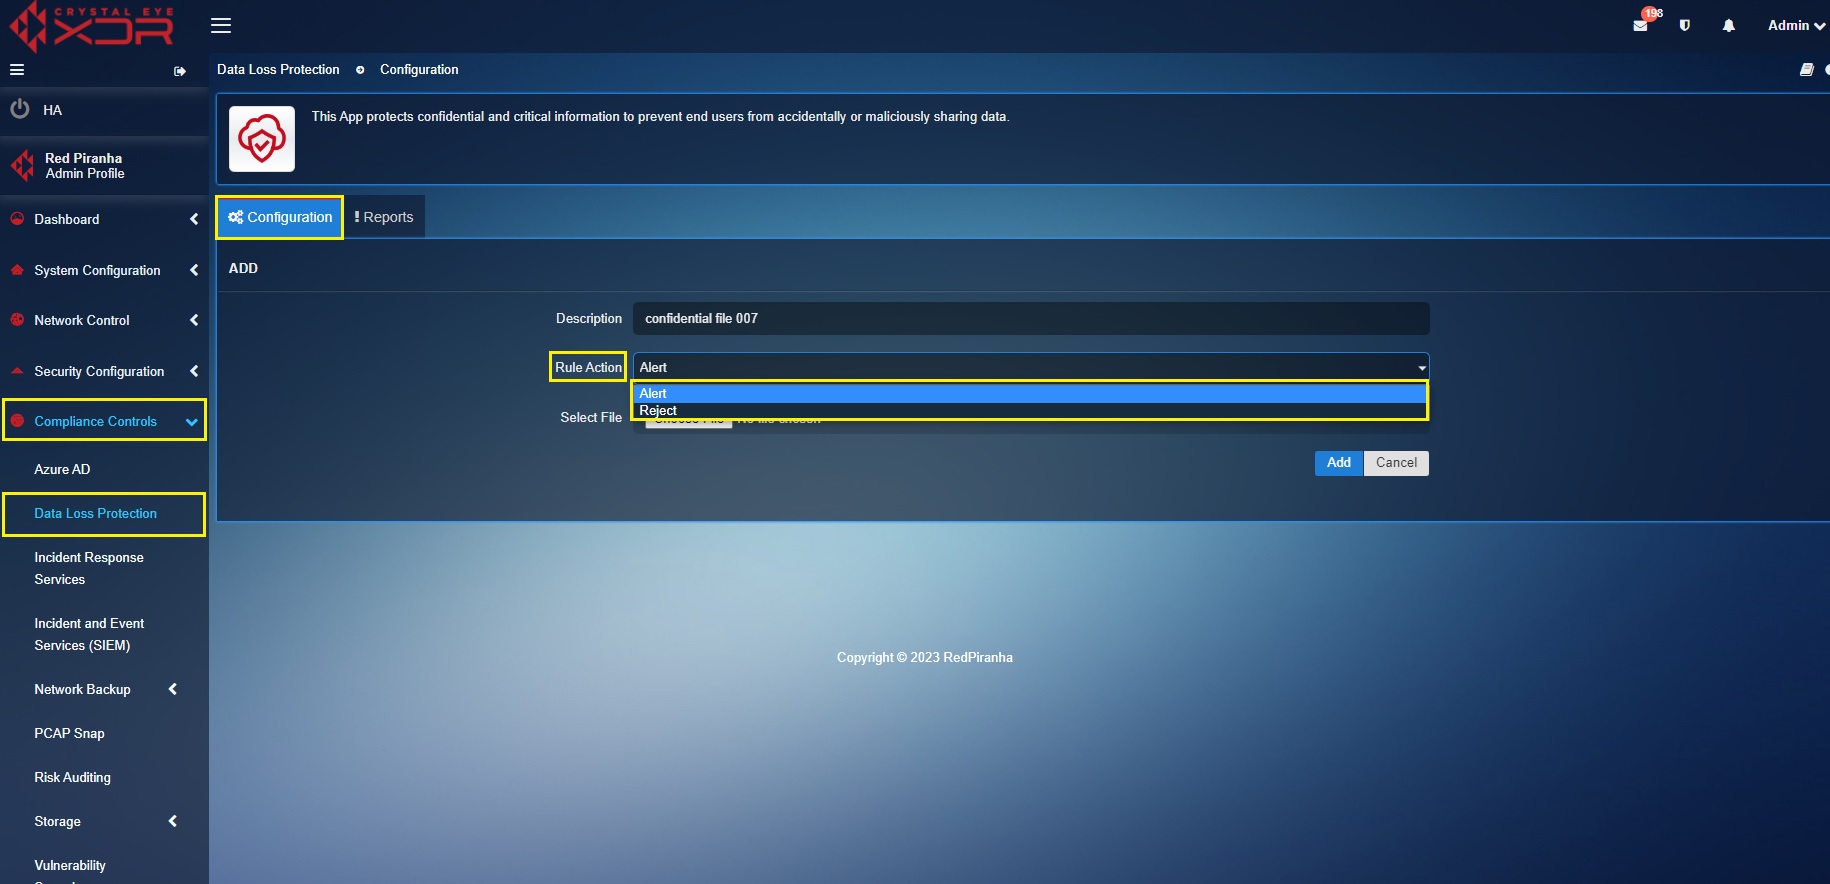
If the DLP rule action is selected as ‘Alert’ then the DLP module will only produce an alert when a file movement to an external platform is detected. These file movements will then be displayed in the DLP dashboard as an alert. However, if the ‘Reject’ DLP rule action is selected, the file will be blocked and the DLP dashboard will reflect the file movement attempt.
How to Alert or Reject Sensitive File Movement?
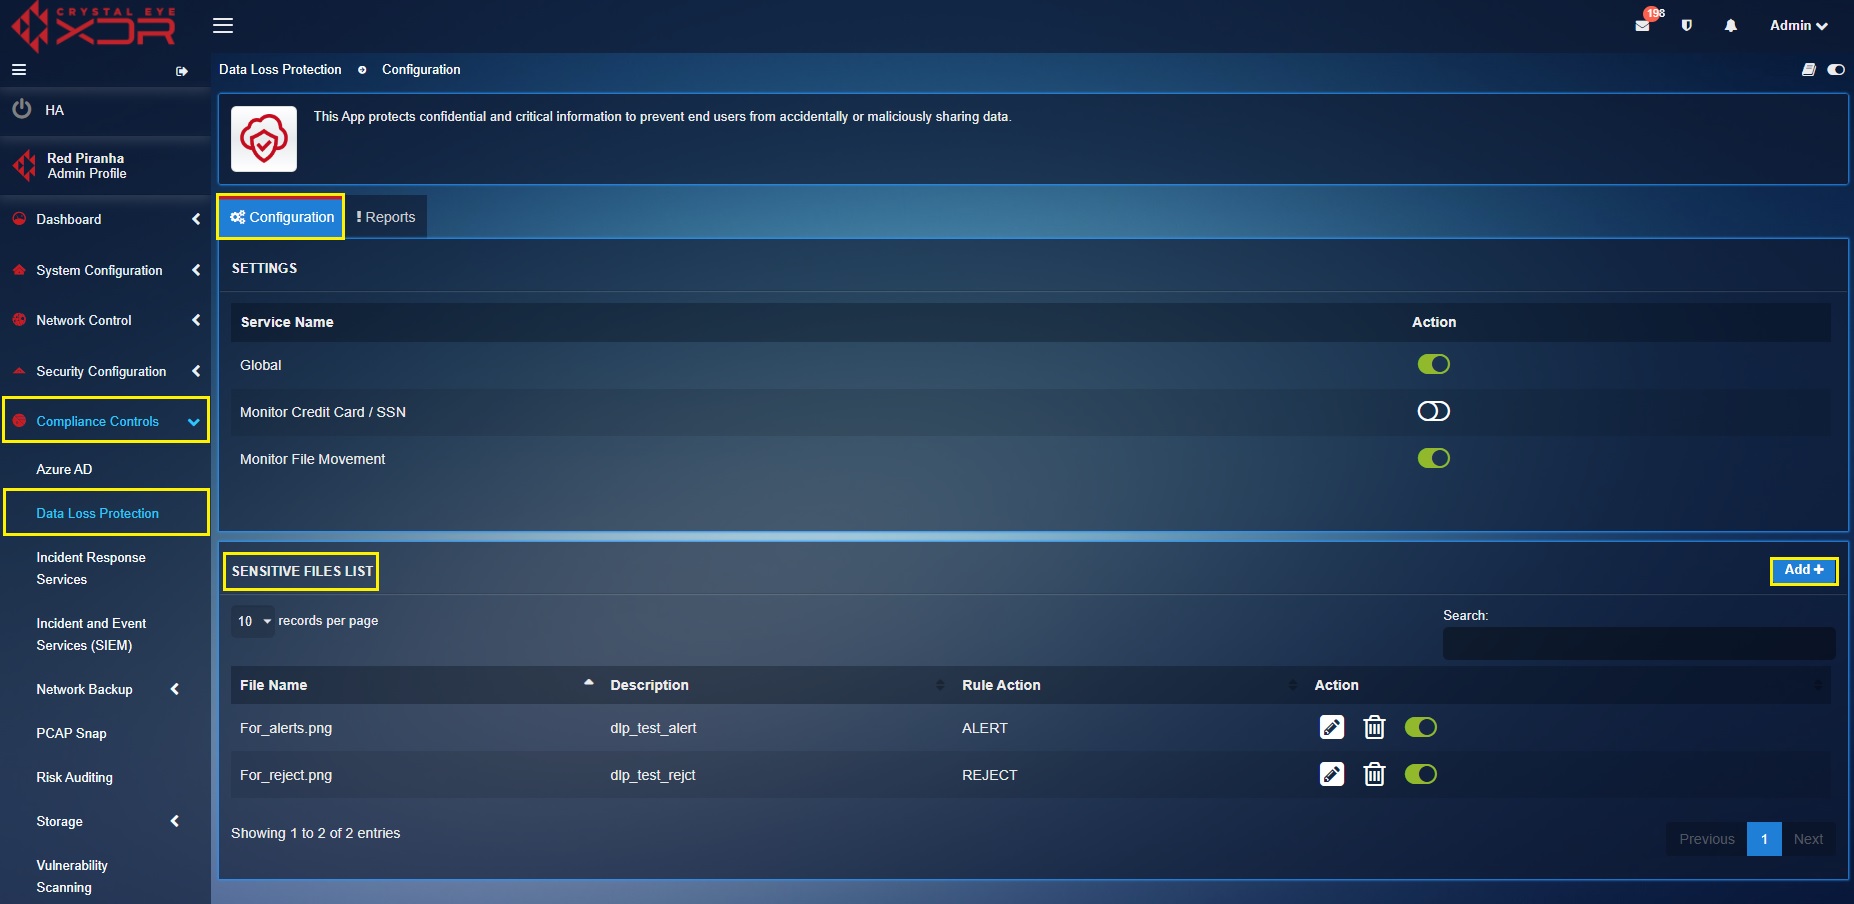
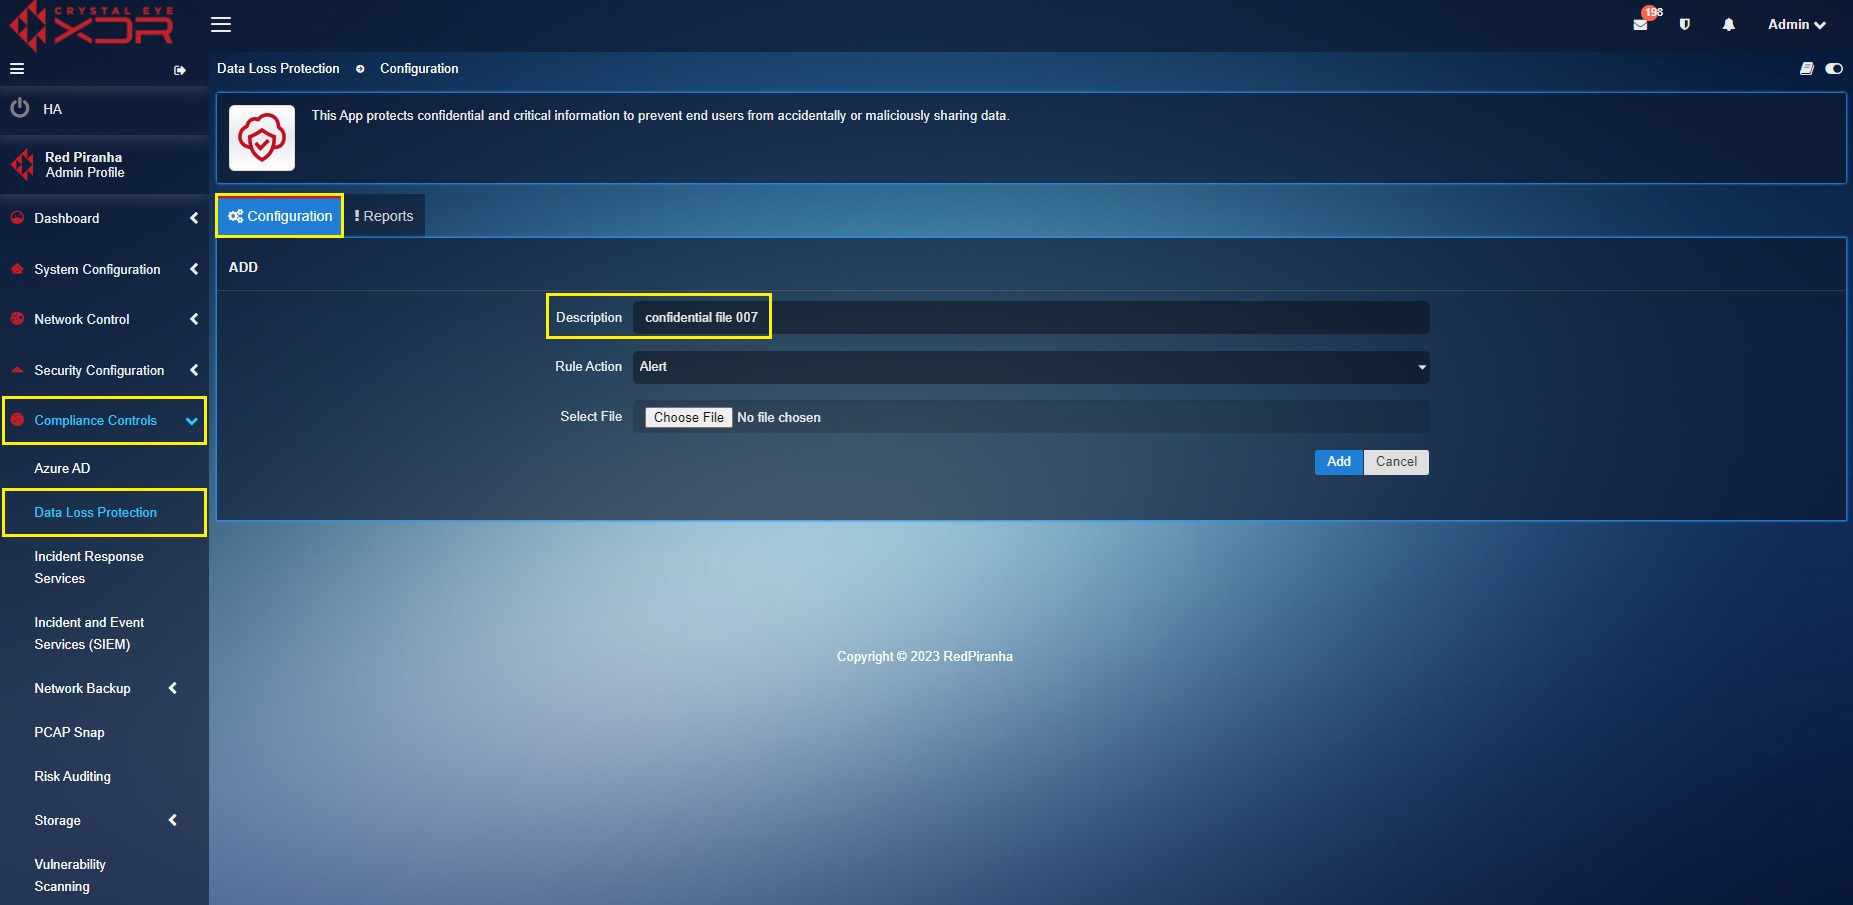
Step 1: Go to Compliance Controls > Data Loss Protection app and click the Configuration tab.
Step 2: You will now see the Add file page. Enter the DLP implementer description.
Step 3: Select the Rule Action.
Note
If the DLP rule action is selected as ‘Alert’ then the DLP module will only produce an alert when a file movement to an external platform is detected. These file movements will then be displayed in the DLP dashboard as an alert. However, if the ‘Reject’ DLP rule action is selected, the file will be blocked and the DLP dashboard will reflect the file movement attempt.
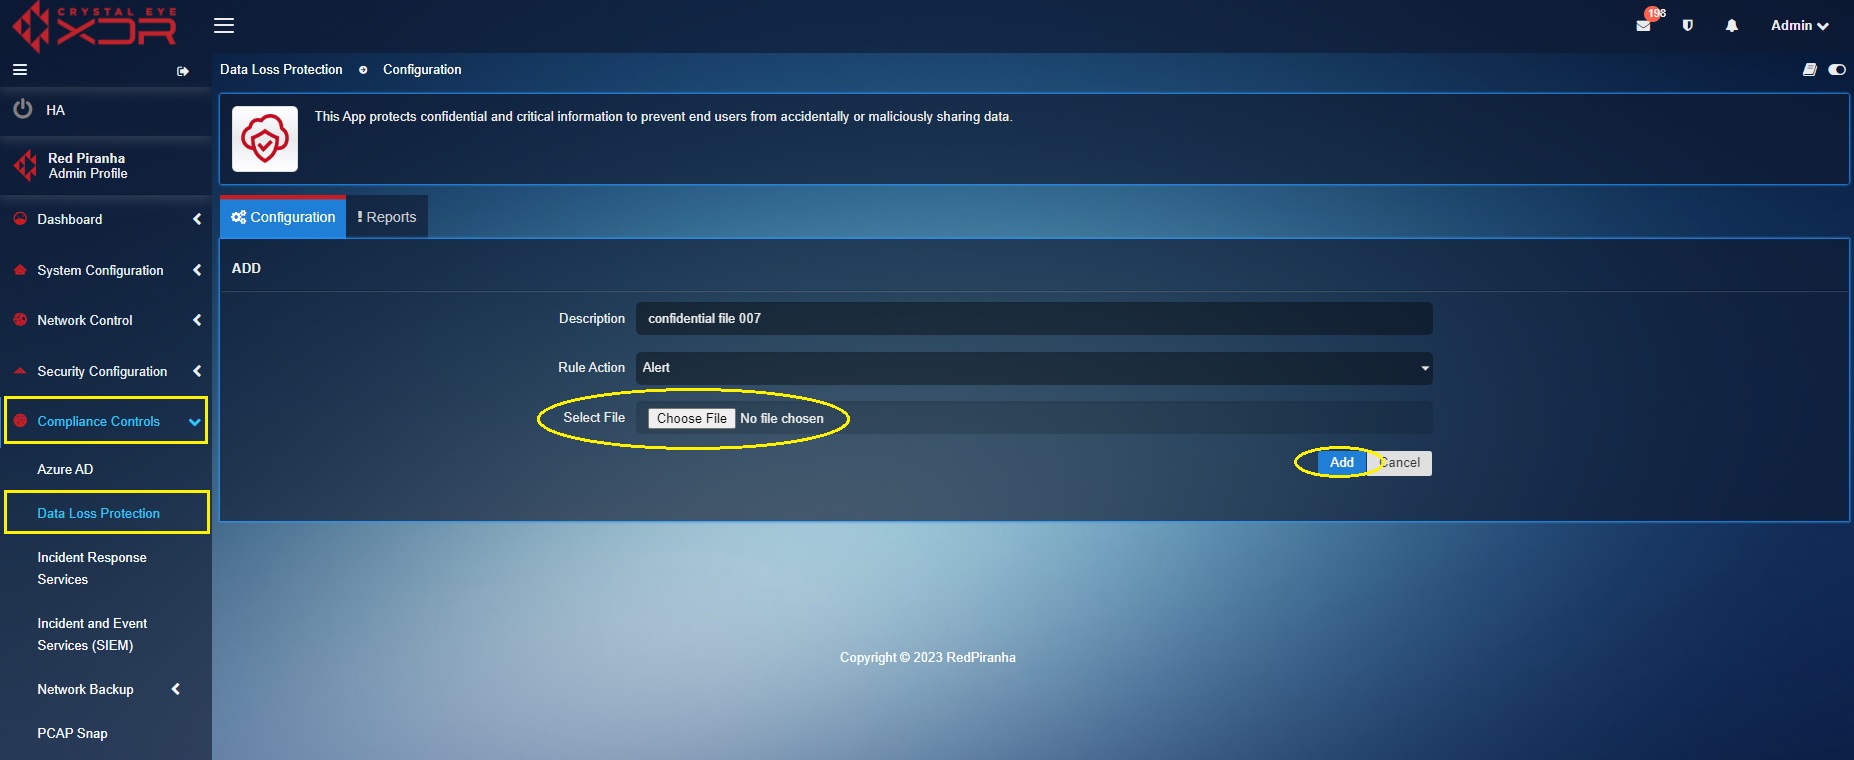
Step 4: Click the Choose File button, upload the file that needs to be monitored by the DLP module of the Crystal Eye XDR and click the Add button.
Note
You will now see the uploaded file that is to be monitored by the DLP module in the Sensitive File List dashboard.

