Single Sign-On (SSO)
Overview
SSO (Single Sign On) brings many benefits to your environment by unifying IAM (Identity and Access Management) across multiple applications and systems. The User Experience is improved through a simplified authentication process and provides the Administration Team with controls to enforce Entra ID managed IAM functions.
With the introduction of M365 integration, and Wireguard capabilities within Crystal Eye you can now implement Wireguard with SSO user authentication.
This allows the deployment of Wireguard VPN functionality to endpoints without the need to bundle a configuration file as this is all managed on the Crystal Eye and through Entra ID Authentication.
Installation
The SSO application is not available by default. It can be installed from Marketplace found near the bottom of the left-hand navigation panel.
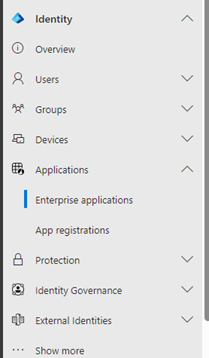
Navigation to Single Sign-On (SSO)
Once installed, SSO can be located under the System Configuration menu on the left hand side.
Configuring MS Entra ID SSO in Crystal Eye
Step 1: Create application in Entra ID
Sign in to your Entra Admin Center as a global administrator or Application Administrator.
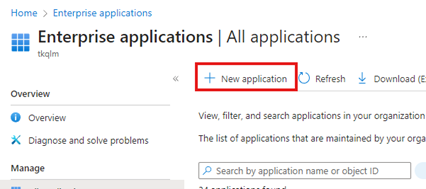
Under Applications click Enterprise Applications.
Under Enterprise Application, click New Application.
You Will then need to click Create your own application.
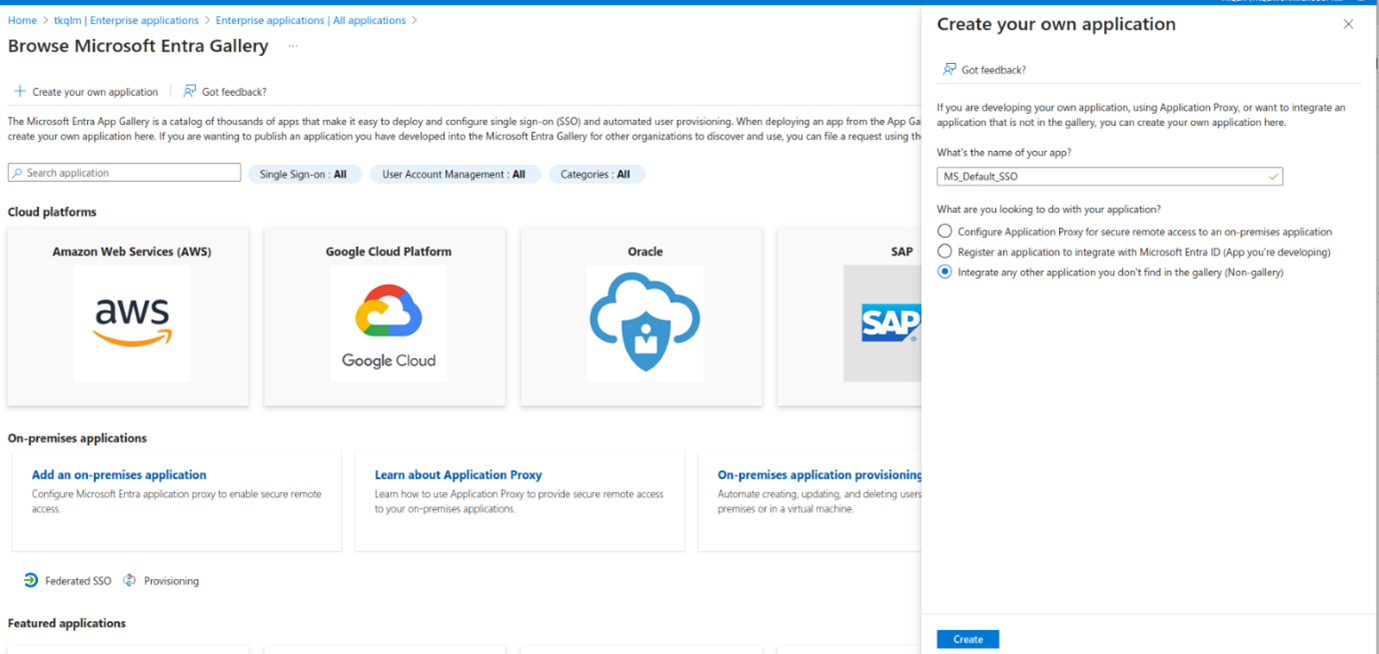
Step 2. Name and Create Application
Give a name related to the app you’re creating and hit Create.
Note
You will need sufficient permissions to create enterprise application.

Step 3. Configure App For Deployment
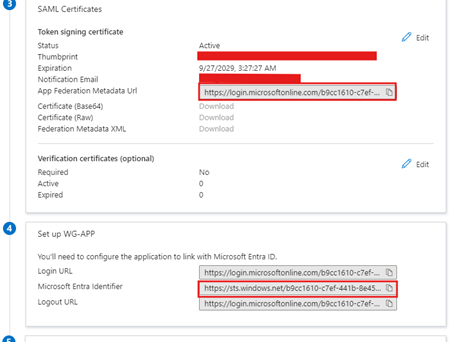
Click on “Set up single sign on”. Select “SAML” as single sign-on method.
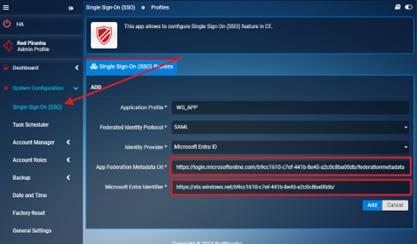
From this page you will need to copy the App Federation Metadata Url and Microsoft Entra Identifier that will be used to configure SSO in the Crystal Eye.
Step 4: Create application in Crystal Eye
Login to Crystal Eye admin and go to Marketplace and install SSO app.
Refresh the Crystal Eye UI. Click on Single Sign-On (SSO) menu under “System Configuration”.
You are now going to add a new profile in Crystal Eye for SAML authentication using Microsoft Entra ID enterprise application.
Step 5: Exchange Metadata Between IdP and SP
In Crystal Eye, under “Single Sign-On (SSO) Profiles”, Click” Add+”. Fill in Application Profile with any descriptive name, choose SAML under Federated Copy the the App Federation Metadata Url and Microsoft Entra Identifier from the previous page into the SSO Profile.
Before we can Test Sign-In we first need to copy the Identifier (Entity ID) and Reply URL from the Crystal Eye and link it back to the Enterprise Application.
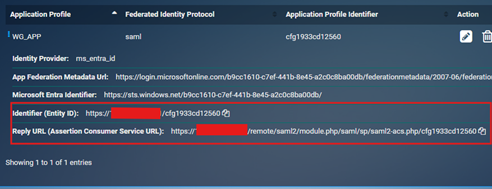
Step 6: Copy Metadata back to Entra ID
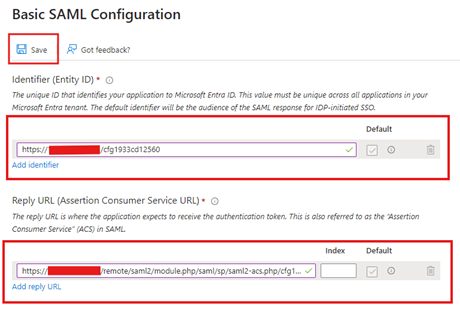
Go to Entra ID. Click Edit on Basic SAML Configuration.
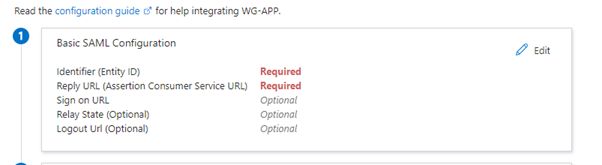
Copy Identifier (Entity ID) and Reply URL (Assertion Consumer Service URL) from the previous page into Entra ID for the specific profile, matching the field name, as shown in the below screenshot. And click on the save button.
Crystal Eye to Entra ID metadata exchange is done. This also completes the two-way exchange between Identify Provider (Microsoft Entra ID) and Service Provider (Crystal Eye).
The IdP has updated its metadata because of the previous step. Refresh it by clicking “Synchronize IdP Metadata” button under the created profile in Crystal Eye.
Step 7: App Permissions
In Entra ID, add users and groups in your Tenant and add these users to your application created in Step 1.
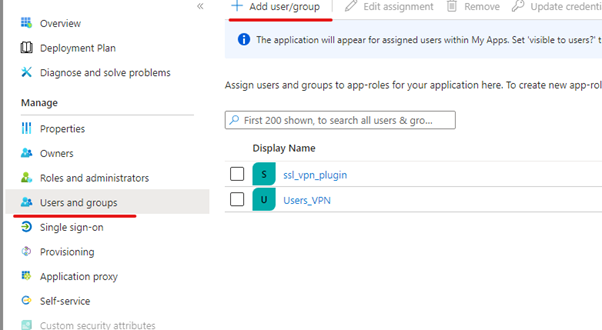
We Can Now Click the Test Sign-in button to confirm SSO is working.

Important!
Any changes in configs under” Set up Single Sign-On with SAML” in Microsoft Entra ID should be followed by refreshing the IdP metadata in Crystal Eye.
Configuring MS Entra ID SSO in Crystal Eye completed – Continue to Configure & Register API.
Configure & Register API Permissions
Step 1: Add API permissions to application
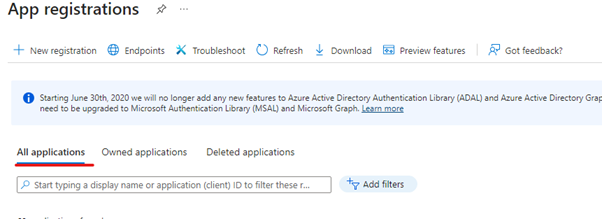
On the admin blade select “App registration”, all applications and search for the application you have just created as below.
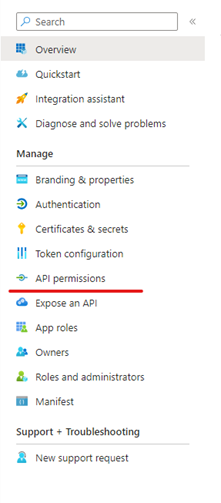
Open the application and select “API permission” from the blade as below
Click Add permission

Microsoft Graph
Application.Read.All
CrossTenantInformation.ReadBasic.All
Directory.Read.All
EntitlementManagement.ReadWrite.All
Group.ReadWrite.All
GroupMember.ReadWrite.All
Policy.Read.All
Policy.ReadWrite.ConditionalAccess
Policy.ReadWrite.SecurityDefaults
User.ReadWrite.All
Office 365 Management APIs
ActivityFeed.Read
ActivityFeed.ReadDlp
ServiceHealth.Read
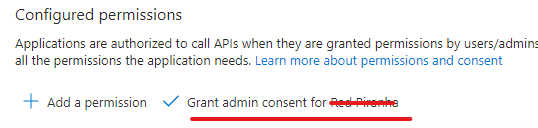
Once All Api Permissions are Added Click Grant admin consent for [Your Tenant]
Step 2: Create New Client Secret
In App registrations Click Certificates & Secrets.
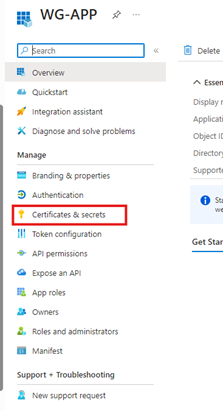
Then click New Client Secret.
Enter a Description related to the App and select an Expiration.
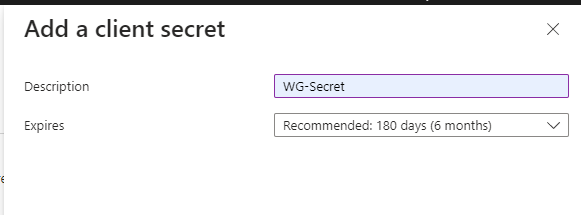
Note
It’s recommended to set the Expiry to 6 months and client Secret rotation will need to be work into your maintenance routine.
Keep this page open as the Value will need to be copied into the Crystal Eye.

Note
Clicking off this page in Entra ID will make it impossible to view the Secret ID again and another will need to be created.
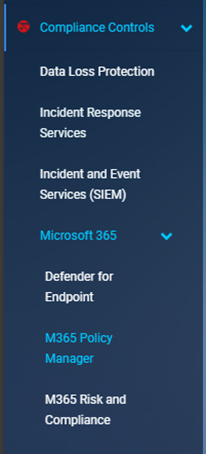
Step 3: Add settings to M365 policy manager in Crystal Eye
Open your Crystal Eye admin panel and browse to “Compliance Control” > “Microsoft 365” > M365 Policy Manager.
Click Add to create a new profile.

Fill in all fields as they appear in the Entra portal.
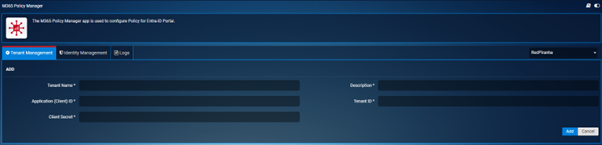
Client Secret being the Value from the previous page.
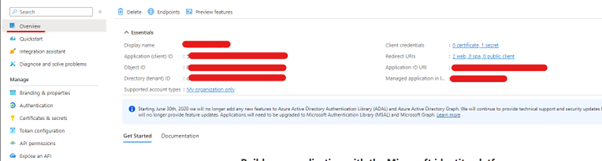
Application ID and Tenant ID can be found in the Overview section of the App Registration.
Once all the Information has been entered Click Enable Tenant.

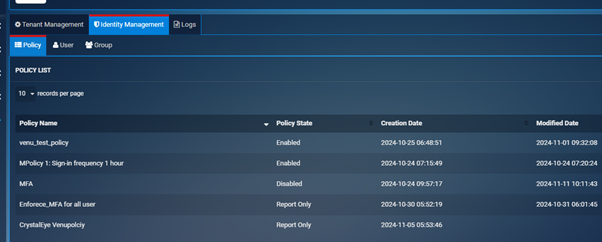
To Test Crystal Eye is Connection to Entra click the Identity Management Tab.
If Policy’s Users and Groups load this confirms the Crystal Eye is configured Correctly.
Configure & Register API completed - Continue to Configure Wireguard in Crystal Eye
Configure Wireguard in Crystal Eye
When Configuring Wireguard for remote users it is best to create a new zone which allows us to make specific access policies for those users.
Step 1: Create Interface for Wireguard (Optional)
Under Security Configuration > Advanced Firewall click on Security Zones.
Click Add.
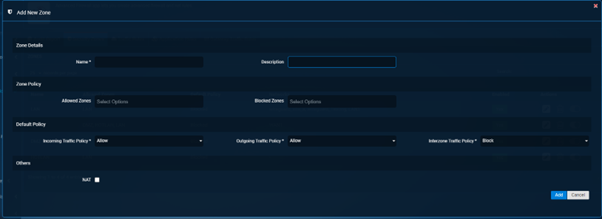
Give The Zone a Name relating to Wireguard.
And leave all other settings as is.
Step 2: Configure Wireguard Tunnel
Under Network Control > SD-WAN click Wireguard.
Click Add.
Give the Tunnel a Name and select the Zone you created in the step above.
The Address and Server Port can be whatever you like if it doesn’t conflict with other VPN configurations.
Select the Boxes for Full Tunnel Mode and SSO Authentication.
It is recommended to set Last Handshake Timeout to 60 minutes this is the during Wireguard will keep the session alive after a client has disconnected.
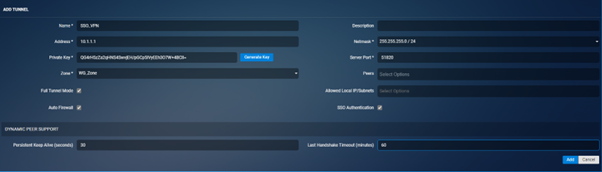
Note
If you want split tunnel don’t select Full tunnel mode and manually select the Allowed Local IP/Subnets.
Crystal Eye Wireguard Entra Setup Complete